Mainframe: Existing source
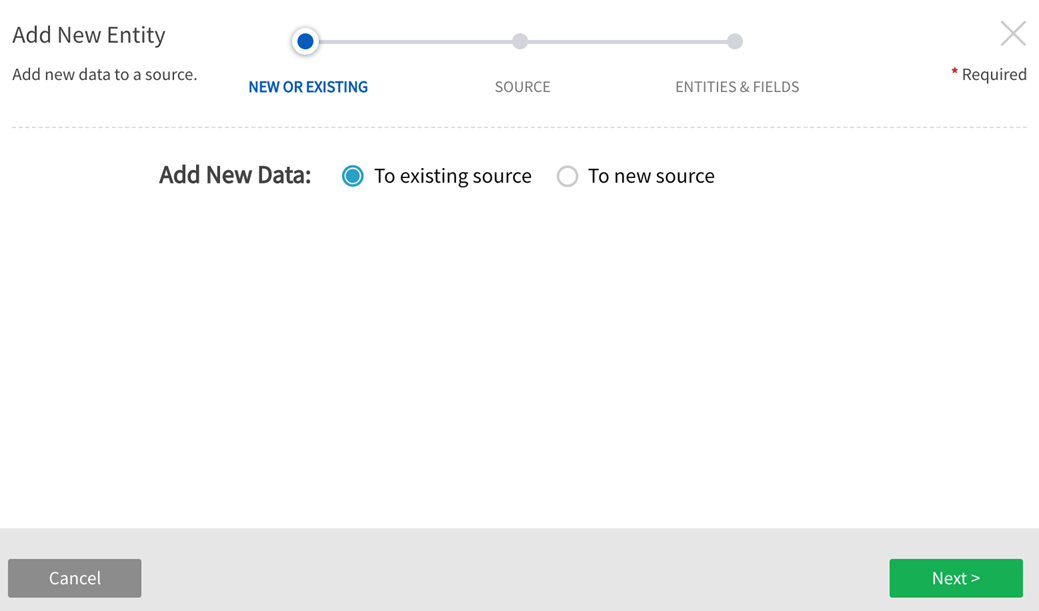
Adding a new Mainframe entity to an existing source
Select radio button: To existing Source
This will kick off the Add Data wizard to define a new Entity within an existing Source.
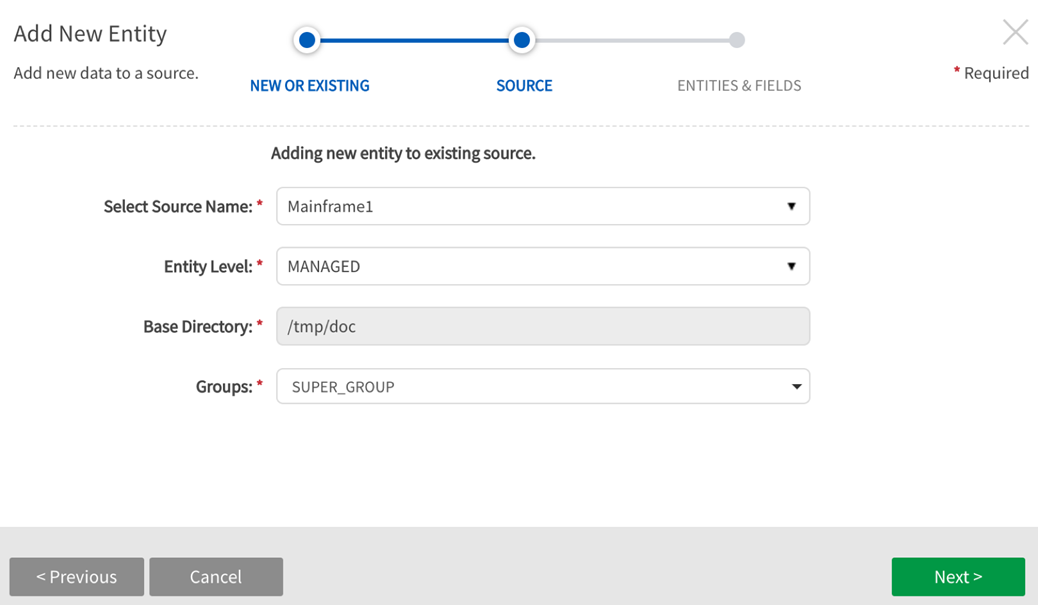
Select Source Name from dropdown. This is the source that the new entity will be added to.
Entity Level: Specify level of data management
(see System Settings: Level Control)
The default level for the source will populate in the dropdown and this can be modified and applied to new entities.
Base Directory: Pre-defined. Pre-defined. This is the directory where data will be stored in file system. [This value is specified in core_env property: localfile.base.dir.source.connection. This property limits access and browsing to subdirectories of the specified location.]
Groups: Select Groups Select Group(s) requiring access from the dropdown options. At least one group must be added for the data to be discoverable.
Click Next.
File Format
File Path: Enter the exact file path to the originating source, ending with the file name and file format suffix. Select the file browserto explore the local server directory for filepath to data.
Copybook:
Select and upload a copybook from local desktop machine. Click on Next.
Copybooks are text documents loaded in tandem with Mainframe files that validate and enforce record and field structure. Copybook file properties include data field definitions, metadata, and procedure codes for Mainframe data files.
The Copybook used in this example contains multiple record types at the 01 level. Separate entities are created from these specifications.
Copybook example text:
       01 HEADER.
         20 RECORD-TYPE       PIC X(4).
           88 HEADER-RECORD-FLAG  VALUE 'HEAD'.
         20 PROCESSING-SYSTEM PIC X(4).
         20 PROCESSING-DATE   PIC X(8).
         20 FILLER            PIC X(48).

       01 TRAILER.
         20 RECORD-TYPE       PIC X(4).
           88 TRAILER-RECORD-FLAG  VALUE 'TRLR'.
         20 RECORD-COUNT      PIC 9(4).
         20 FILLER            PIC X(56).

       01 LOAN.
         20 RECORD-TYPE       PIC X(4).
           88 LOAN-RECORD-FLAG    VALUE 'LOAN'.
         20 LOAN-TYPE         PIC X(4).
           88 AUTO-LOAN-FLAG VALUE 'AUTO'.
           88 HOME-LOAN-FLAG VALUE 'HOME'.
           88 EDUC-LOAN-FLAG VALUE 'EDUC'.
         20 LOAN-NUMBER       PIC 9(4).
         20 CUSTOMER-ID       PIC X(4).
         20 LOAN-AMOUNT       PIC 9(6)V9(2).
         20 LOAN-DETAIL-AREA  PIC X(40).

	 20 AUTO-LOAN REDEFINES LOAN-DETAIL-AREA.
	   30 AUTO-TYPE		PIC X(8).
	   30 AUTO-MODEL-YEAR	PIC 9(4).
	   30 FILLER		PIC X(28).
Copybook example screenshot

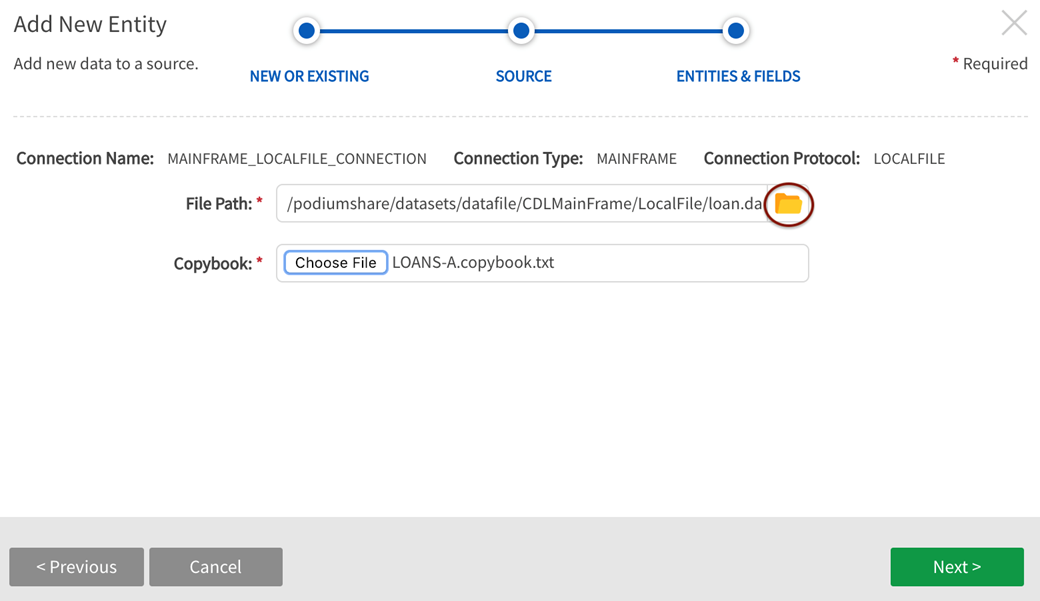
Local File Browser for discovery of Local Server directories (Select Folder icon)

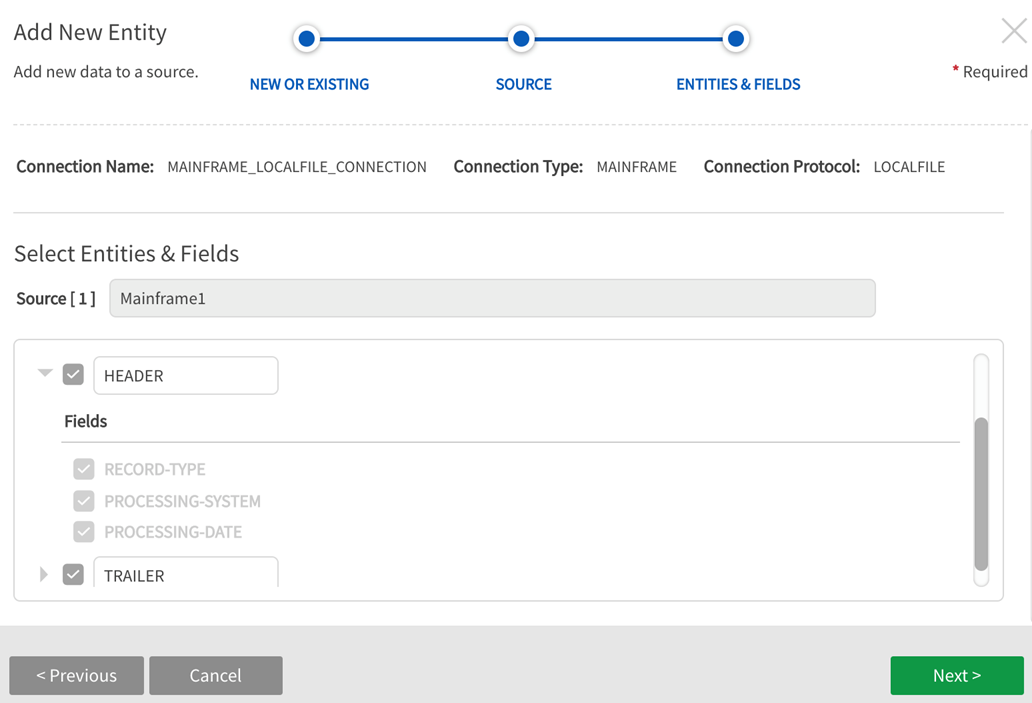
Select Entities + Fields
Select entities to load data to. Rename entities as required due to potential naming conflict of existing entities. Fields display by expanding the ![]() caret to the left of the entity name (field name selections are not editable as in other source types)
caret to the left of the entity name (field name selections are not editable as in other source types)
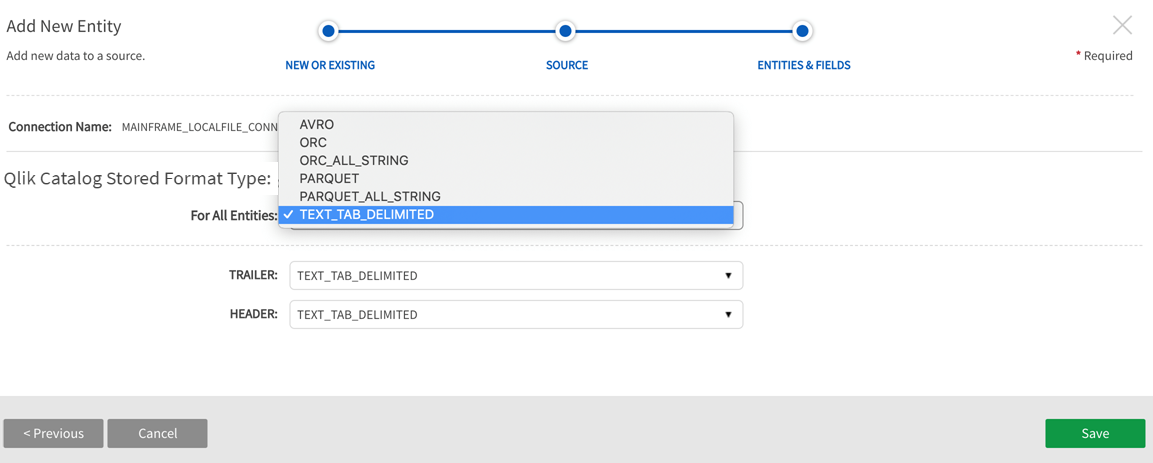
Stored Format Type
Options include:
- AVRO
- ORC
- ORC_ALL_STRING
- PARQUET
- PARQUET_ALL_STRING
- TEXT_TAB_DELIMITED
Qlik Catalog Stored Format Type step is skipped for single node environments where format type is always TEXT_TAB_DELIMITED.
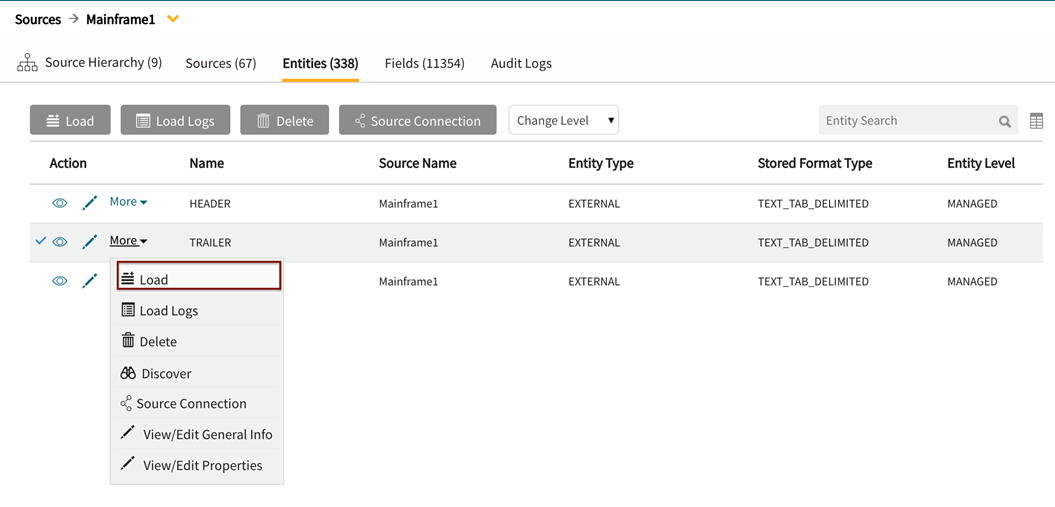
Load Data to the Entity(s). Once the entity has been saved, navigate to Entities screen in Source to load the data.
Note that Last Update Time for LOAN displays the time when the source was created and the time is later for the two entities that were added to the existing source.
Select Load from the More dropdown.