Using context variables with Cloudera
In this scenario, you want to choose where to run Spark Jobs between different Cloudera on-premises Runtimes 7.1.7 Spark 3.2.x and 7.1.9 Spark 3.3.x.
It is also relevant with a mix of Cloudera distributions on-premises (7.1.x) and Cloud (7.2.x).
This capability is enabled with Talend Studio context variable feature and with Qlik Spark Universal 3.3.x distribution mode (the latest for Cloudera distributions).
Before you begin
- Check in the Cloudera documentation whether your targets distributions are compatible with Spark 2, Spark 3 or both at the same time.
- From Cloudera Manager, download the client configuration for each Hadoop service used (HDFS, Hive, HBase...). For more information, see Downloading Client Configuration Files, from Cloudera documentation.
Creating a Metadata Connection to a Hadoop cluster
Procedure
-
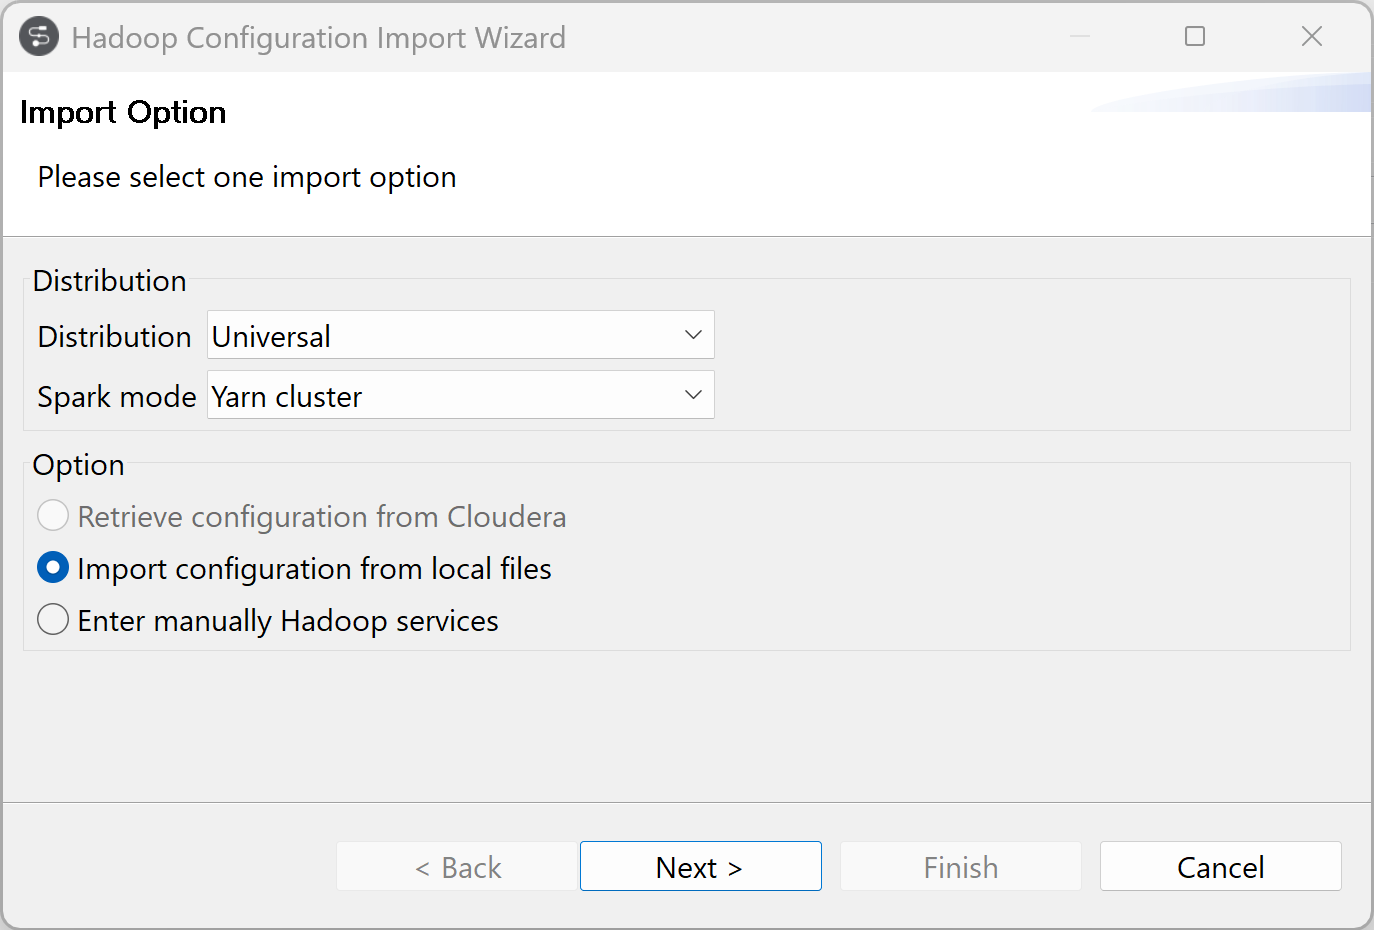
Select your distribution, Universal in this example,
and select the Spark mode, Yarn cluster in this
example.
Importing Hadoop configuration
Procedure
-
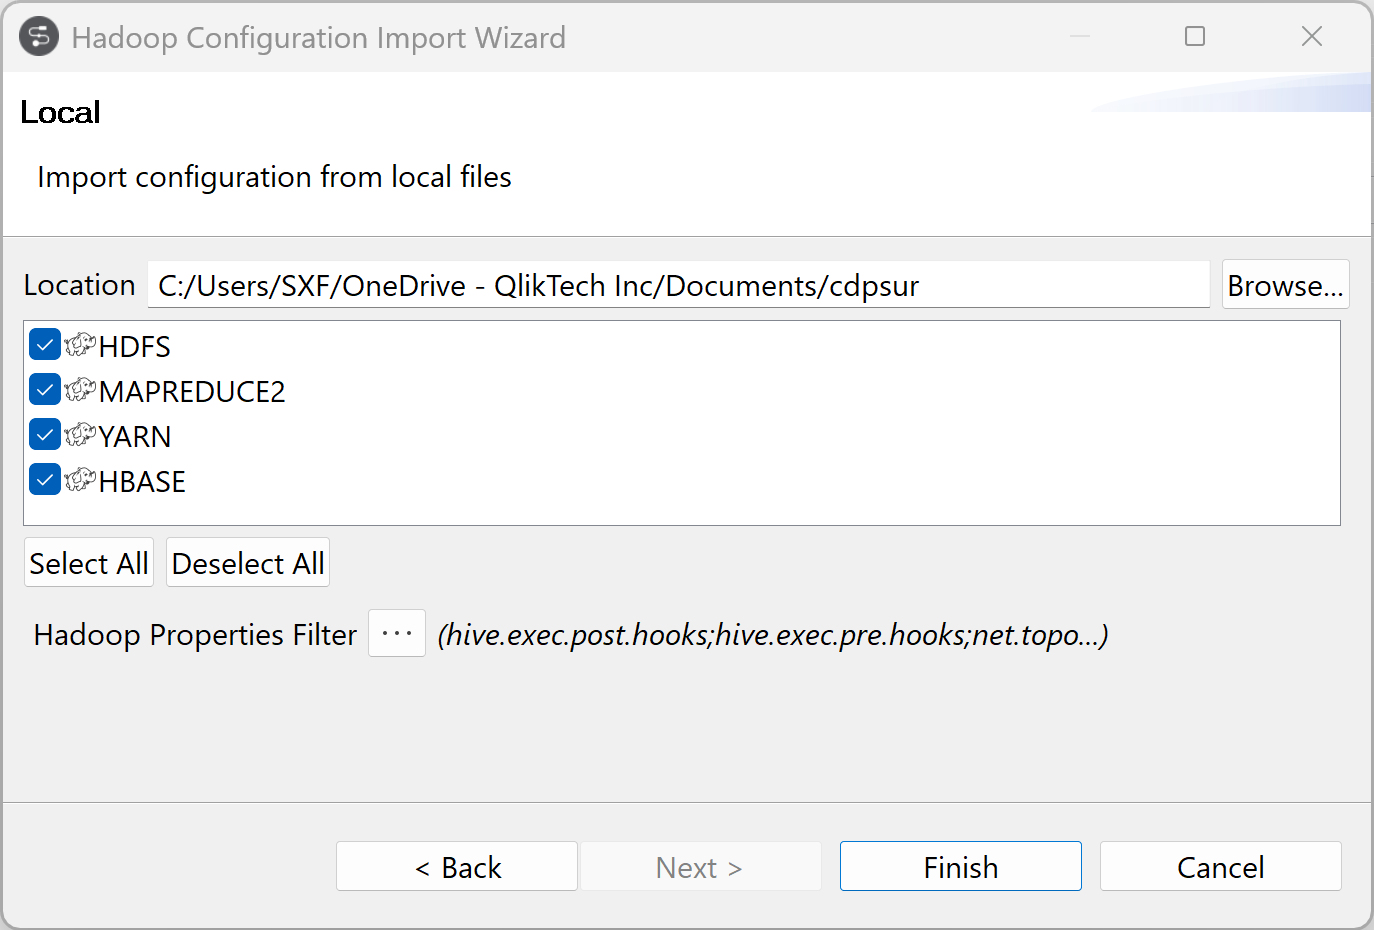
Specify the location of your client configurations and click
Finish.
-
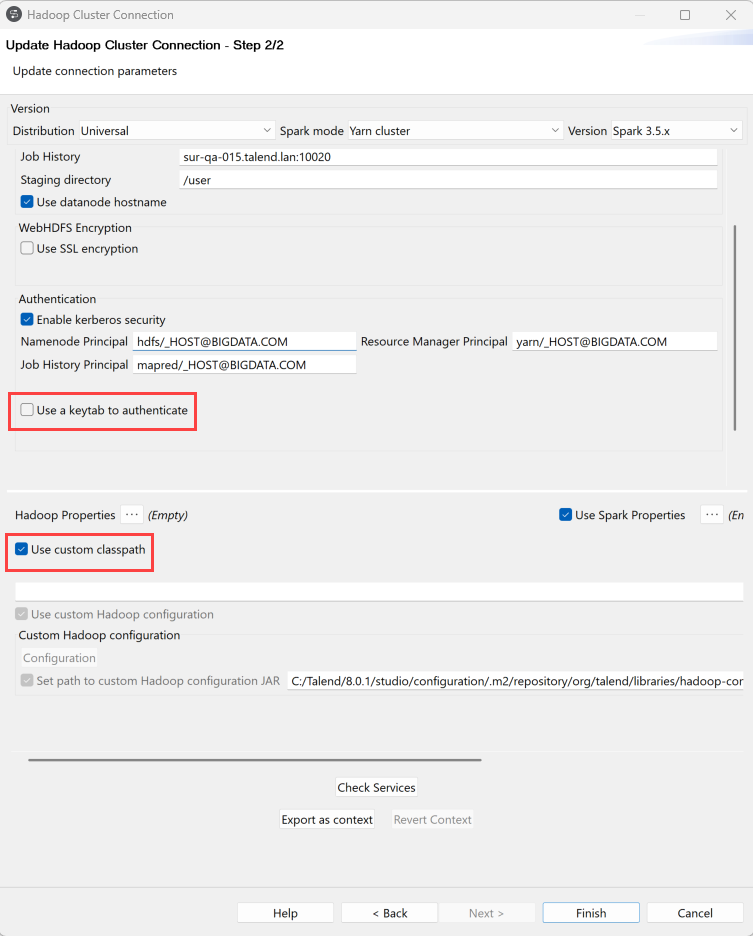
In the Update connection parameters tab, the default
parameters are already filled.
However, if needed, you can either:
- select Use a key tab to authenticate to authenticate on a Hadoop cluster,
- select Use custom classpath to define which Cloudera classpath to run. In this case, specify Spark 2 or Spark 3 libraries.
Contextualizing the Metadata connection
You are able to use a single cluster with different parameters thanks to
context values.
Procedure
-
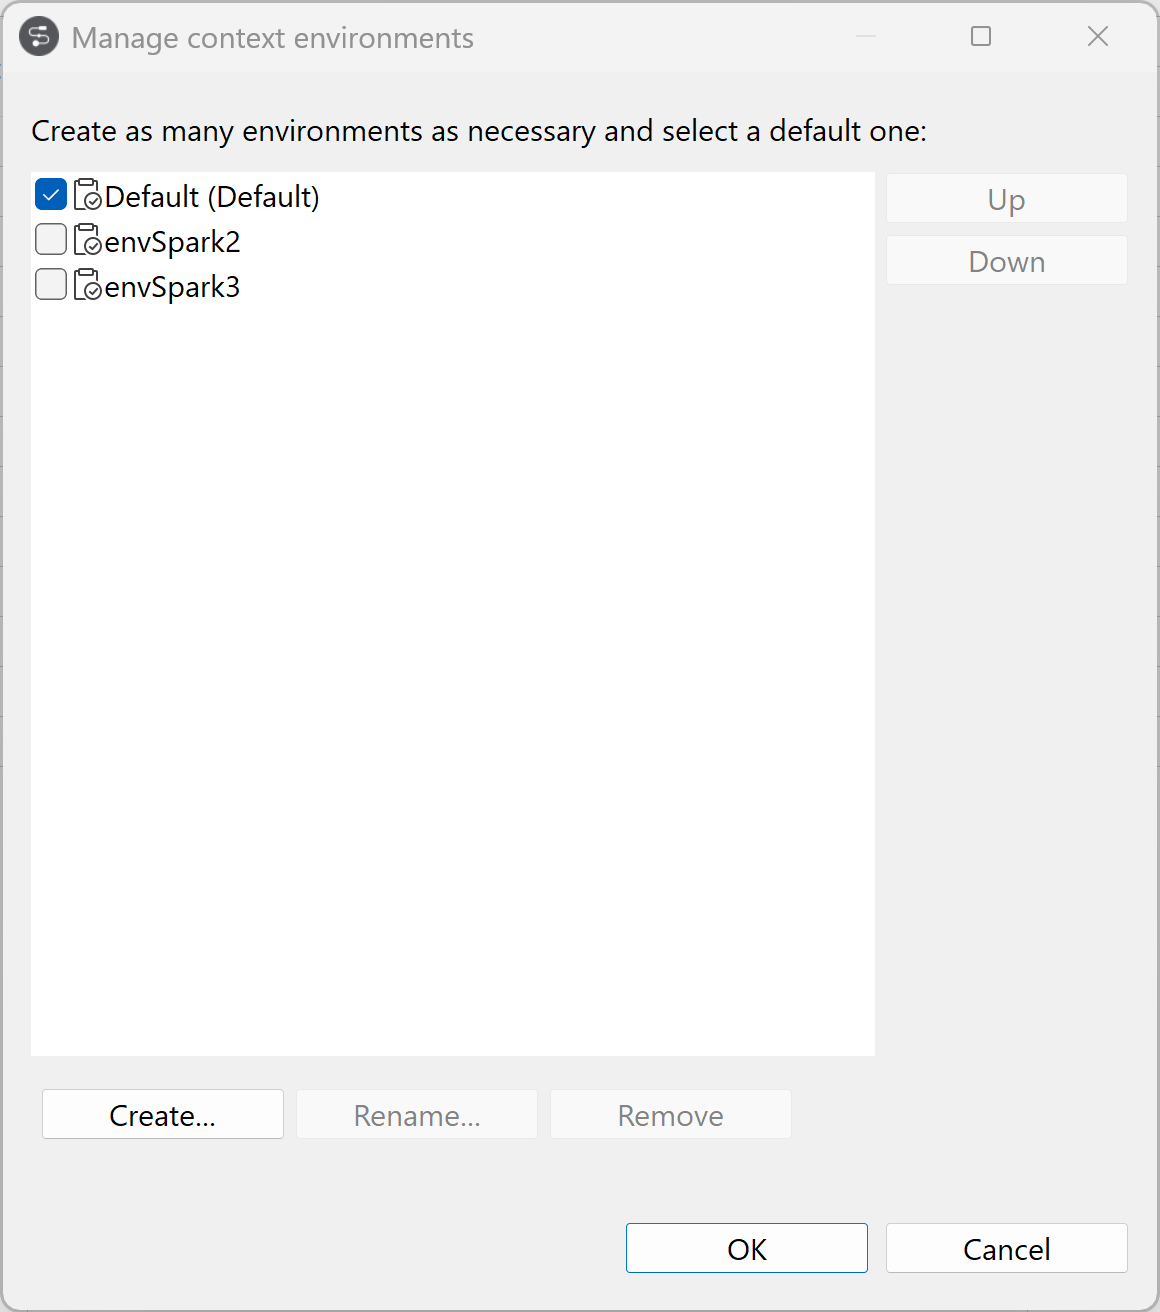
Click Manage environments to create as many
environments as necessary and select a default one.
In this example, click Create to add a Spark 2 and a Spark 3 environments.