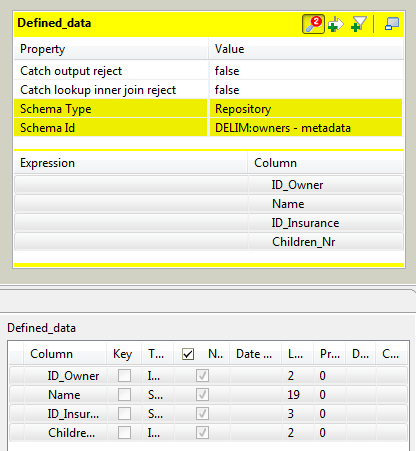
Setting schemas in the Map Editor
In the Map Editor, you can define the type of a table schema as Built-In so that you can modify the data structure in the Schema editor panel, or Repository and retrieve the data structure from the Repository. By default, the schema type is set to Built-In for all tables.
Retrieving the schema structure from the Repository
About this task
To retrieve the schema structure of the selected table from the Repository:
Procedure
Searching schema columns
About this task
The schema column filter of tMap allows you to quickly search an input or output schema column or multiple columns among hundreds of them in one go.
The following example shows how to find columns containing the string "customer" in the output table of the Map Editor.
Procedure
Using the Schema Editor
The Schema Editor details all fields of the selected table. With the schema type of the table set to Built-In, you can modify the schema of the table.
Use the tool bar below the schema table, to add, move or remove columns from the schema.
You can also load a schema from the repository or export it into a file.
| Metadata | Description |
|---|---|
| Column | Column name as defined on the Map Editor schemas and on the Input or Output component schemas. |
| Key | The Key shows if the expression key data should be used to retrieve data through the Join link. If unchecked, the Join relation is disabled. |
| Type | Type of data: String, Integer, Date, etc. Information noteNote: This column should always be
defined in a Java version.
|
| Length | -1 shows that no length value has been defined in the schema. |
| Precision | Defines the number of digits to the right of the decimal point. |
| Nullable | Clear this check box if the field value should not be null. |
| Default | Shows any default value that may be defined for this field. |
| Comment | Free text field. Enter any useful comment. |
However, any change made to the metadata are immediately reflected in the corresponding schema on the tMap relevant (Input or Output) area, but also on the schema defined for the component itself on the design workspace.
A Red colored background shows that an invalid character has been entered. Most special characters are prohibited in order for the Job to be able to interpret and use the text entered in the code. Authorized characters include lower-case, upper-case, figures except as start character.


 at the top of the table to open the filter area.
