Skip to main content Skip to complementary content

Importing multiple projects

About this task

Information noteNote: Make sure that the name of a project you want to import is not already used for a remote project. Otherwise, an error message will appear when you try to import the project unless you store the local and remote projects in two different workspace directories.

Procedure

  1. From the Talend Studio login window, select Import an existing project then click Select to open the Import wizard.
  2. Click Import several projects.
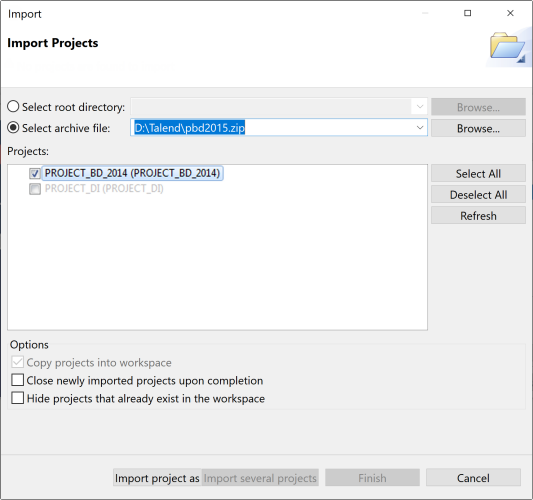
  3. Click Select root directory or Select archive file depending on the source you want to import from.
  4. Click Browse... to select the workspace directory/archive file of the specific project folder.
    By default, the workspace in selection is the current release's one. Browse up to reach the previous release workspace directory or the archive file containing the projects to import.
    Import wizard.
  5. Select the Copy projects into workspace check box to make a copy of the imported project instead of moving it.
    This option is available only when you import several projects from a root directory.
    Information noteNote: If you want to remove the original project folders from the Talend Studio workspace directory you import from, clear this check box. But we strongly recommend you to keep it selected for backup purposes.
  6. Select the Hide projects that already exist in the workspace check box to hide existing projects from the Projects list. This option is available only when you import several projects.
  7. From the Projects list, select the projects to import and click Finish to validate the operation.

Results

Upon successful project import, the names of the imported projects are displayed on the Project list of the login window.
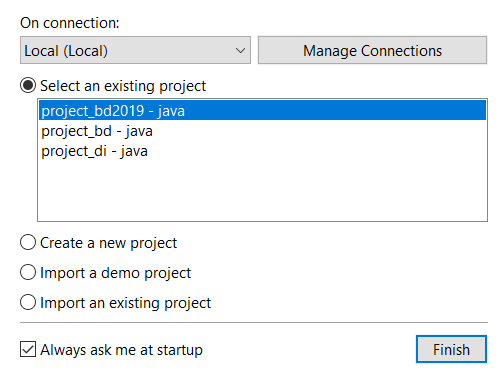
Login window of Talend Studio.

You can now select the imported project you want to open in Talend Studio and click Finish to launch Talend Studio.

Information noteNote: A generation initialization window might come up when launching the application. Wait until the initialization is complete.

Did this page help you?

If you find any issues with this page or its content – a typo, a missing step, or a technical error – please let us know!