Skip to main content Skip to complementary content

Defining the time correlation analysis

Procedure

  1. In the DQ Repository tree view, expand the Data Profiling folder.
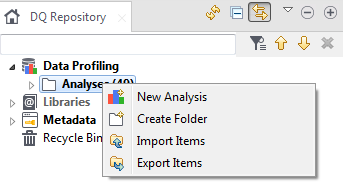
  2. Right-click the Analyses folder and select New Analysis.
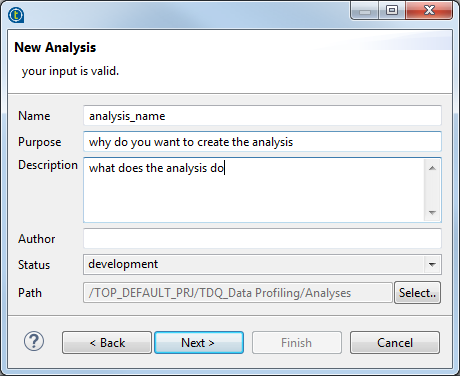
    The Create New Analysis wizard opens.
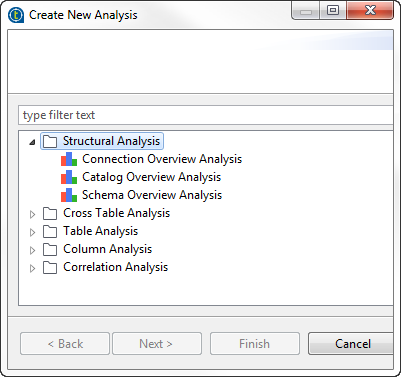
  3. Start typing time correlation analysis in the filter field, select Time Correlation Analysis and click Next.
  4. In the Name field, enter a name for the current analysis.
    Information noteNote:

    Avoid using special characters in the item names including:

    "~", "!", "`", "#", "^", "&", "*", "\\", "/", "?", ":", ";", "\"", ".", "(", ")", "'", "¥", "'", """, "«", "»", "<", ">".

    These characters are all replaced with "_" in the file system and you may end up creating duplicate items.

  5. Set the analysis metadata (purpose, description and author name) in the corresponding fields and then click Finish.
    A folder for the newly created analysis is listed under Analysis in the DQ Repository tree view, and the analysis editor opens on the analysis metadata.

Did this page help you?

If you find any issues with this page or its content – a typo, a missing step, or a technical error – please let us know!