Skip to main content Skip to complementary content

Configuring Nexus

If you do not use Talend Artifact Repository embedded with your Talend product but a supported version of Nexus, you need to create and configure the required repositories in Nexus.

Before you begin

Nexus is launched.

Procedure

  1. Open the Nexus Repository Manager.
  2. Create the following maven2 (hosted) repositories:
    • releases
    • snapshots
    • talend-custom-libs-release
    • talend-custom-libs-snapshot
    • talend-updates
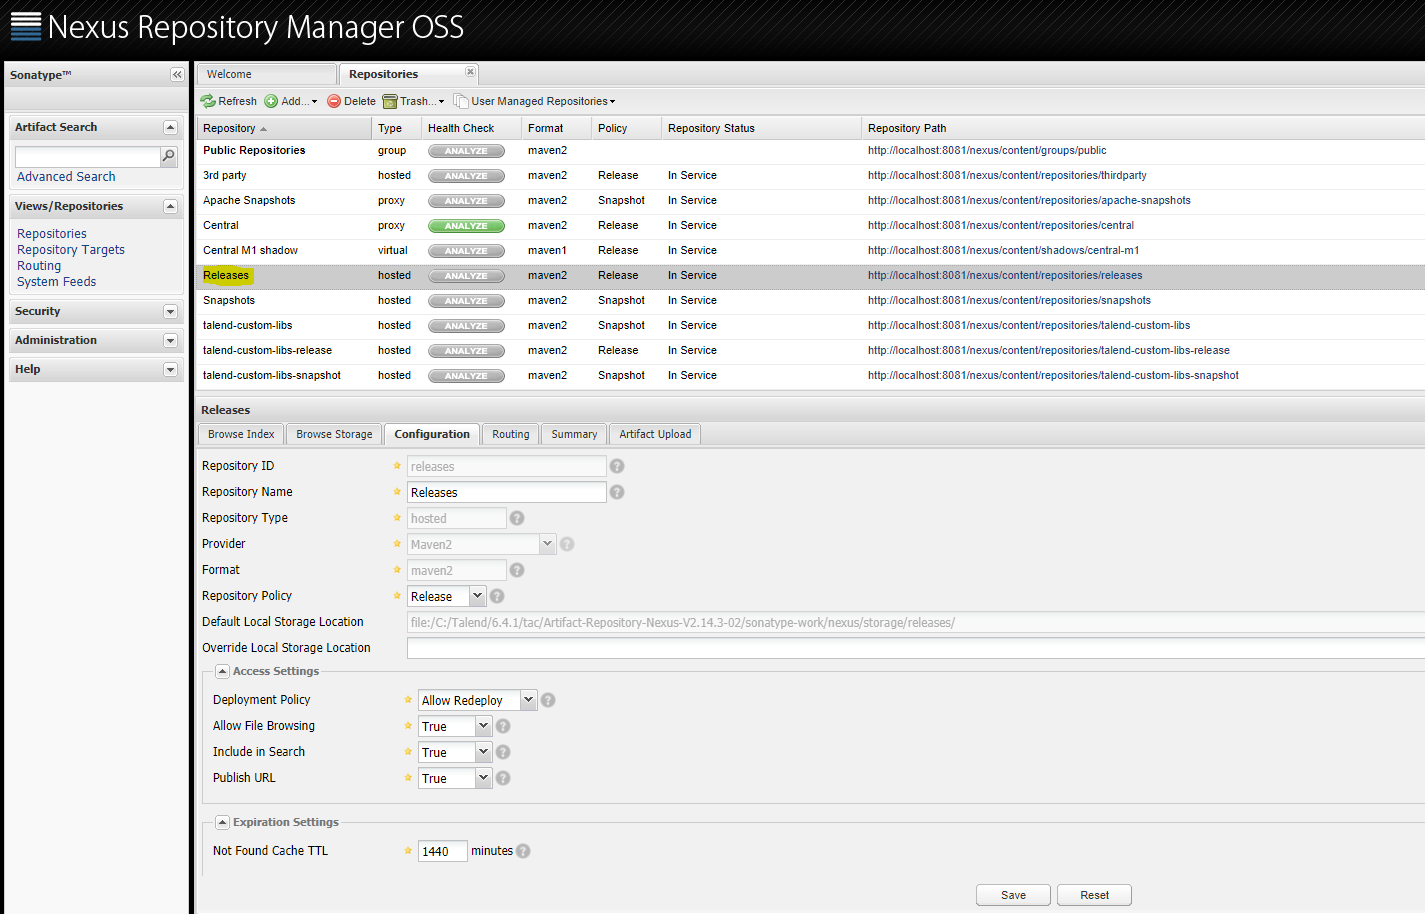
  3. Configure the created repositories.

    Example

    For example:

  4. Create the following users in Nexus:
    • admin
    • talend-custom-libs-admin with the talend-custom-libs-admin and talend-custom-libs-deploy user roles
    • talend-updates-libs-admin with the talend-updates-libs-admin and talend-updates-libs-deploy user roles
    At least, the create, delete and update privileges must be granted to the user associated to the repository.
    Information noteNote: If you are using Nexus 3, it is recommended to enable the delete privilege for Talend Administration Center user in Nexus. Otherwise the maven-metadata.xml file in Nexus containing information about artifact versions can not be updated and when executing an artifact from the Talend Administration Center, the wrong version of the artifact might be used.

What to do next

Go to the Configuration page of Talend Administration Center and add the configuration settings for the created repositories.

For more information, see Configuring the Software Update repository in Talend Administration Center, Configuring Talend Artifact Repository in Talend Administration Center and Setting up the user library location in Talend Administration Center User Guide.

Did this page help you?

If you find any issues with this page or its content – a typo, a missing step, or a technical error – please let us know!