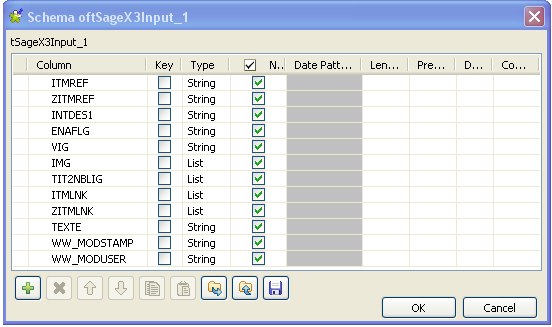
Double-click tSageX3Input to set its
properties in the Basic Settings view.
In the Schema field, select Built-In and click the three-dot button next to
Edit schema to open the schema
editor.
In this editor, click the plus button 12 times beneath the schema table to
add 12 rows into this table.
Type in the names you want to use for each row. In this example, these
rows are named after the publication names of the object attributes set in
the Sage X3 Web server. These columns are used to map the corresponding
attribute fields in the Sage X3 system.
In the Type column, click the
IMG row to display its drop-down list.
From the drop-down list, select List as
this attribute appears twice or even more and do the same to switch the
types of the TIT2NBLIG row, the
ITMLNK row and the ZITMLNK row
to List as well for the same reason.
Click OK to validate this change and
accept the propagation prompted by a pop-up dialog box.
Did this page help you?
If you find any issues with this page or its content – a typo, a missing step, or a technical error – please let us know!