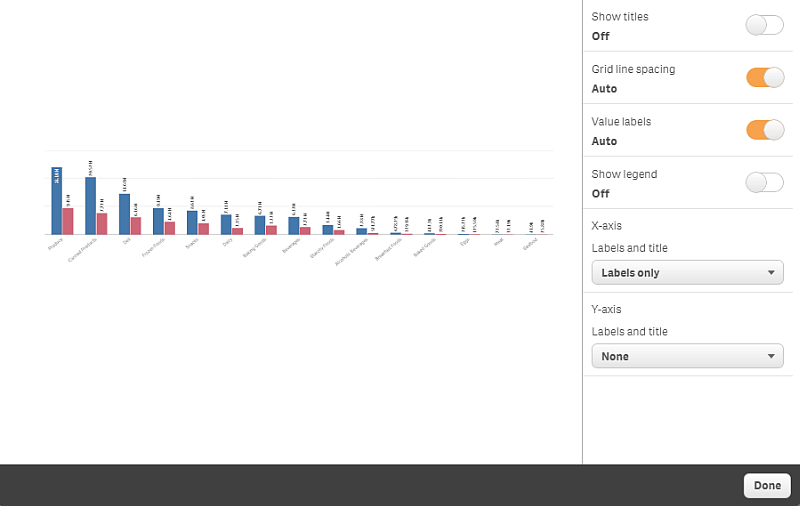
One way to make insights stand out and help you getting your message through in a clear way is the possibility to hide, or show, certain parts of a snapshot.
Changing snapshot properties
The following list summarizes the editable properties:
- Titles (main title, subtitle and footnote)
- Grid line spacing
- Labels (data point labels, leaf labels, dimension labels)
- Legend
- X-axis with title and labels
- Y-axis with title and labels
Do the following:
- In storytelling view,click the snapshot you want to edit.
-
Click
.
A dialog where you can change the snapshot's appearance is opened.
-
For Show titles click either On or Off to show or hide main title, subtitle and footnote.
- For Grid line spacing you can set the spacing of the grid lines to Auto or Custom and select one of the options No lines, Wide, Medium or Narrow from the drop-down list.
- For Value labels click either Auto or Off.
- For Show legend click either Auto or Off.
-
For x-axis and y-axis Labels and title, select one of the options Labels and title, Labels only, Title only or None from the drop-down list.
- Click Done.
The snapshot’s appearance has changed.

Changing the aspect ratio when resizing a snapshot
When you resize a snapshot you can choose to unlock the aspect ratio to enable free resize. Then the resize causes the visualization to use progressive disclosure.
Do the following:
- In storytelling view, click the snapshot you want to resize.
-
Click
to unlock the aspect ratio for free resize.
is displayed.
-
Use the handles on the edges to resize the visualization.
The resize causes the visualization to use progressive disclosure.
-
Click
to lock the aspect ratio.
You now have changed the aspect ratio in the snapshot and resized the visualization.
Did this page help you?
If you find any issues with this page or its content – a typo, a missing step, or a technical error – let us know how we can improve!
