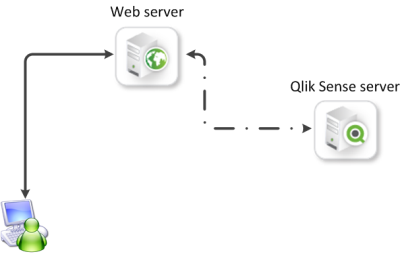
In the normal mashup scenario, the mashup web page is running on a different server from your Qlik Sense server. Use this method if your situation matches either of these two scenarios:
- You started building your mashup as a simple mashup (typically using the DevHub).
- You started from an existing web solution and need to include Qlik Analytics in that.

To deploy your mashup the normal way, you need to do one of the following:
- Tell the Qlik Sense server to accept your website as a client. This is done in the QMC. Use a mashup built in Dev Hub. This is done by deploying to the repository.
- Add Qlik Analytics to an existing web page/solution.
Preparing for deploying to the repository
If you have created your mashup in a Qlik Sense Desktop environment, or on a dedicated development node, and you now want to deploy it to Qlik Sense, there are some preparation tasks to perform.
Do the following:
-
Make sure to upload the Qlik Sense app to the repository.
-
Update the JavaScript file. In a Qlik Sense environment, the openApp function references an app ID instead of the app name. See examples below.
Example: openApp in Qlik Sense Desktop environment
		//open app and get objects
		var app = qlik.openApp( "Tutorial.qvf", config );
		$( ".qvobject" ).each( function () {
			var qvid = $( this ).data( "qvid" );
			app.getObject( this, qvid ).then( function ( object ) {
				qvobjects[qvid] = object;
			} );
		} );
Example: openApp in Qlik Sense environment
		//open app and get objects
		var app = qlik.openApp( "2c18060f-d3b3-46ed-b3d4-a24915e1b64f", config );
		$( ".qvobject" ).each( function () {
			var qvid = $( this ).data( "qvid" );
			app.getObject( this, qvid ).then( function ( object ) {
				qvobjects[qvid] = object;
			} );
		} );
Obtaining app IDs and object IDs to find help on locating the app ID.
-
You are now ready to upload the mashup files to the repository.
Adding Qlik Analytics to an existing webpage/solution
If you are adding Qlik Analytics to an existing web page/solution then you need to do the following:
-
Include the following Qlik stylesheets and Qlik scripts from the Qlik Sense server or domain.
-
<link rel="stylesheet" href="https://QSE_domain/resources/autogenerated/qlik-styles.css">
-
<script src="https://QSE_domain/resources/assets/external/requirejs/require.js"></script>
-
-
In the JavaScript file you also need to define the Qlik Sense server or domain to open an app.
var config = {
    host: 'QSE_domain',
    prefix: "/",
    port: 443,
    isSecure: true
    //webIntegrationId: 'web-integration-id-here' // only needed in SaaS editions
};
const baseUrl = ( config.isSecure ? 'https://' : 'http://' ) + config.host + (config.port ? ':' + config.port : '') + config.prefix;
require.config( {
    baseUrl: '${baseUrl}resources'

} );
