Example: Configuring header authentication
Header authentication is one of the authentication methods in the Qlik Sense environment. It is easy to set up and therefore a good choice for a development environment or between trusted systems.
In this example, you will learn how to:
- set up a virtual proxy with header authentication in the Qlik Management Console (QMC)
- test the virtual proxy with Postman, using the QRS API
Header authentication and Qlik Sense
The Virtual Proxy concept allows you to set up multiple authentication methods for a single environment. When using header authentication, traditional authentication is bypassed, and instead, the passed parameters in the HTTP header is used to identify the current authorized user. This makes this an ideal method to use in a trusted system where an existing identity management system has already identified the given user as an authorized user to access Qlik Sense.
Header authentication can be used as a back-door into your system. Make sure to only use it under the following circumstances:
- Use only between systems that can fully trust each other.
- Use only in combination with a firewall, proxy or routing solution.
- Use only in a development environment.
Setting up the virtual proxy
Create a new virtual proxy in the QMC.
Do the following:
- Launch the QMC.
- Select Virtual Proxies.
- Click Create new.
You can now start setting up your new virtual proxy as described below.
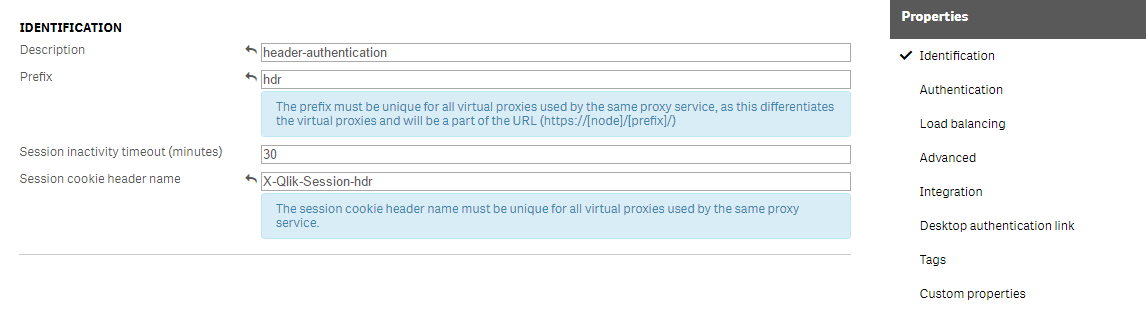
Identification
Define the Identification fields for your new virtual proxy. Do the following:
-
Enter a name for the virtual proxy in the Description field. You can use any description; this is used only in the QMC.
For example, header-authentication.
-
Define a Prefix that then needs to be included in the URL to point to the appropriate virtual proxy.
For example, use hdr, which indicates that the URL https://[servername]/hdr routes you to the header-authentication virtual proxy.
-
If you want to change the Session inactivity timeout, enter a new value (in minutes). This is the maximum period of time with inactivity before timeout. After this, the session is invalid and the user is logged out from the system.
-
Define a Session cookie header name.
This is the name of the HTTP header used for the session cookie and it has to be unique in the system. When you create a new virtual proxy, the default name is suggested but it can be a good idea to add the prefix value to the default name, for example X-Qlik-Session-hdr.
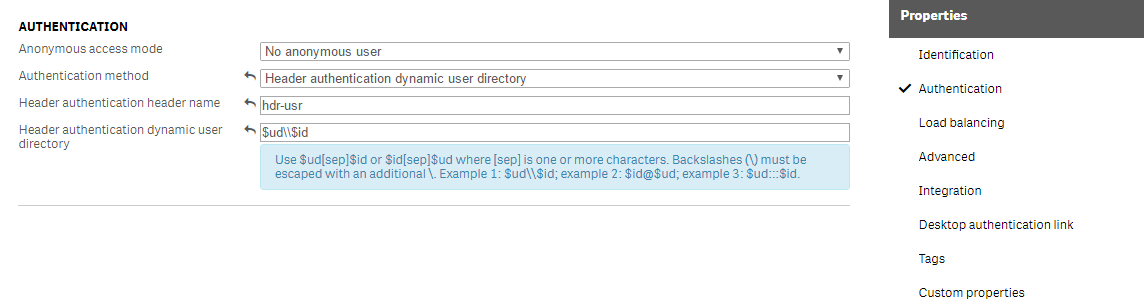
Authentication
Define the Authentication fields for your new virtual proxy. Do the following:
- In the Properties list, select Authentication.
-
Use the Anonymous access mode field to define if anonymous users are allowed.
In this example, set this to No anonymous user.
- Select the Authentication method to be used. Header authentication dynamic user directory is used in this example which allows the user directory to be fetched from the header.
-
In Header authentication header name, define the name of the HTTP header that identifies users. This is mandatory when you allow header authentication.
In this example we use the name hdr-usr.
-
The Header authentication dynamic user directory setting is mandatory if you allow dynamic header authentication. This tells Qlik Sense how to map the user you have passed in the HTTP header to the Qlik Sense user directory. The pattern you supply must contain $ud, $id and a way to separate them.
Example: setting and matching header
- $ud\\$id – matches USERDIRECTORY\userid (backslashes must be escaped with an additional \)
- $id@$ud – matches userid@USERDIRECTORY ($id and $ud can be in any order)
- $ud:::$id – matches USERDIRECTORY:::userid
In this example, we use $ud\\$id, which is a generic approach where we define the user-directory and the user-id in the HTTP header.
Load balancing
A server node needs to be added as a Load balancing node to instruct the virtual proxy to use a specific proxy to route requests. Do the following:
-
Click Add new server node to add load balancing to that node. Then select the node you want to add.
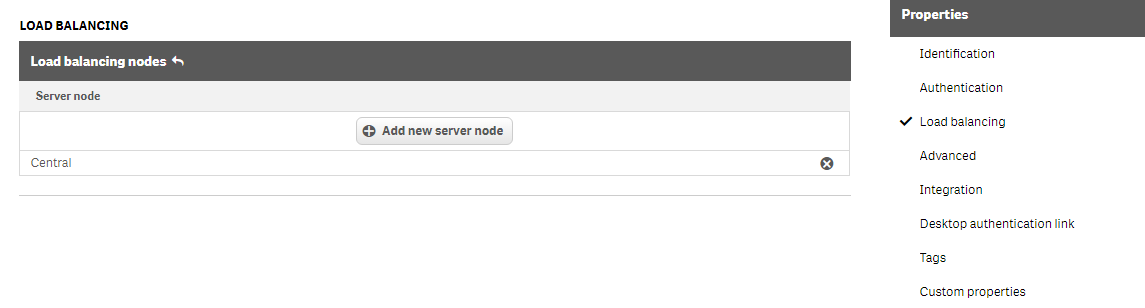
- Click Apply to save the changes done for Identification, Authentication and Load balancing.
Linking the virtual proxy to a proxy
In order for the virtual proxy to work, it needs to be linked to a master proxy. Do the following:
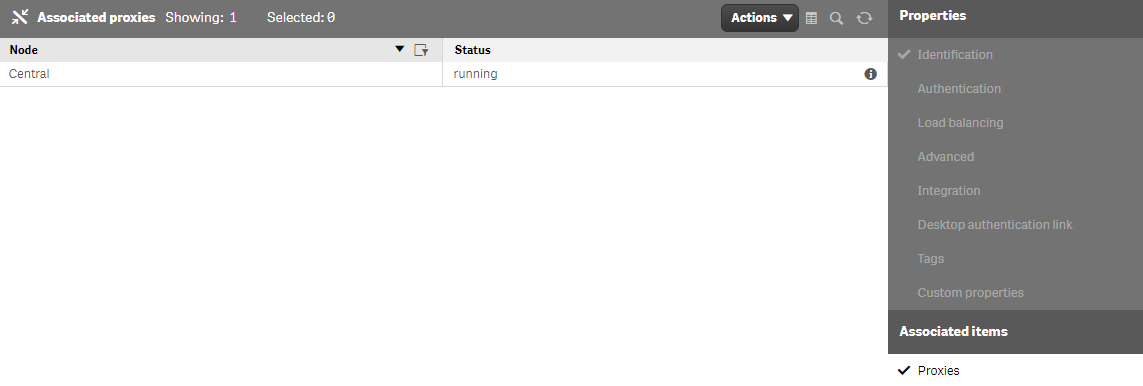
- Under Associated items, select Proxies.
- Click Link.
-
Select the proxy service node to link the virtual proxy to, and click Link.
The selected proxy node is displayed in the Associated proxies list.
Testing the virtual proxy with Postman
Postman is a Chrome plugin that can be used to call REST APIs. In this case, we will perform API calls against the Qlik Repository Service (QRS) API using the virtual proxy we have just configured.
If you do not have Postman, you can install it from the Postman website.
Test the virtual proxy with Postman. Do the following:
- Start Postman.
-
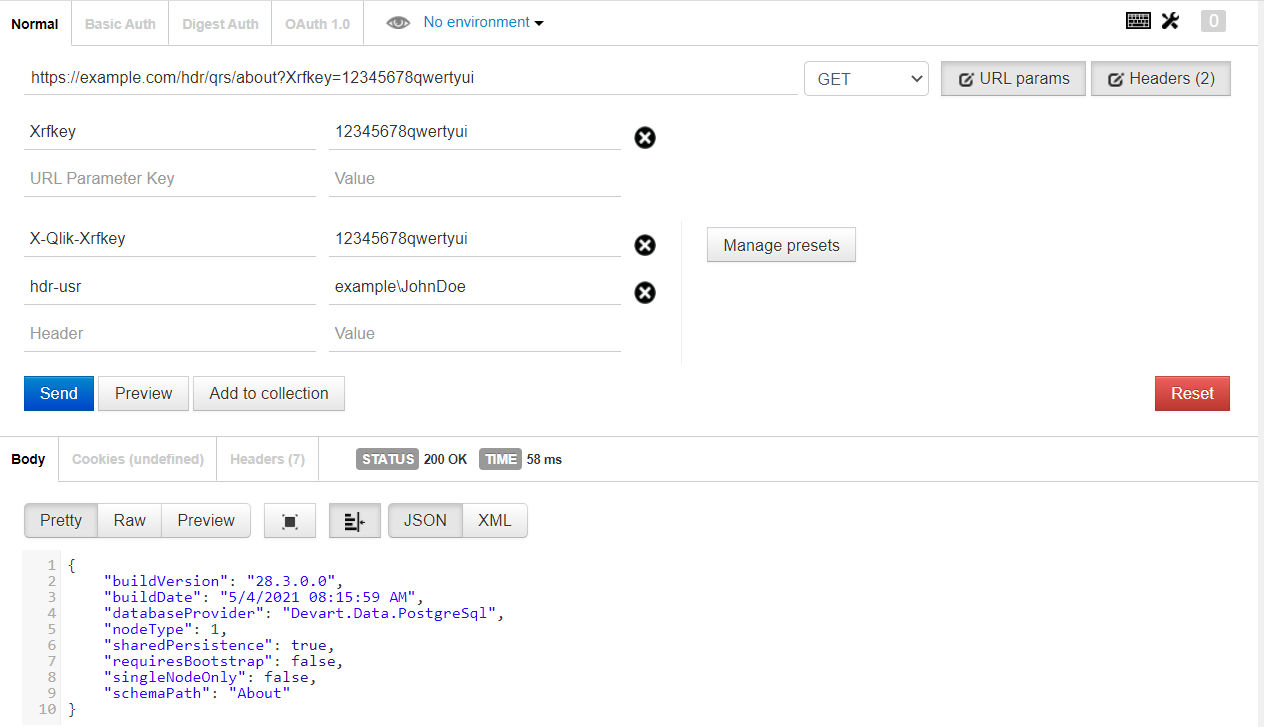
In the URL field, define the endpoint in the following format: http[s]://<servername>/<VirtualProxy>/qrs/<endpoint>/.
In this example, example.com is our server and we use our previously created virtual proxy (hdr) and call the about endpoint: https://example.com/hdr/qrs/about/.
-
Add a xrfkey to both the URL and the HTTP header: (See Using Xrfkey headers for details on how to use Xrfkey parameters and headers.)
Information noteIf you are using header authentication to use the APIs, the xrfkey is needed in both the URL and in the Header. But if you are using header authentication to access the Hub or the QMC, the xrfkey is not needed.Tip noteThe purpose of the xrfkey is to eliminate cross-site scripting issues.- URL: https://example.com/hdr/qrs/about/?xrfkey=123456789ABCDEFG
-
Header: X-Qlik-xrfkey=123456789ABCDEFG
- Pass in the user to be used as defined in Authentication: hdr-usr=example\JohnDoe where example is the user directory and JohnDoe is the user name.
-
Click Send.
Something similar to the following should be returned:
{
  "buildVersion": "12.8.0.0",
  "buildDate": "9/20/2013 10:09:00 AM",
  "databaseProvider": "Devart.Data.PostgreSql",
  "nodeType": 1,
  "sharedPersistence": false,
  "requiresBootstrap": false,
  "singleNodeOnly": false,
  "schemaPath": "About"
}