Preparing your Oracle Cloud to install Qlik Sense Enterprise on Windows
Before installing Qlik Sense, administrators must configure the Oracle Cloud Infrastructure (OCI) to provide the necessary infrastructure resources. This section describes the steps to set up and prepare Oracle Cloud for deploying Qlik Sense Enterprise on Windows. For a production-ready, multi-node environment, you need to deploy Qlik Sense Enterprise on Windows across several virtual machines.
Before you begin
- Download Qlik Sense Enterprise on Windows from Product Downloads. For more information, see Downloading installation files.
- Obtain a Qlik product license. To learn about the licensing options, see Qlik product licenses.
- Log into your Oracle Cloud Infrastructure Console.
Considerations for a multi-node deployment
Your business requirements determine the best way to deploy Qlik Sense Enterprise on Windows on OCI. For multi-node sites, determine the architecture requirements of your multi-node deployment before you begin.
When planning a multi-node deployment, consider the following:
-
Ensure your Oracle Cloud region is geographically close to your on-premises network and data sources to reduce network latency.
- Deploy your Oracle Cloud cluster across availability domains to establish a highly available solution. For more information, see Regions and Availability Domains.
-
Leverage the native Oracle Cloud components, such as Oracle databases, for your Qlik Sense Enterprise on Windows deployment. For more information see Database Management for Oracle Databases.
Create compartments
Compartments in OCI serve as logical containers to organize and isolate resources. For example, you might have compartments labeled "Development," "Testing," and "Production," with additional sub-compartments as needed.
Create compartments to organize the OCI resources for your Qlik Sense Enterprise on Windows deployment. Follow the steps in Choosing a Compartment. For more information, see What is a Compartment?.
Create a virtual cloud network
Creating a Virtual Cloud Network (VCN) establishes an isolated virtual network within OCI. Use the VCN Wizard to initiate this process, which automatically generates essential network components, including security rules governing inbound and outbound traffic.
Detailed steps are described in Creating a Virtual Cloud Network. For additional information, see Networking Overview and Security Lists.
Create a compute instance
An Oracle Cloud compute instance is a virtual machine (VM) hosted on OCI. Choose between a bare metal compute instance or a virtual machine based on your performance and resource requirements.
Launch a Windows instance with the appropriate Windows Server image and compute shape. Refer to Launching a Windows Instance for step-by-step guidance. For more information about compute instances, see Overview of the Compute Service.
Create a block volume
An Oracle Cloud block volume is a persistent, scalable storage in OCI. Create and attach a block volume to your Windows instance. For detailed instructions, see Adding a Block Volume to a Windows Instance.
Connect to the Compute Engine instance through a Remote Desktop Protocol (RDP)
Access your windows instance though an RDP client. For detailed instructions, see Connecting to Your Windows Instance.
Create Windows user accounts
On your virtual machine, you must set up an administrator service account to install and run Qlik Sense. You can also create additional local user accounts to access Qlik Sense Enterprise on Windows after installation.
- From the Windows virtual machine you created, open the Computer Management application.
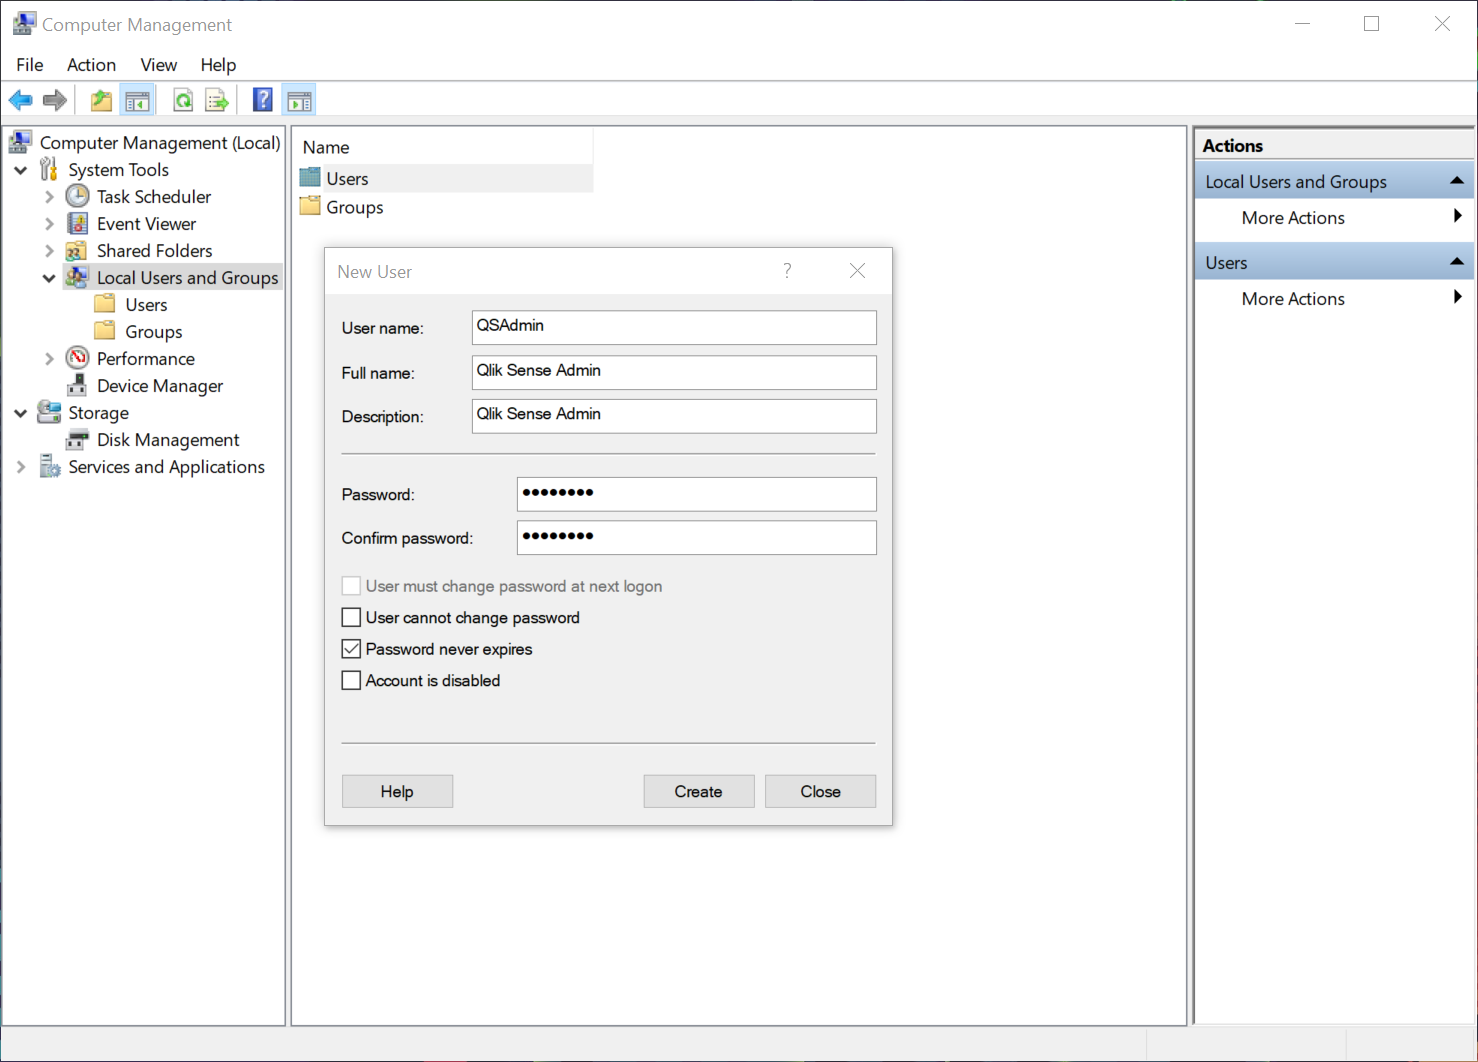
- Under Local Users and Groups, right-click on Users, then select New User.
- Enter a username and a password. Optionally add a full name and description.
- Clear User must change password at next logon.
-
Select Password never expires.

- Click Create.
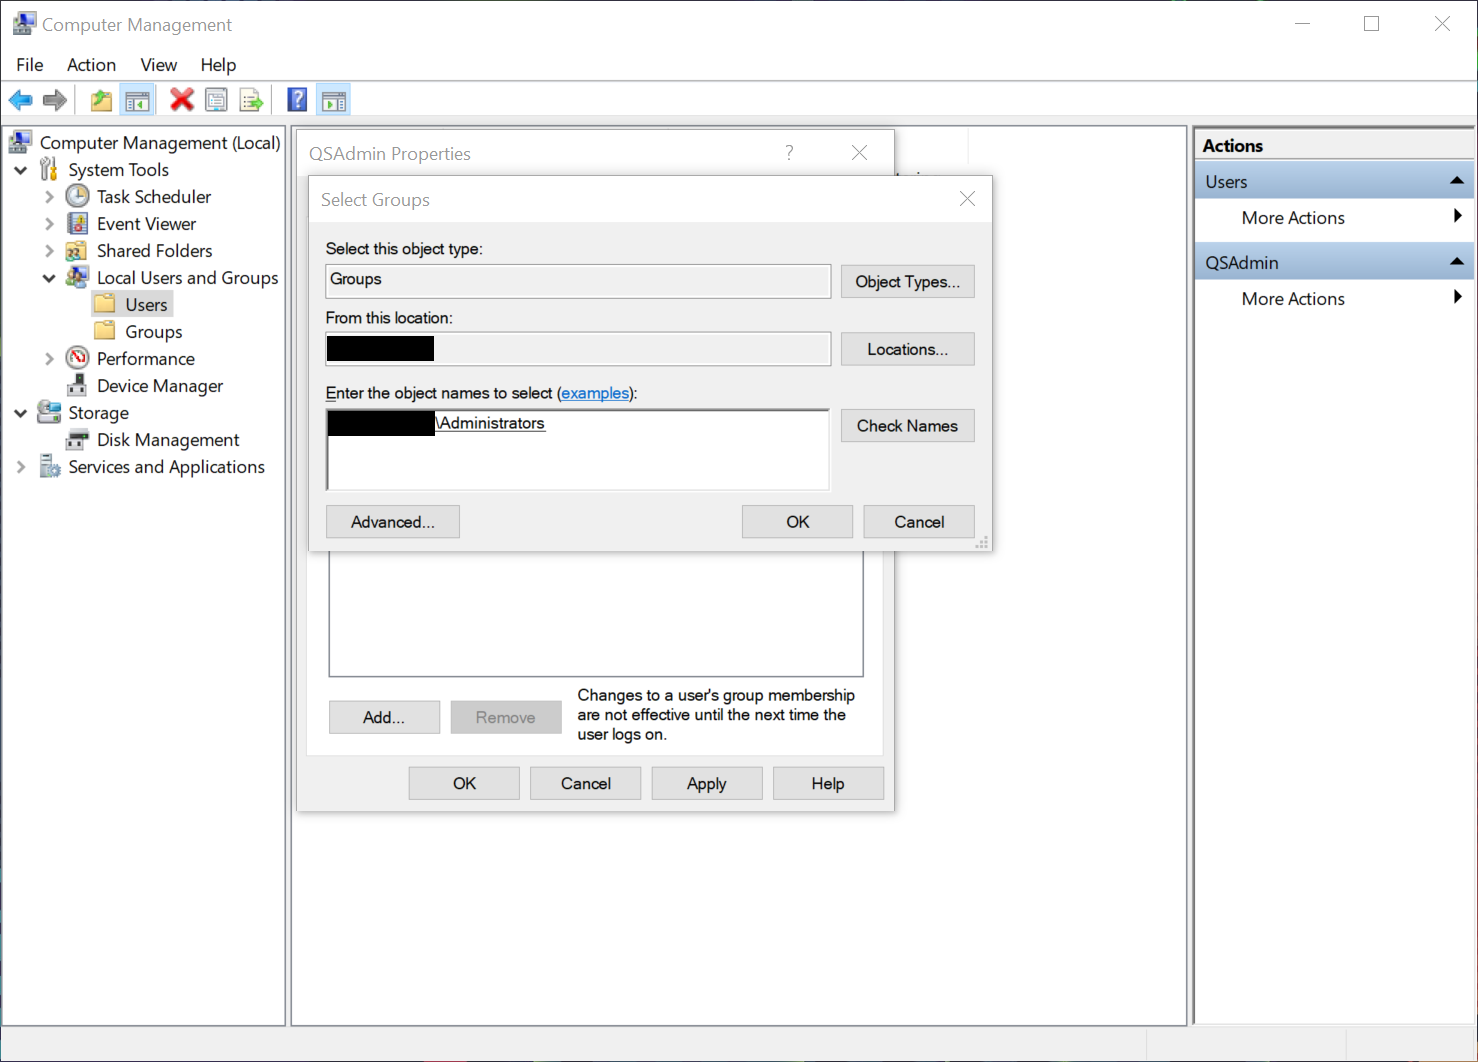
- Right-click the user your created, then select Properties.
- Click Member Of.
- Click Add.
- Type Administrators, then click Check Names. The field will populate with the Administrators group.
-
Click OK.
-
Under Member of, Click Users.
-
Click Remove.
-
Click OK.

Install Qlik Sense Enterprise on Windows on the Oracle Cloud compute instance
Once the Oracle Cloud compute instance is configured, and user accounts are created on the virtual machine, you're ready to install Qlik Sense Enterprise on Windows on your compute instance.
- Installing Qlik Sense Enterprise on Windows on a single node
- Installing Qlik Sense in a multi-node site
During the installation of Qlik Sense Enterprise on Windows, you'll be prompted to enter the server name or address. The correct server name should automatically appear in the field. Don't use a fully qualified domain name.
