
Cart
Users select entities, sources, or datasets to add to My Cart for use in the following actions:
- Create Dataset: Creation of a new dataset
- Add to Dataset: Inclusion in an already existing dataset
- Publish: Publish to a target location
- Explore: Explore data (also known as Shop for Data) to be queried and saved as an internal user View or checked out locally to CSV or XLS
- Prepare: Inclusion in a prepare transform dataflow
- Publish to Qlik Sense
- Publish to Power BI
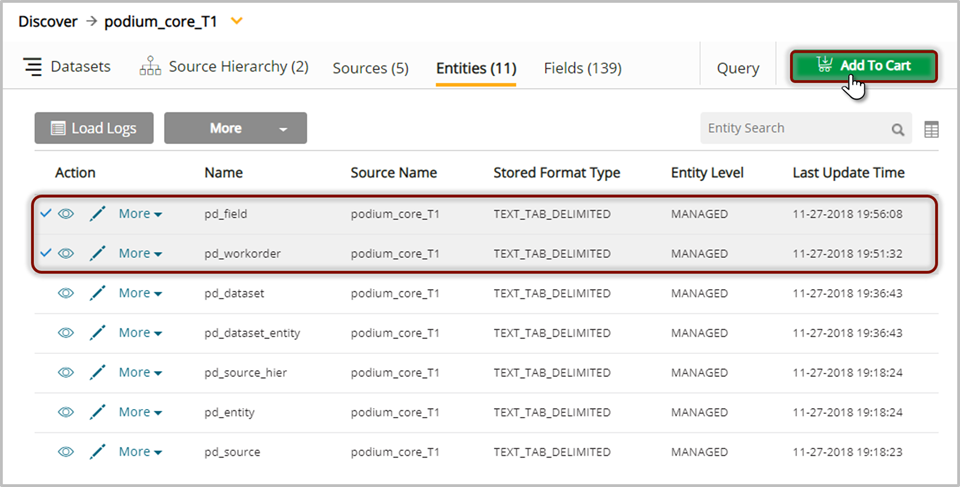
Add to Cart: entities and sources
Select individual Entities or Sources and then Add to Cart.
Selection of datasets to add to cart
Users add Datasets to My Cart by selecting the sets to be added then Add to Cart.
Datasets are the recommended tool for the logical grouping of objects for inclusion in Prepare transforms and Publish facilitated by My Cart.
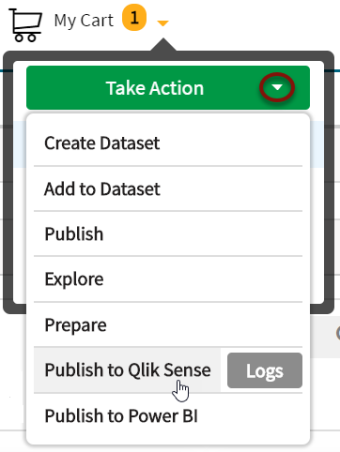
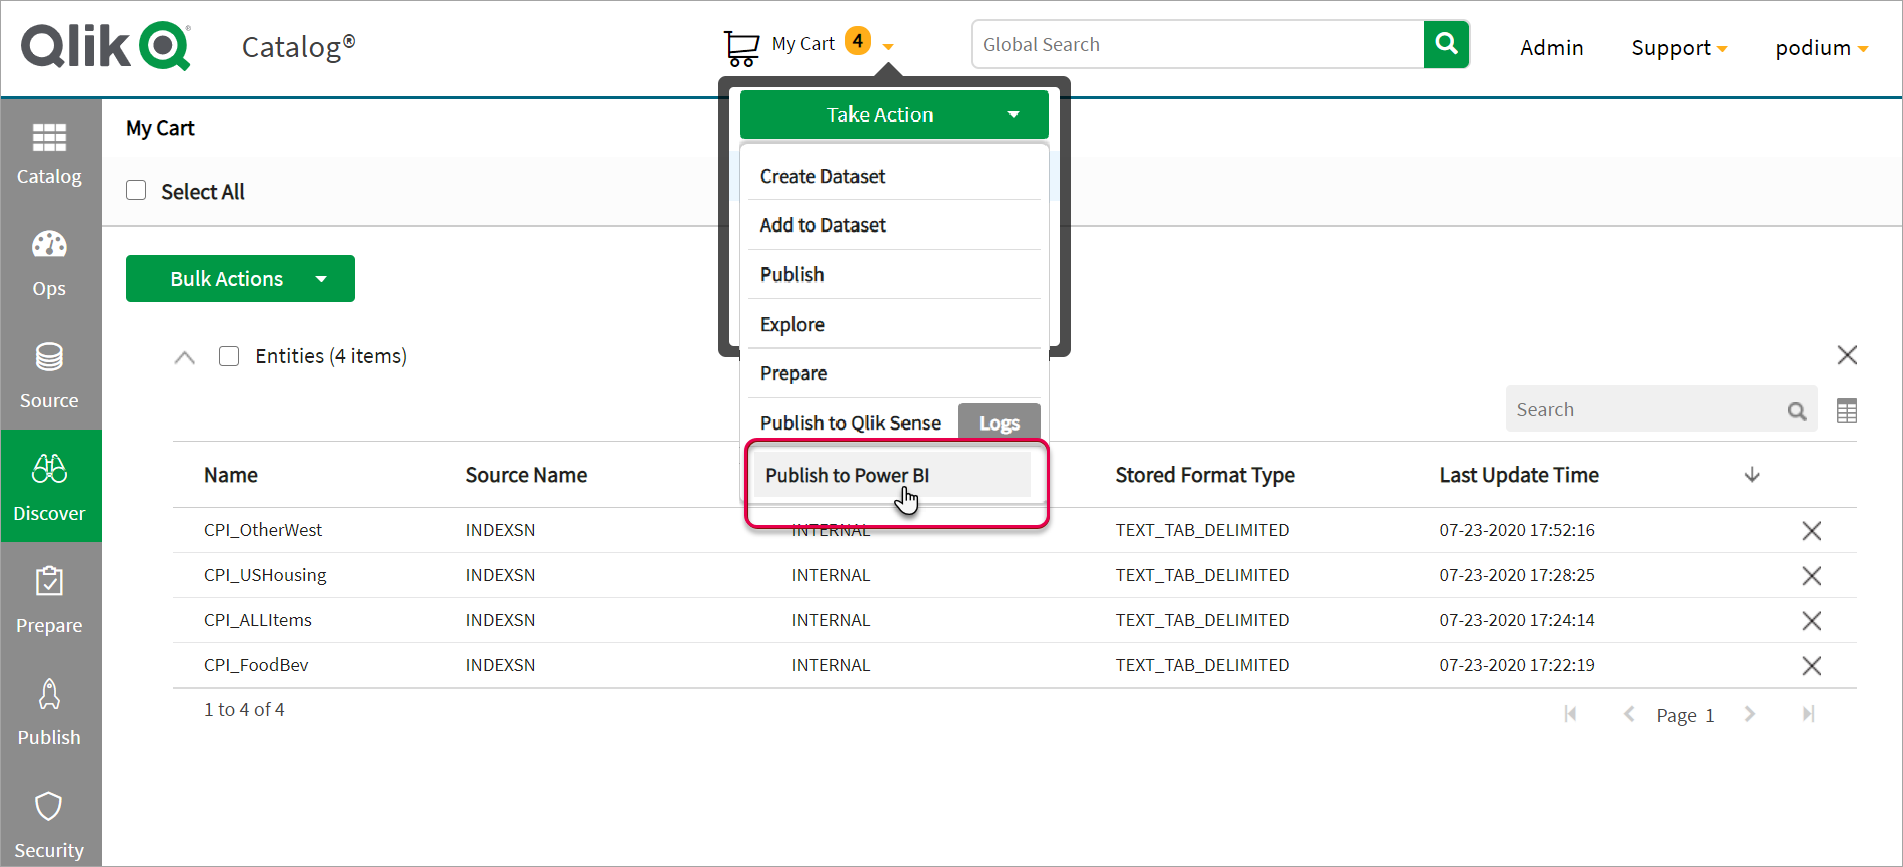
From My Cart located in the top-middle of the screen, display items in the cart by selecting the small orange carat to the right of My Cart and items count:
Display cart items

Once the cart opens to display content, either check Select All checkbox to select all cart items or expand each object type (Entities, Sources, and individual Datasets) to delete non-desired entities to make more granular selections.
Once items have been deleted and omitted for the operation, expand the Take Action dropdown.
Note that the number next to My Cart represents the number of selected entities and datasets placed in the cart. For example, if a dataset contains 3 Entities, My Cart will only register 1 item for that dataset however if a source containing 3 entities is added to the cart, the cart will register 3 more items.
Entities selected for My Cart

Publish to Qlik Sense
Publish to Qlik Sense creates (or updates) an app in Qlik Sense using either imported QVD or non-QVD entities. Publish to Qlik Sense logs are available by selecting the Logs button on this option in the dropdown from My Cart.
Users are able to choose one or more entities in either Catalog (by selecting cart icons on entity tiles of interest), or Discover by selecting or multi-selecting the source or entity row(s) then Add to Cart [or Datasets then (the gear icon) actions and Publish to Qlik Sense]. Multi-selection in Discover or Catalog will place entities in the cart from where users can Take Action to choose a destination for the selected entities. This section will focus on Publish to Qlik Sense options. Hover over My Cart in the top navigation bar to view possible actions from My Cart.
When Publish to Qlik Sense is selected, Catalog will check to see if any non-QVD entities are present. If non-QVD entities are present, a dialog appears allowing the user to select the Qlik Sense server at which the app will be created or updated (if multiple Sense servers are configured):
Select a Qlik Sense server

If only QVD entities are present, the Select Qlik Sense Connector dialog is skipped, as QVDs can only be published to the Sense server from which they originate. In this case, Qlik Catalog automatically determines the correct Sense server (if multiple Sense servers are configured).
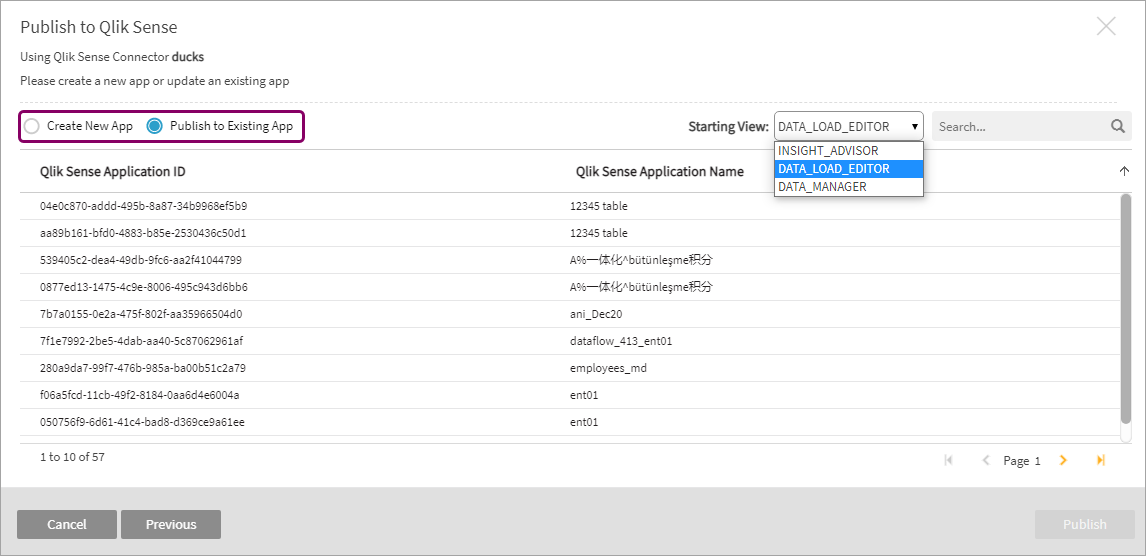
Once the Sense server has been selected or determined, a new modal presents two radio button options: Create New App and Publish to Existing App.
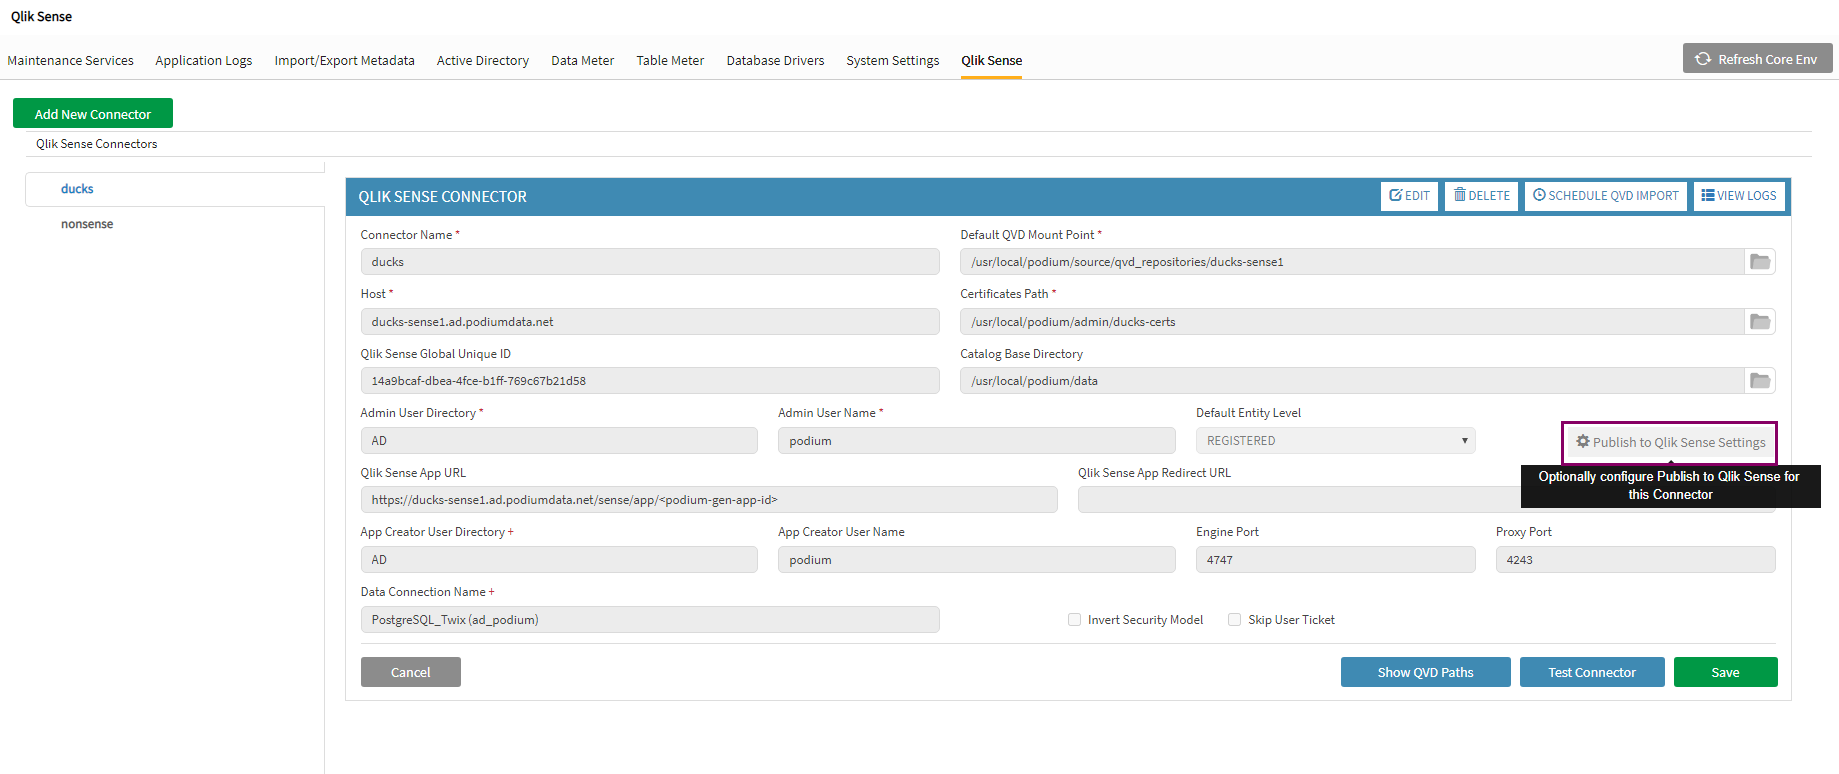
Configuration of Sense servers
Information required to Publish to Qlik Sense is configured in Admin > Qlik Sense. Global settings are configured in the core_env.properties file. For each configured Qlik Sense connector, its Publish to Qlik Sense Settings can be altered by clicking to expand Publish to Qlik Sense Settings. Tooltips exist for each of the nine additional fields. For more information, see Qlik Catalog + Qlik Sense Integration Guide here: Installation Guides.
Publishing non-Managed, non-QVD entities to Qlik Sense
Publishing Registered or Addressed entities to Qlik Sense requires configuration to ensure that data is or can be loaded. Registered and Addressed entities do not have data loaded to them by definition, therefore either promotion or additional properties must be invoked to access and load source data. The following options are available to users:
- Recommended: Promote the entities to entity level MANAGED before selection, load the data in Catalog, then select and publish to Qlik Sense.
- Publish the entities to Qlik Sense and manually load the data in Qlik Sense.
- If the non-Managed, non-QVD entities are from a JDBC source, an additional option exists. The following core env property should be configured with default value (EXTERNAL) enabling Qlik Sense to pull data directly from the table’s external source (with Catalog brokering the exchange): podium.qlik.dataconnection.addressed.registered.entity.generating.from=EXTERNAL
Note that these properties must be set in addition to setting standard Publish to Qlik Sense properties.
Selection of Create New App or Publish to Existing App with Insight Advisor selected for the Starting View options navigates the user directly to an instance of Qlik Sense. Insight Advisor is the entry point for exploring data and creating visualizations. The difference between these options is that Create New App will produce a new app with the entity name (seen in the upper left of Qlik Sense Analyze sheet) and Publish to Existing App option will provide a new sheet within the existing selected App (the App name will appear in the upper left of the Analyze sheet).
Qlik Sense Analyze sheet

From the analyze sheet, click  (edit) at the top right to navigate to the Edit sheet, where published tables can be accessed from Filter by table dropdown. Published entity fields are listed below Filter by table dropdown.
Qlik Sense Edit sheet

If the button for Publish to Existing App is selected, listed Apps to which the user has access in Qlik Sense are enabled for selection. Users also select their choice of starting view location in Qlik Sense: Insight Advisor (default), Data Load Editor, or Data Load Manager. Developers building Qlik Sense applications will likely select Data Load Editor or Data Manager starting views. Once a selection is made for the starting view, and then the existing App in which to publish, and then Ok, the entities in the cart are published and data can be loaded to the App.


Publish to Power BI
Publish to Power BI from My Cart pushes data from Qlik Catalog to a Power BI user’s workspace. Leveraging Power BI RESTful APIs, this feature requires that an admin first create an application for Qlik Catalog in the Azure Active Directory (AD) portal. It is used to obtain required API permissions for the Catalog user and critical pieces of information for authentication that users enter into System Settings in the Catalog Administration module: Application (client) ID, Directory (tenant) ID, and Client Secret. This information is used by Qlik Catalog to obtain an access token to call Power BI REST APIs.
The following property setting is required in the core_env.properties global configuration file to enable Publish to Power BI. This property must be explicitly set (default value is false):
- is.publish.to.powerbi.enabled=true
Click Refresh Core Env in Admin and then log out and back in after setting this property.
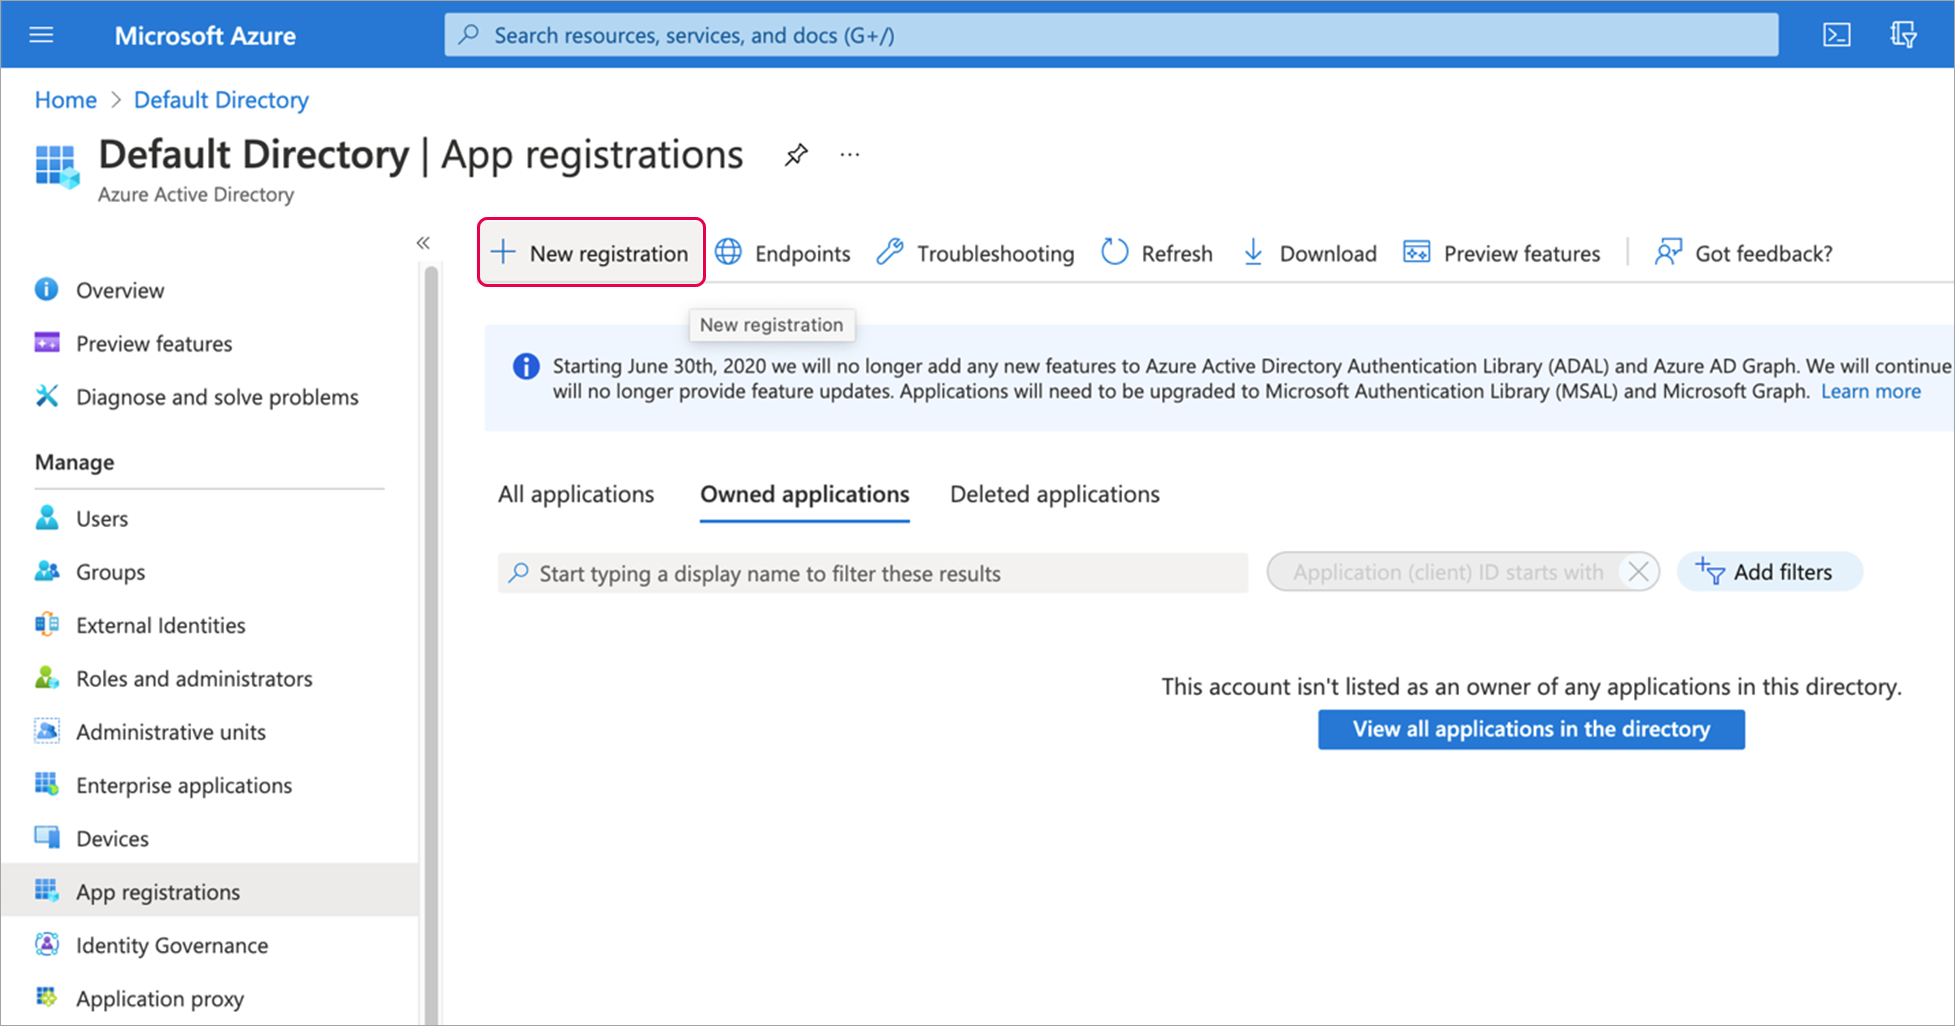
To begin the integration process between Qlik Catalog and Power BI, login to the Azure portal:
https://portal.azure.com/#homeSelect Azure Active Directory, then select App Registrations, then select New registration.
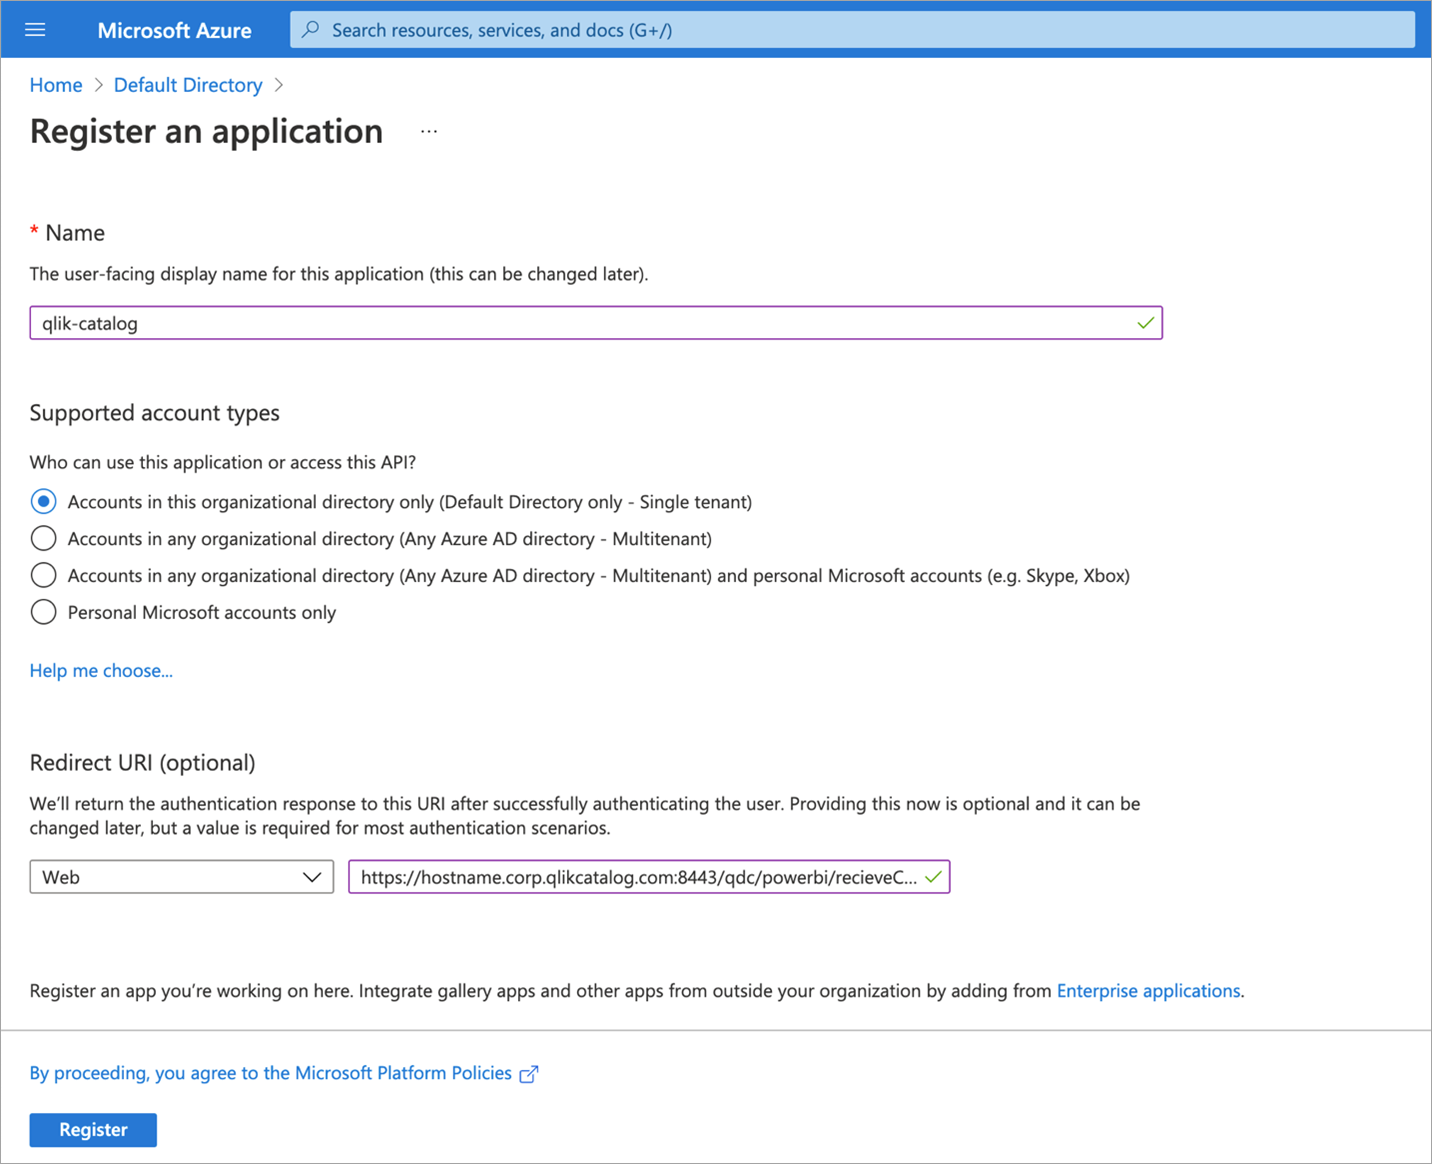
Provide the required information for the following fields (values are examples, configure to environment):
Name The user-facing display name for this application (this can be changed later): qlik-catalog
Supported account types Who can use this application or access this API?: [check radio button for] Accounts in this organizational directory only
Redirect URI (optional): This is required for Qlik Catalog.
[The first field is a dropdown value]: Web
[The second field is a free-form field in which to provide Qlik Catalog install URL]: https://hostname.corp.qlikcatalog.com:8443/qdc/powerbi/recieveCode
Select Register.
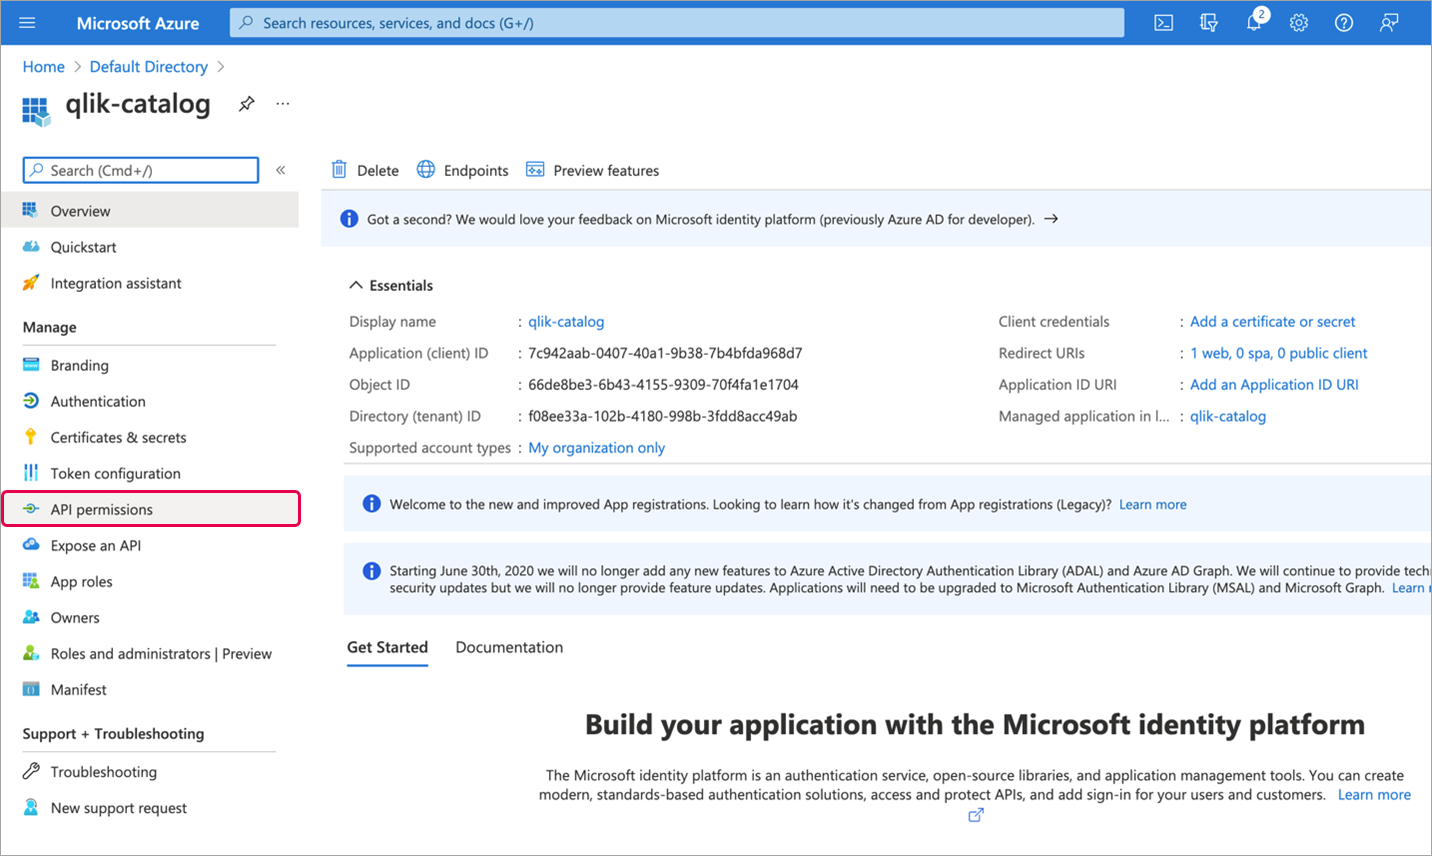
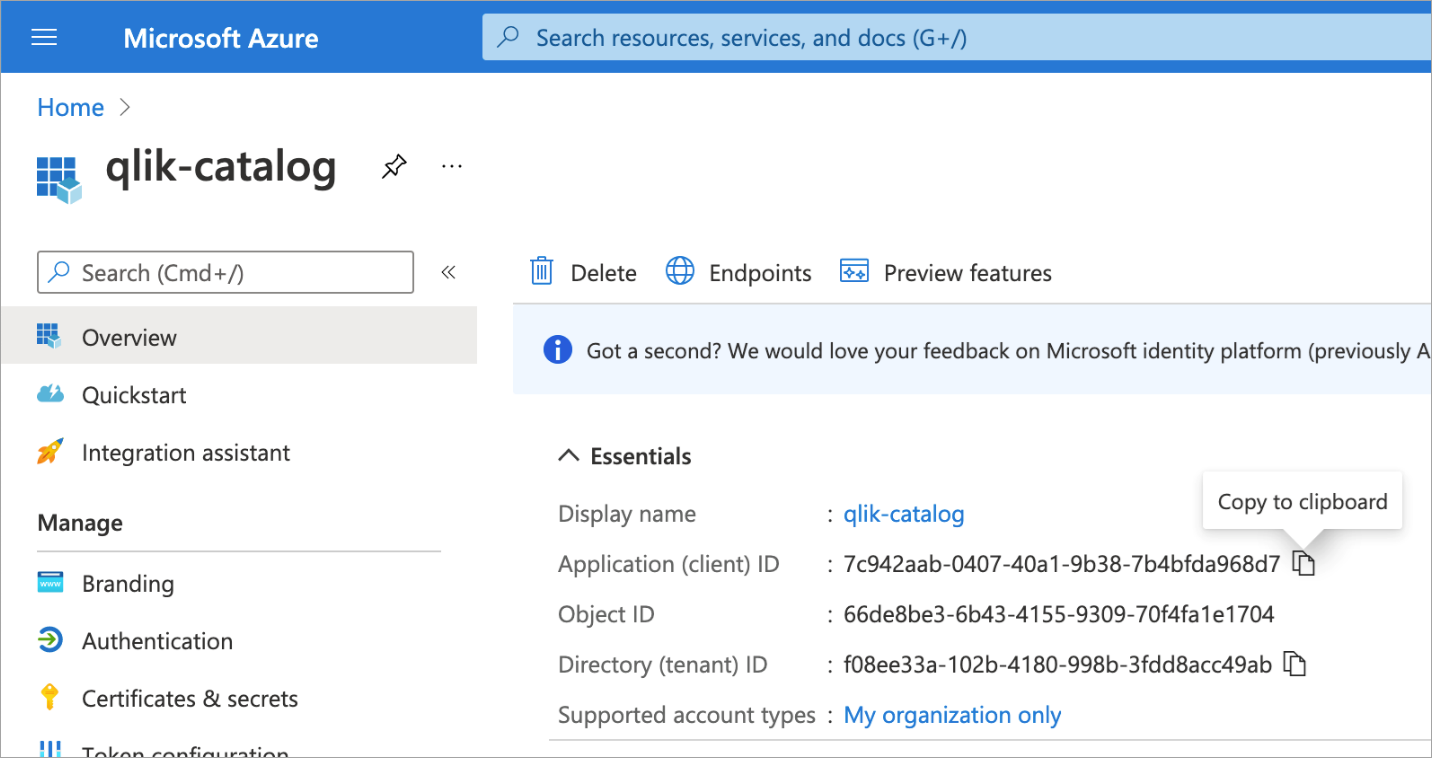
An overview with application information will display. Select API Permissions under Manage.
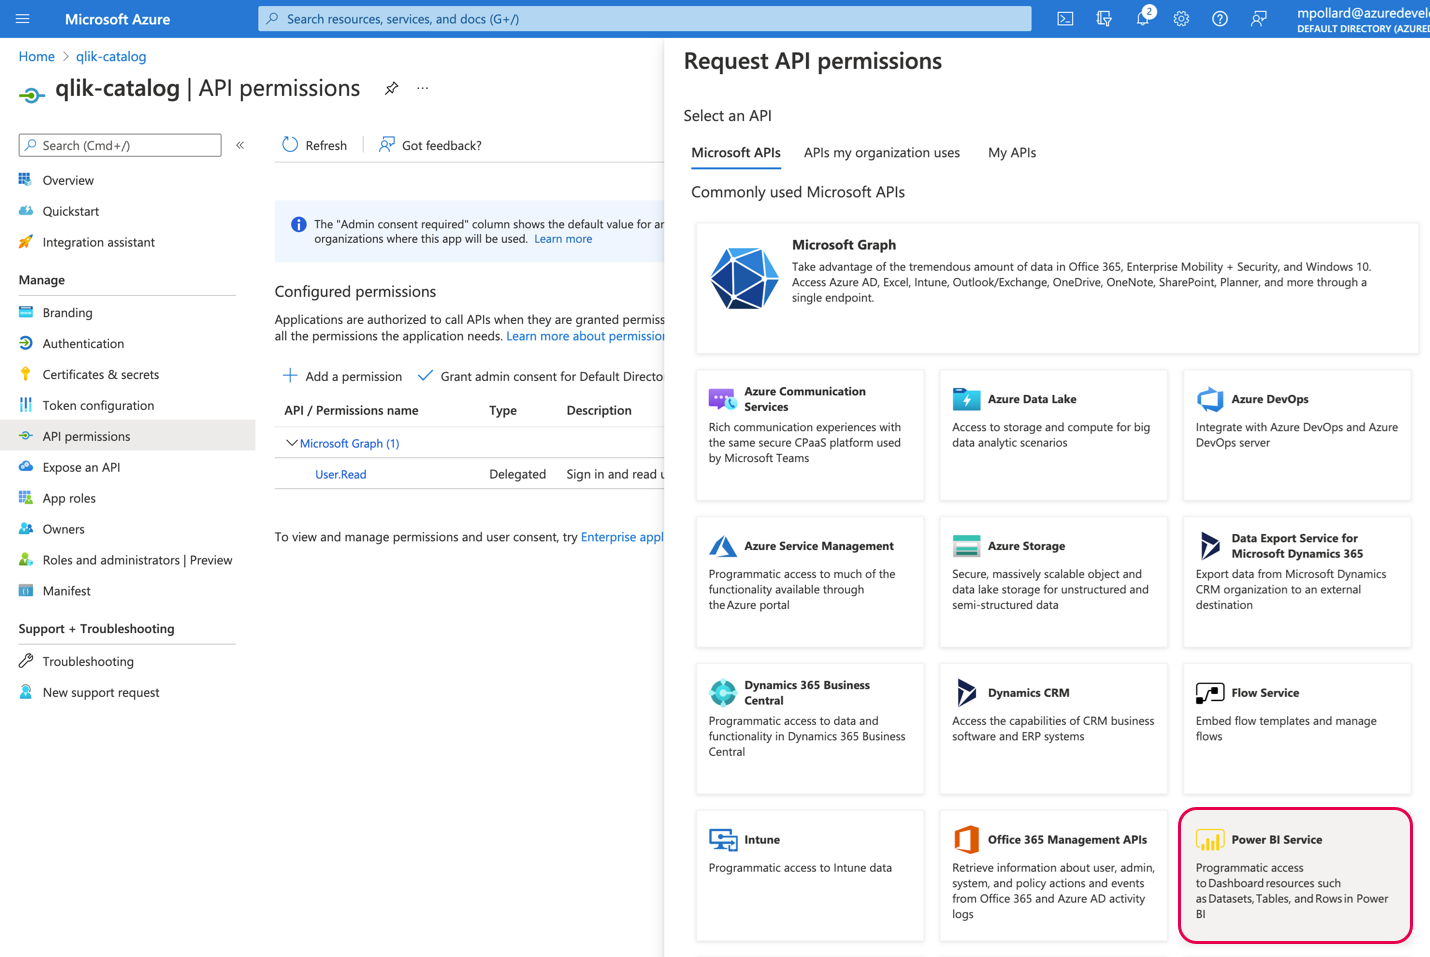
Select Add a permission
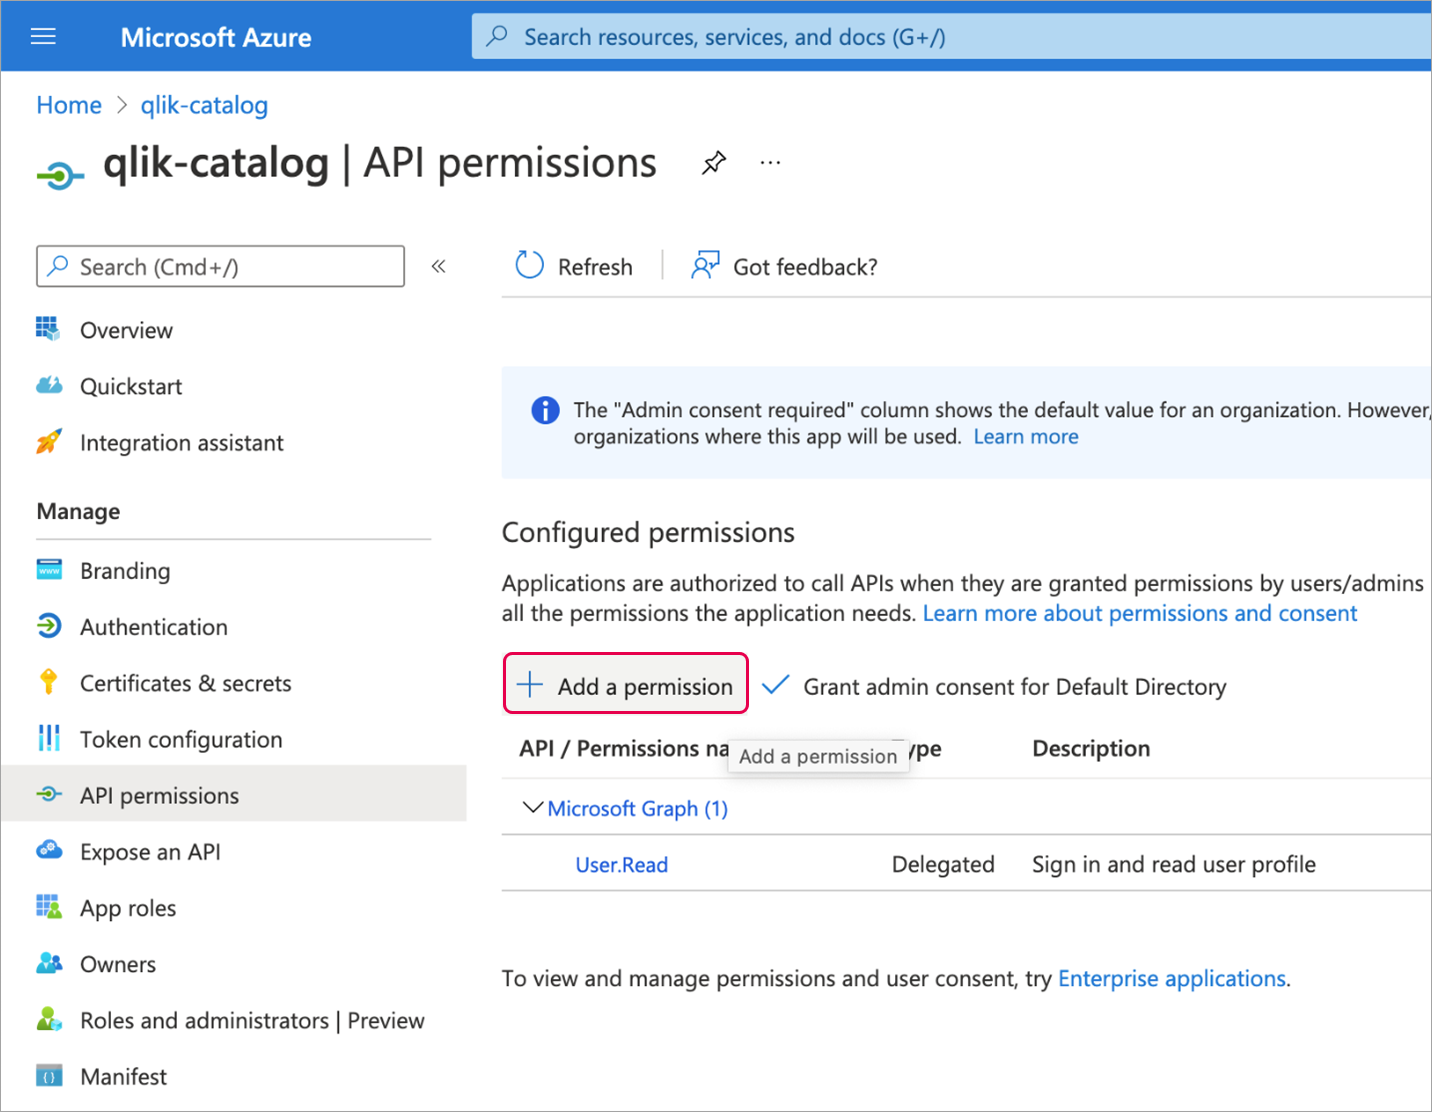
Select Power BI Service from Request API permissions.
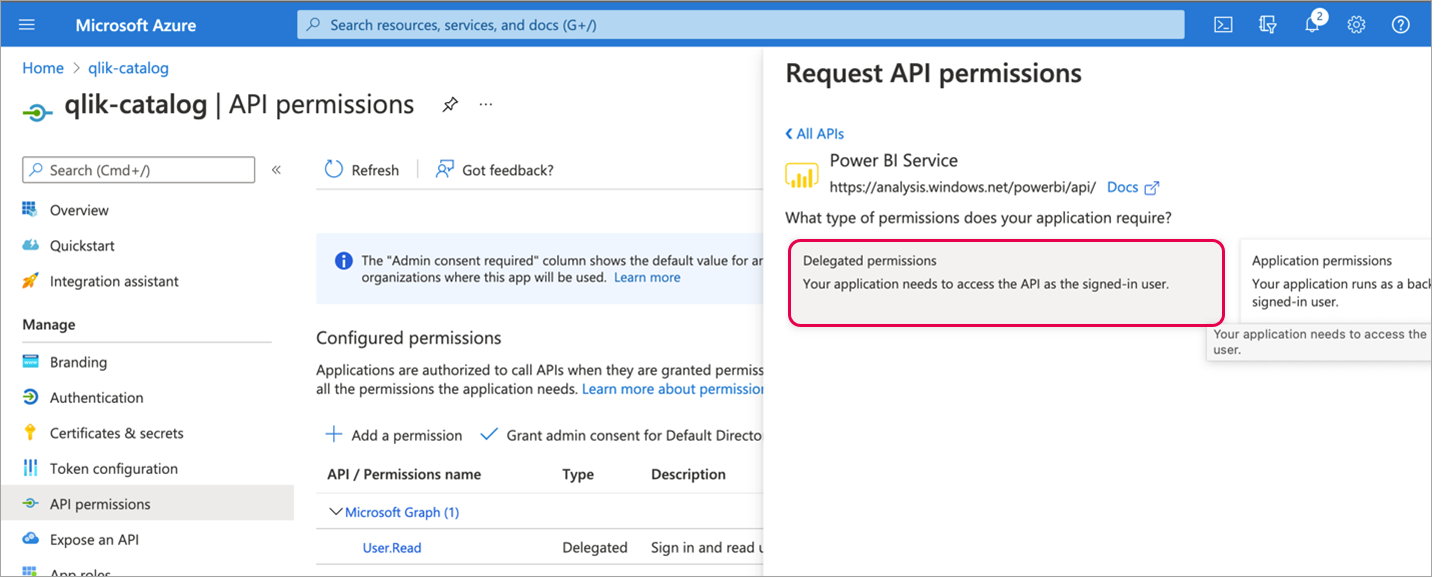
When the popup asks what type of permissions your application requires, select Delegated permissions.
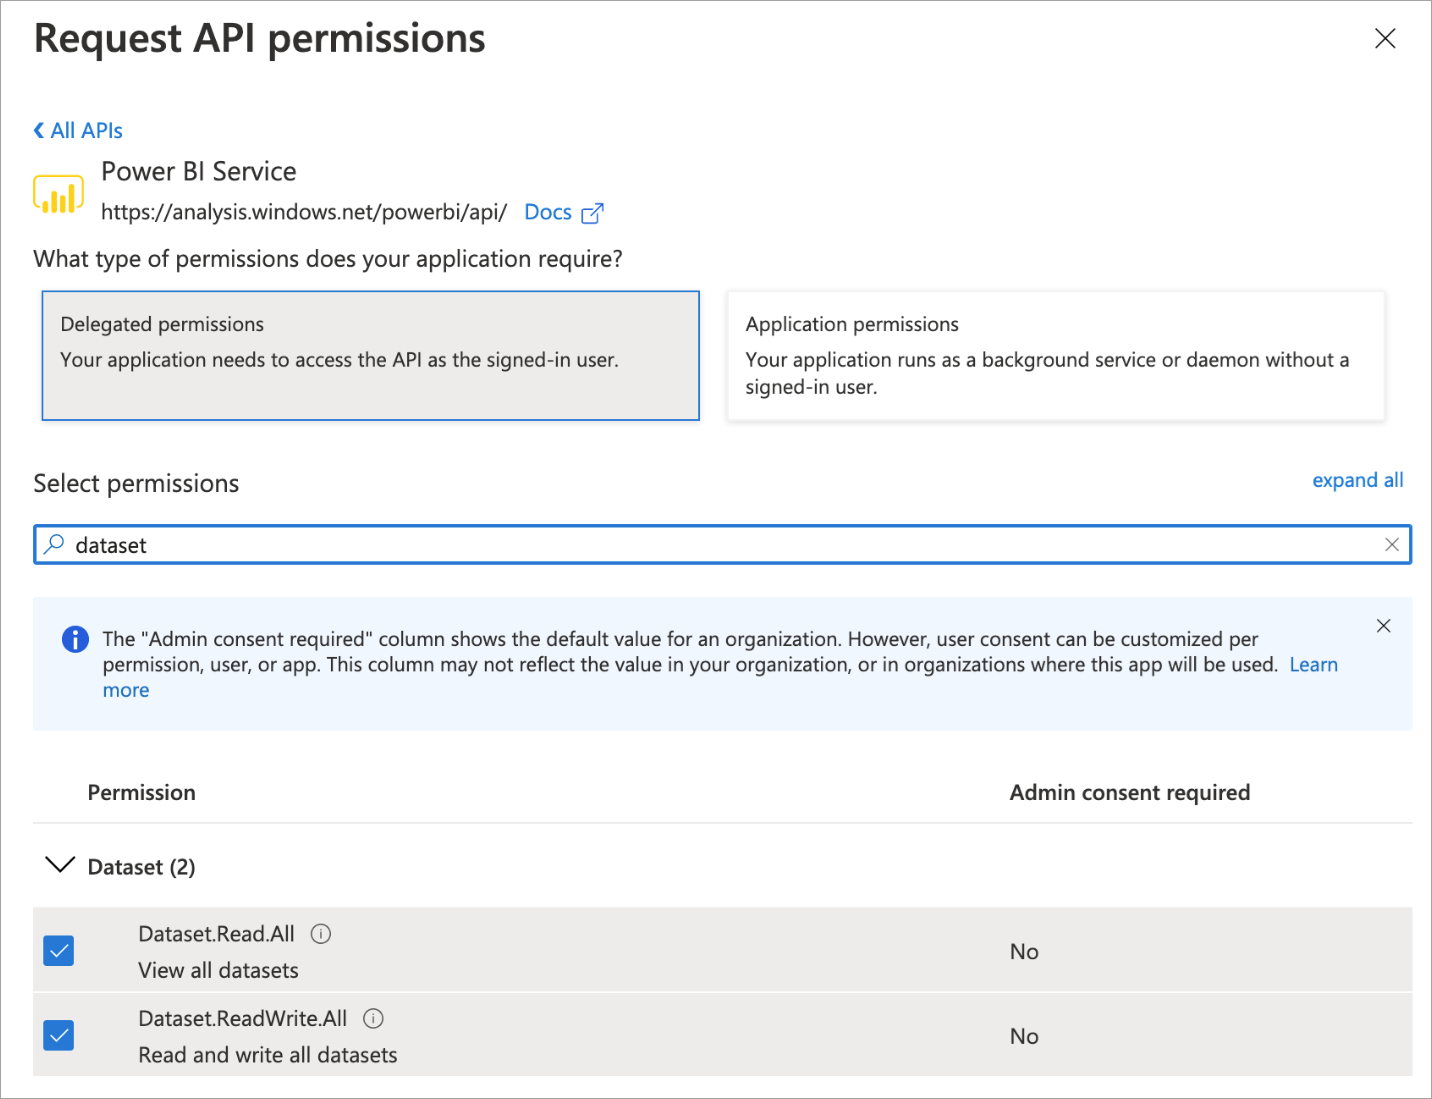
From the Request API permissions tab, search for and add the following permissions:
- Dataset.Read.All
- Dataset.ReadWrite.All
- Workspace.Read.All
- Workspace.ReadWrite.All
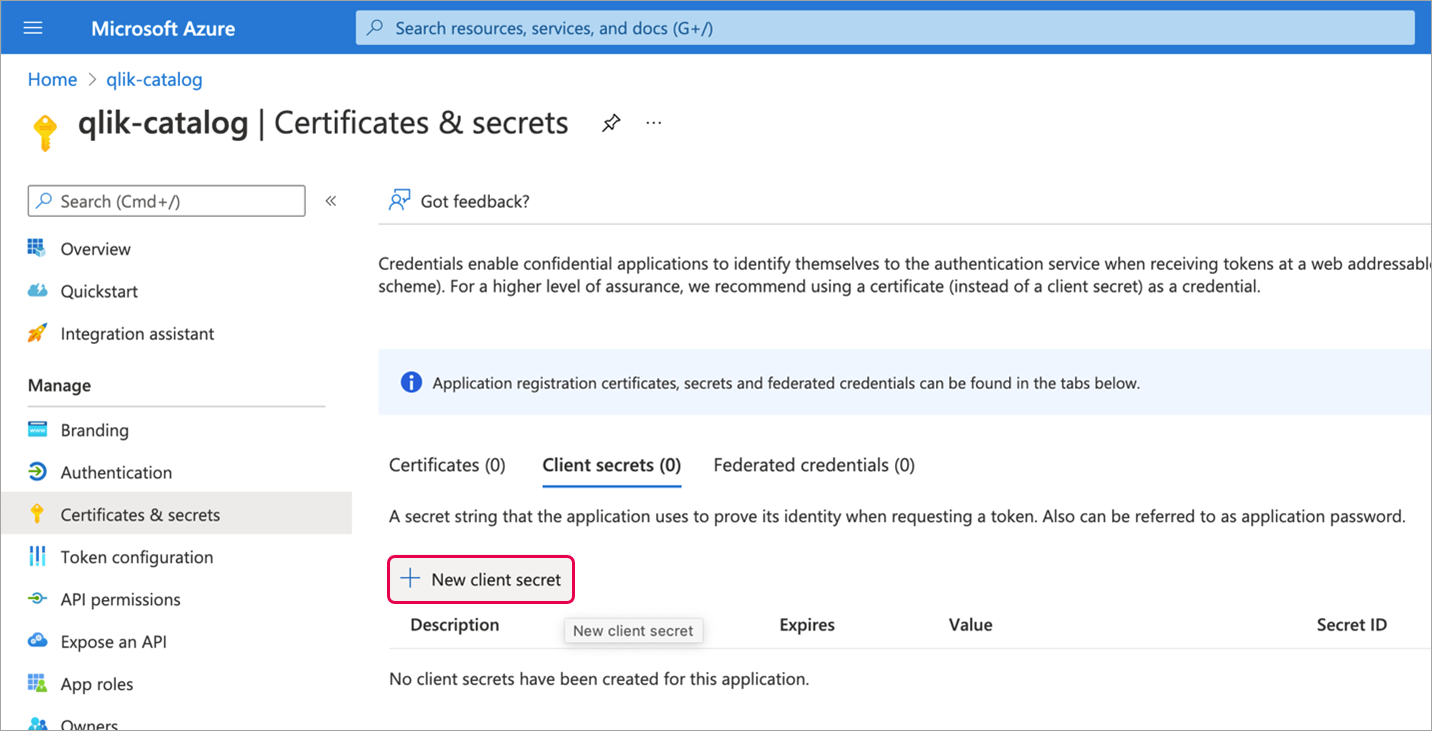
Once the permissions have been selected, select Add permissions. Once the permissions have been added, select Certificate & secrets and select New client secret.
Enter a description and expiration duration and then click Add.
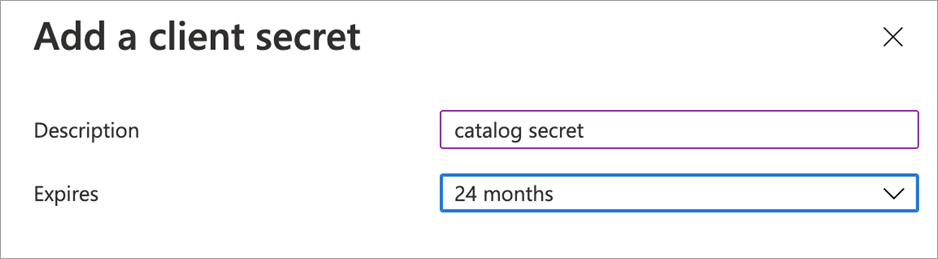

If for some reason the secret value is not captured at this time, simply delete the secret and create a new one.
Select Overview and copy the values for Application (client) ID and Directory (tenant) ID; these values and the client secret will be copied into Qlik Catalog System Settings.
Qlik Catalog
Log into the installed instance of Qlik Catalog specified in the Redirect URI field during registration.
Go to Admin>System Settings and copy the values for Application (client) ID, Directory (tenant) ID, and Client Secret.
Save the settings.

The integration is complete and users can now select datasets and objects, add them to My Cart, and Publish to Power BI.
A popup will display requesting a name for the published dataset so that it can be identified in Power BI. Upon proceeding after naming the dataset, users are navigated to a Microsoft login URI that includes session authentication and redirect information.
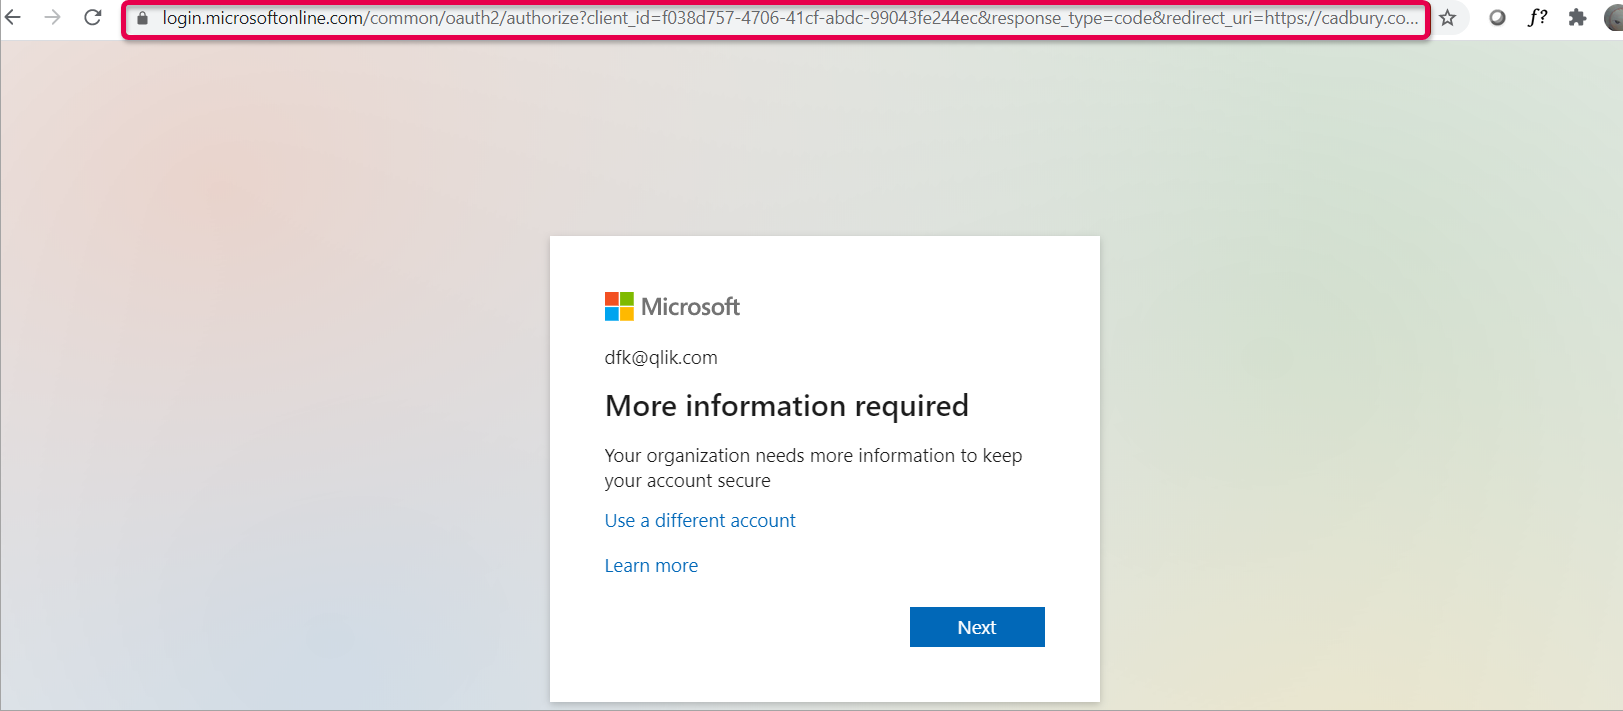
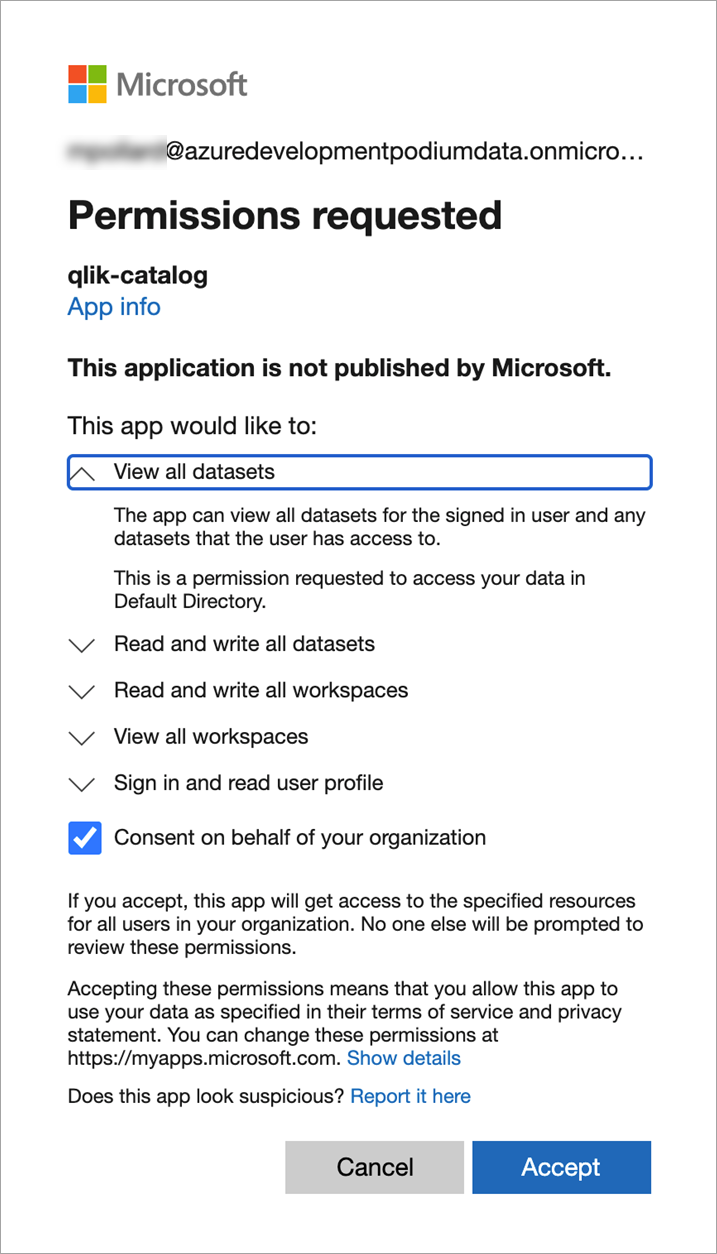
Upon verification and login, Microsoft requests permissions, Accept these permissions.
Users are then navigated back to Qlik Catalog where the cart is now empty. Publish to Power BI logs are found in the same place as Publish to Qlik Sense logs by selecting the Logs button on the cart dropdown.
Screenshot example: Publish to Power BI logs:

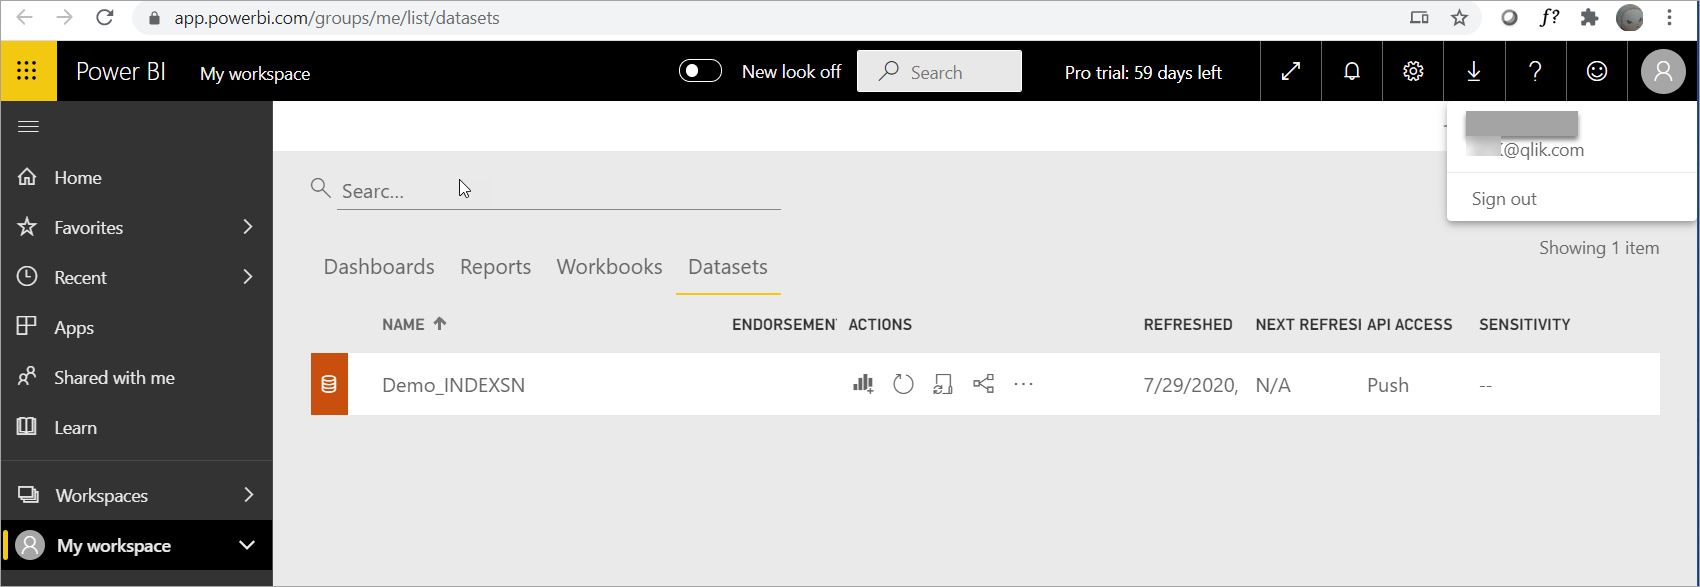
Log into Power BI app at https://app.powerbi.com/groups/me/list/datasets to view and work with datasets published from Qlik Catalog.
Note the following Publish to Power BI limitations:
- This functionality is currently only available for Power BI Web (not Power BI Desktop)
-
75 max columns
-
75 max tables
-
10,000 max rows per single POST rows request
-
1,000,000 rows added per hour per dataset
-
5 max pending POST rows requests per dataset
-
120 POST rows requests per minute per dataset
-
If table has 250,000 or more rows, 120 POST rows requests per hour per dataset
-
200,000 max rows stored per table in FIFO dataset
-
5,000,000 max rows stored per table in 'none retention policy' dataset
-
4,000 characters per value for string column in POST rows operation