Making the MDM demo project work
About this task
Procedure
-
Install the following relevant modules either using the installer or
manually:
- Talend IAM (Talend Identity and Access Management) service: a mandatory service for using MDM, which provides authentication and SSO (Single Sign On) for the applications using Talend Administration Center as the Identity Provider.
- Talend Administration Center: a mandatory web-application for using MDM, which allows the administrator to manage MDM users and projects.
- Talend MDM server: includes the MDM central data hub and the Talend MDM Web UI web-application where MDM data is governed and monitored.
- MDM Workflow server (Bonita BPM server): a mandatory service for using the MDM workflow feature. It is installed as an MDM server component together with other MDM packs.
- Talend Studio: a client studio that enables you to build data models employing the necessary business and data rules to create one single master copy of the data.
For example, to fully dive into the MDM demo project, select these components in the following two steps when installing your product using installer:


For more information about how to install them, see Talend Installation Guide.
-
Start Talend IAM, Talend Administration Center, Talend
MDM, and Bonita BPM (only when using MDM workflow feature)
services.
For more information about how to start these services, see Talend Installation Guide.
-
Start Talend Studio and import the MDM
demo project into it.
All items will be listed in the MDM repository under the MDM perspective.
-
Update the value of the context variable host and port in the Contexts
view under the Talend Studio
Integration perspective if the
MDM server is not installed locally and if you did not choose the default port
number 8180 during the installation.
In this example, all servers and Talend Studio are installed locally with the default port number, so just keep the context variable values as they are.

-
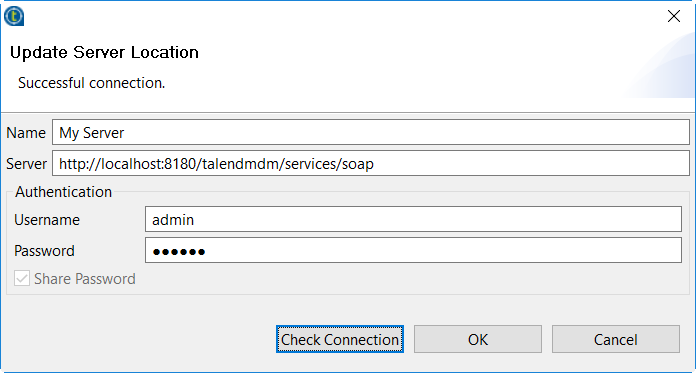
Create a connection to the MDM server and check the
connection to the server in the Server
Explorer panel in Talend Studio.

For more information about how to create an MDM server connection, see the section on creating a connection to the MDM server in Talend Studio User Guide.
- If you are going to deploy and use the GoogleMap Job, enter your API Key for Google Maps Platform in the API key field on the Basic settings view of the tGoogleAddressRow component in the Job. For more information, see tGoogleAddressRow.
-
Deploy the demo project repository items to the MDM server.
For more information, see the section on deploying repository items to Talend MDM Server in Talend Studio User Guide.
-
Execute the Job CreateUsers under the Talend Studio
Integration perspective to
create the following three MDM users in Talend Administration Center and assign specific custom roles to them.
Login Password Type System Role Custom Role aministrator@mdm.company.com administrator MDM Super Admin manager@mdm.company.com manager No Project Access Interactive User Demo_Manager user@mdm.company.com user No Project Access Interactive User Demo_User After the Job being executed successfully, you can log into Talend MDM Web UI with the user name administrator@mdm.company.com and the password administrator and go to the Administration > Manage Users page to double-confirm that the three users have been created and specific custom roles Demo_Manager and Demo_User have been assigned to the corresponding users.

For more information about MDM system roles, see the section on MDM user types and system roles in Talend Administration Center User Guide.
For more information about MDM custom role, see the sections on:
- MDM custom roles and access control and defining a custom role in Talend Studio User Guide, and
- Updating the language and assigned custom roles of an MDM user in Talend MDM Web UI User Guide.
-
Execute the Job MDM_LoadAll under the Talend Studio
Integration perspective to load
the following sample data into the entity ProductFamily and Product.
The sample data for the ProductFamily entity:
#id;family
1;Shirts
2;Hats
3;Pets
4;Mugs
The sample data for the Product entity:
#Id;Name;Description;Price;Family;Picture
231035933;Talend Dog T-Shirt;Doggie t-shirt from American Apparel;16.99;Pets;dog
231035934;Talend Jr. Spaghetti Tank;Spaghetti tank from American Apparel;16.99;Shirts;spaghetti
231035935;Talend Golf Shirt;Golf-style, collared t-shirt;16.99;Shirts;golf_shirt
231035936;Talend Fitted T-Shirt;Fitted T. ultra-fine combed ring spun cotton;15.99;Shirts;tshirt
231035937;Talend Stein;22 oz. ceramic stein with gold trim;13.99;Mugs;stein
231035938;Talend Mug;Large mug, easy-grip handle;10.99;Mugs;mug
231035939;Talend Large Mug;15 oz. ceramic Large Mug;11.99;Mugs;mug_large
231035940;Talend Cap;Adjustable, 100% brushed cotton Cap;14.99;Hats;cap
231035941;Talend Trucker Hat;Standard Trucker Hat, resilient polyester foam front, adjustable headband;10.99;Hats;trucker_hat
The sample data for the Colors element of the Product entity:
#Name;Colors
Talend Jr. Spaghetti Tank;White,Light Blue,Light Pink,Lemon
Talend Golf Shirt;White
Talend Fitted T-Shirt;White
Talend Cap;White,Khaki
Talend Dog T-Shirt;White
The sample data for the Sizes element of the Product entity:
#Name;Sizes
Talend Jr. Spaghetti Tank;Small,Medium,Large,X-Large
Talend Fitted T-Shirt;Small,Medium,Large,X-Large
Talend Dog T-Shirt;Small,Medium,Large,X-Large
After the Job being executed successfully, you can log into Talend MDM Web UI with any of the three newly created users to double-confirm that the sample data has been loaded.

-
Synchronize the MDM users information to the Bonita BPM server in Talend MDM Web UI so that you can manage
workflow tasks in the Bonita BPM web portal.
For more information, see the section on synchronizing workflow users manually in Talend MDM Web UI User Guide.
Did this page help you?
If you find any issues with this page or its content – a typo, a missing step, or a technical error – please let us know!
