Skip to main content Skip to complementary content

Configuring Talend Administration Center to run on a different database than H2

By default, the Talend Administration Center Web application is configured to run with the default H2 embedded database.

Before you begin

  • The external database must have been created with a utf8 collation.
  • If you want to use a MySQL, Oracle, or MS SQL database for Talend Administration Center, install the right database driver in the application server as described in Installing database drivers in your Web application server.
  • For MySQL users: to prevent further transaction issues when resuming a trigger on the Job Conductor page of Talend Administration Center, it is recommended to configure the transaction isolation level under the [mysqld] group in the mysql.ini or mysql.conf configuration file as follows: transaction-isolation=READ-COMMITTED.

Procedure

  1. Start the application server, then open a Web browser and type the URL of the Talend Administration Center Web application.
  2. On the Login page, click Go to db config page, then enter the administrator password (by default, it is admin).
    Note that if you are starting Talend Administration Center for the first time, you already are on the database configuration page.
    Information noteNote:

    Depending on the database security setting, you may need to add additional parameters to your connection URL. For Windows users connecting to a MySQL database, you must load the time zone data into the time zone tables. You can do this by adding the serverTimeZone parameter to the URL:

    jdbc:mysql://hostname:{ip_address}:3306/{db_name}?useSSL=false&serverTimezone={server_time_zone}&allowPublicKeyRetrieval=true

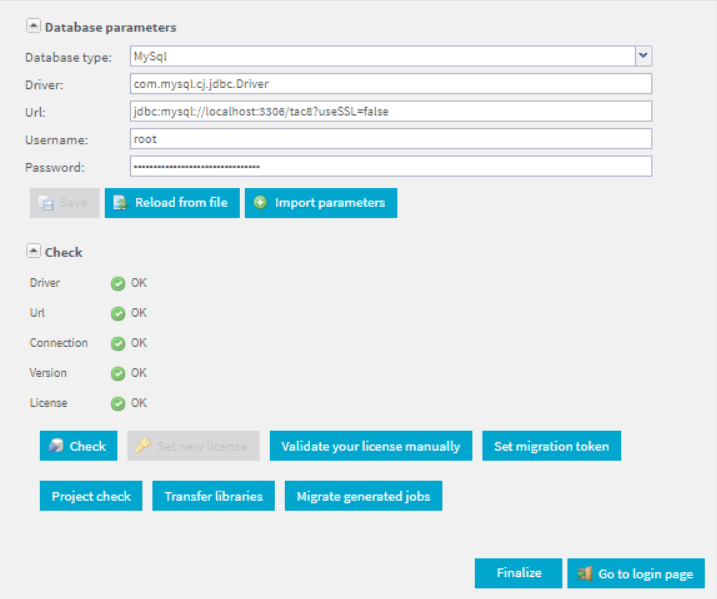
  3. In the Database type list, select your database. As a result, the Driver and URL fields are automatically updated with the template corresponding to this database.
  4. In the URL field, replace the parameters in brackets with your database details.
    Note that you can click the Reload from file button to reload your previous database as changes are not saved until you click Save.
  5. Click Save to take your changes into account.

Did this page help you?

If you find any issues with this page or its content – a typo, a missing step, or a technical error – please let us know!