Auto Scaling Groups
Procedure
-
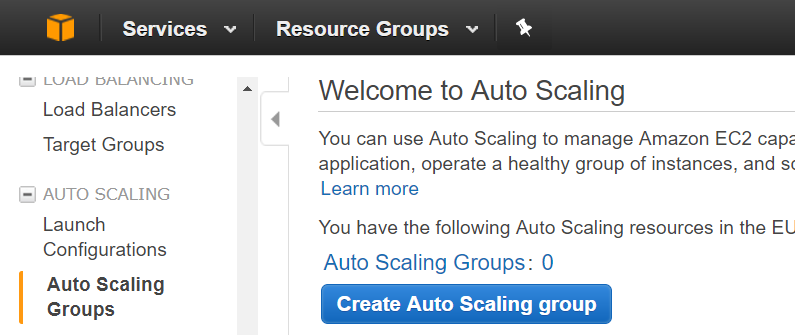
Under AWS EC2 services, select AUTO SCALING > Auto Scaling
Groups and click on Create Auto Scaling group.
-
Select our previously built TalendRunimeAutoScaling-LC Launch Configuration from the list.

-
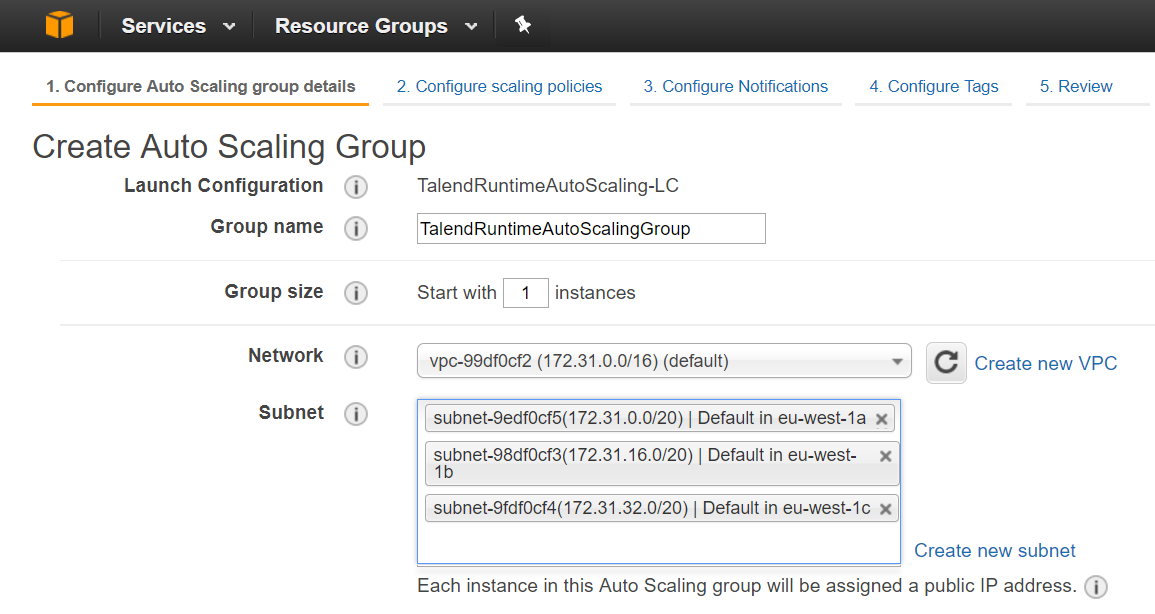
In step 1, in the Configure Auto Scaling group details section.
- Name the group as TalendRuntimeAutoScaling-Group.
- Setup Group size start with one instance – so at least one Talend Runtime will be always available.
- Select Subnet on all three availability zone as good practice.
-
In the Expand Advanced Details section:
- Select Load Balancing option.
- Choose the TalenRuntimeAutoScaling-LB built from previous steps.
- Choose Health Check Type as ELB and set Health Check Grace Period to 10 seconds.

-
In step 2, in Configure scaling policies:
- Select Use scaling policies to adjust the capacity of this group.
- Set scale between 1 and 2 instances (or more according to your needs) so Auto Scaling group will remain 1 to 2 Runtime instances.
- In Increase Group Size part, click on Add new alarm.
-
Unselect the Send a notification box as you don’t need
notification in this demo, configure your triggering rule as shown below:
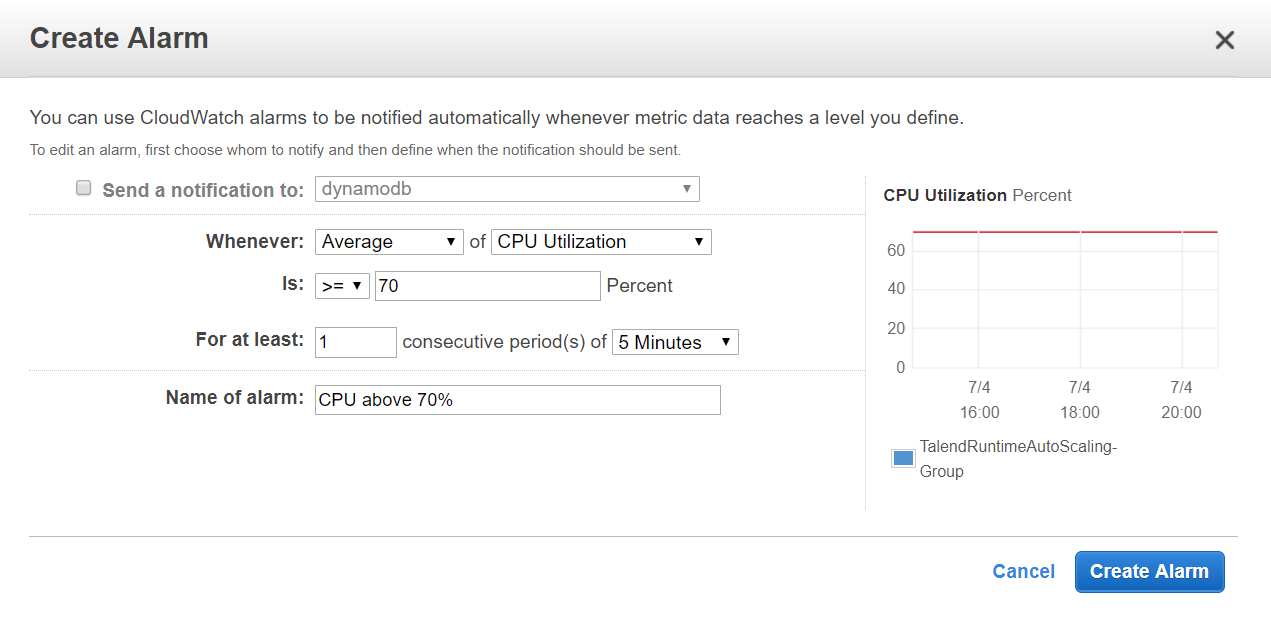 Information noteNote: If one of Runtime instances was running is above 70% of CPU for constantly 5 minutes, then this rule will be triggered.
 -
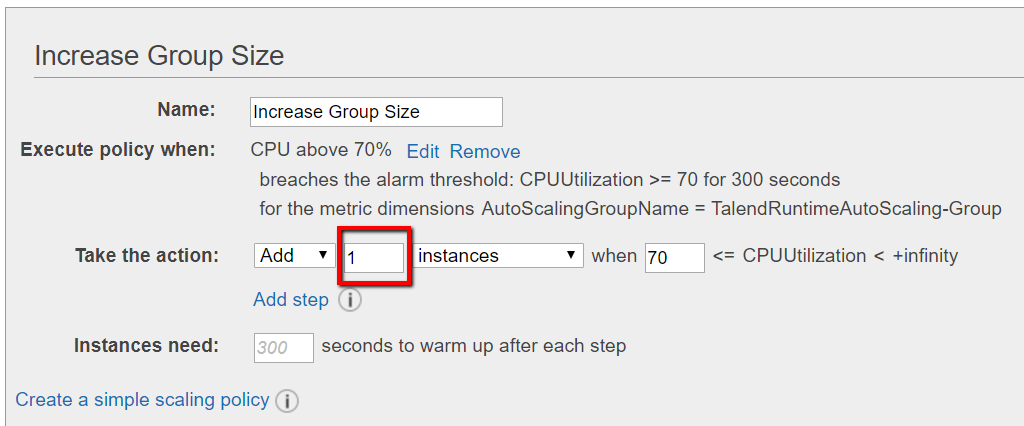
Click on Create Alarm, all configuration will be saved
as shown below, please don’t forget to change the instance number – highlighted
in red:
-
In the same way, configure the rule for decreasing Group size.
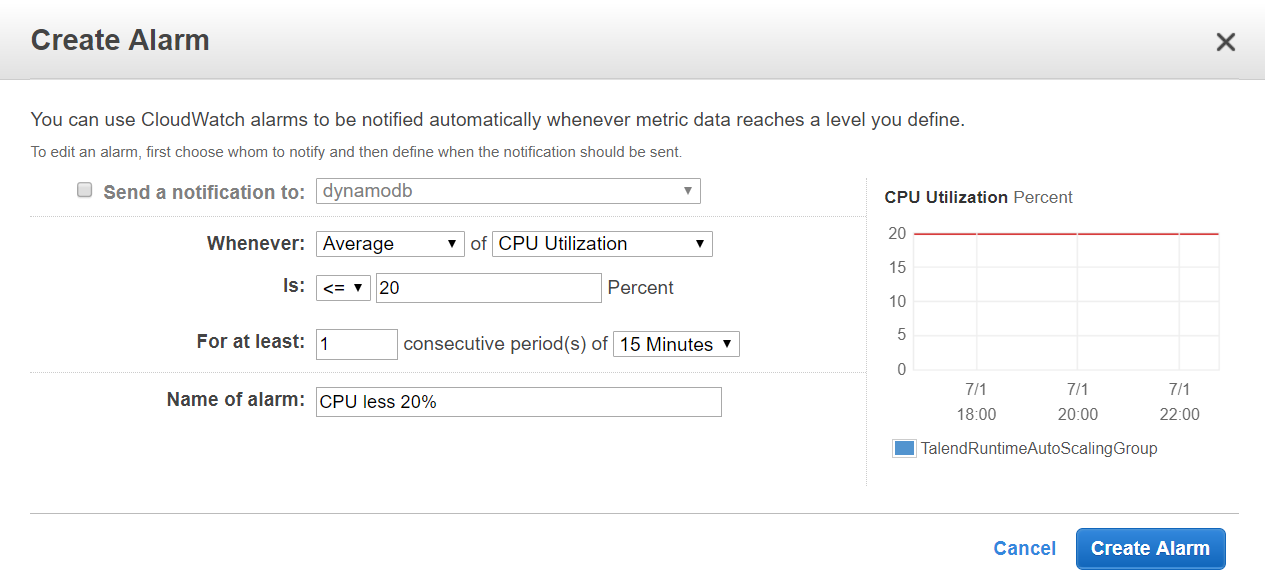 Information noteNote: If one Runtime instances was running with less than 20% of CPU utilisation for 15 minutes, then this Runtime instances will be terminated and client requests traffic will be redirected to other available Runtime instances by Load Balancer.
 -
In Step 3&4, you don’t need to setup anything in Configure
Notification step. In Configure Tags. Add
tags as shown below, this will be your new Runtime EC2 instances’ name once
enabled by Auto Scaling Group.

-
Once configuration steps are completed, please review all your setting details
in Review page and validate. Click on the
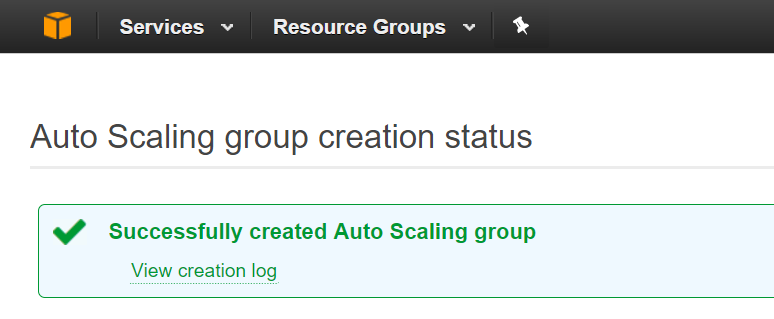
Create Auto Scaling Group button and you will receive
this status notification as shown below:
Did this page help you?
If you find any issues with this page or its content – a typo, a missing step, or a technical error – please let us know!
