
About Talend Management Console and Dynamic Engine
Talend Management Console (TMC) and Dynamic Engine provide a SaaS experience while using customer-managed infrastructure. This solution is tailored for enterprises and federal organizations with stringent policies prohibiting data processing in public cloud environments.
Dynamic Engine excels in flexibility and integrates deeply with Kubernetes environments. Unlike traditional Talend Remote Engine instances, which are deployed on virtual machines or physical servers to run Talend tasks remotely, Dynamic Engine instances are designed to fully leverage Kubernetes’ orchestration, scalability, and resilience.
What is Dynamic Engine
A Dynamic Engine instance consists of a logical entity created in Talend Management Console and a physical entity provisioned on a Kubernetes cluster. The physical entity operates as a set of pods in an allocated Dynamic Engine environment namespace, which consolidates all the services required to run Talend tasks. Talend Management Console and its API services manage users, tasks, and their associated ecosystems, including Dynamic Engine.
Dynamic Engine versus Talend Remote Engine
The traditional Talend Remote Engine provides isolated environments deployed on on-premises infrastructure or virtual machines in private clouds. These environments are well-suited for traditional deployments where infrastructure remains relatively static and the need for automatic scaling is minimal. However, they often require more manual intervention, particularly for scaling and task distribution, which can add complexity to resource management.
In contrast, Dynamic Engine leverages Kubernetes for automation and container management, providing a more modern, flexible approach to data processing. This solution reduces operational overhead by offloading much of the infrastructure management to Kubernetes, allowing your organization to optimize performance with minimal manual effort. Additionally, Dynamic Engine supports a SaaS deployment model that ensures compliance with data sovereignty and strict regulatory requirements. Looking ahead, Dynamic Engine is positioned to facilitate tighter integration across Talend Cloud services, simplifying future processing operations in a single and unified framework.
A Dynamic Engine instance employs the services deployed in its associated Dynamic Engine environments to run tasks. Designed to simplify processes and enhance efficiency, each Dynamic Engine environment requires 18000 engine tokens. For further information about engine tokens, see Execution engines.
Managed by Talend Management Console
As mentioned earlier, Talend Management Console, along with its API services, seamlessly manages Dynamic Engine instances and environments. With Talend Management Console you can easily deploy, monitor, and manage the lifecycle of Dynamic Engine instances and their environments in real-time, leveraging Kubernetes' automation and scalability features to efficiently meet varying workload demands.
Dynamic Engine architecture
The following diagram describes the architecture of the Dynamic Engine solution.
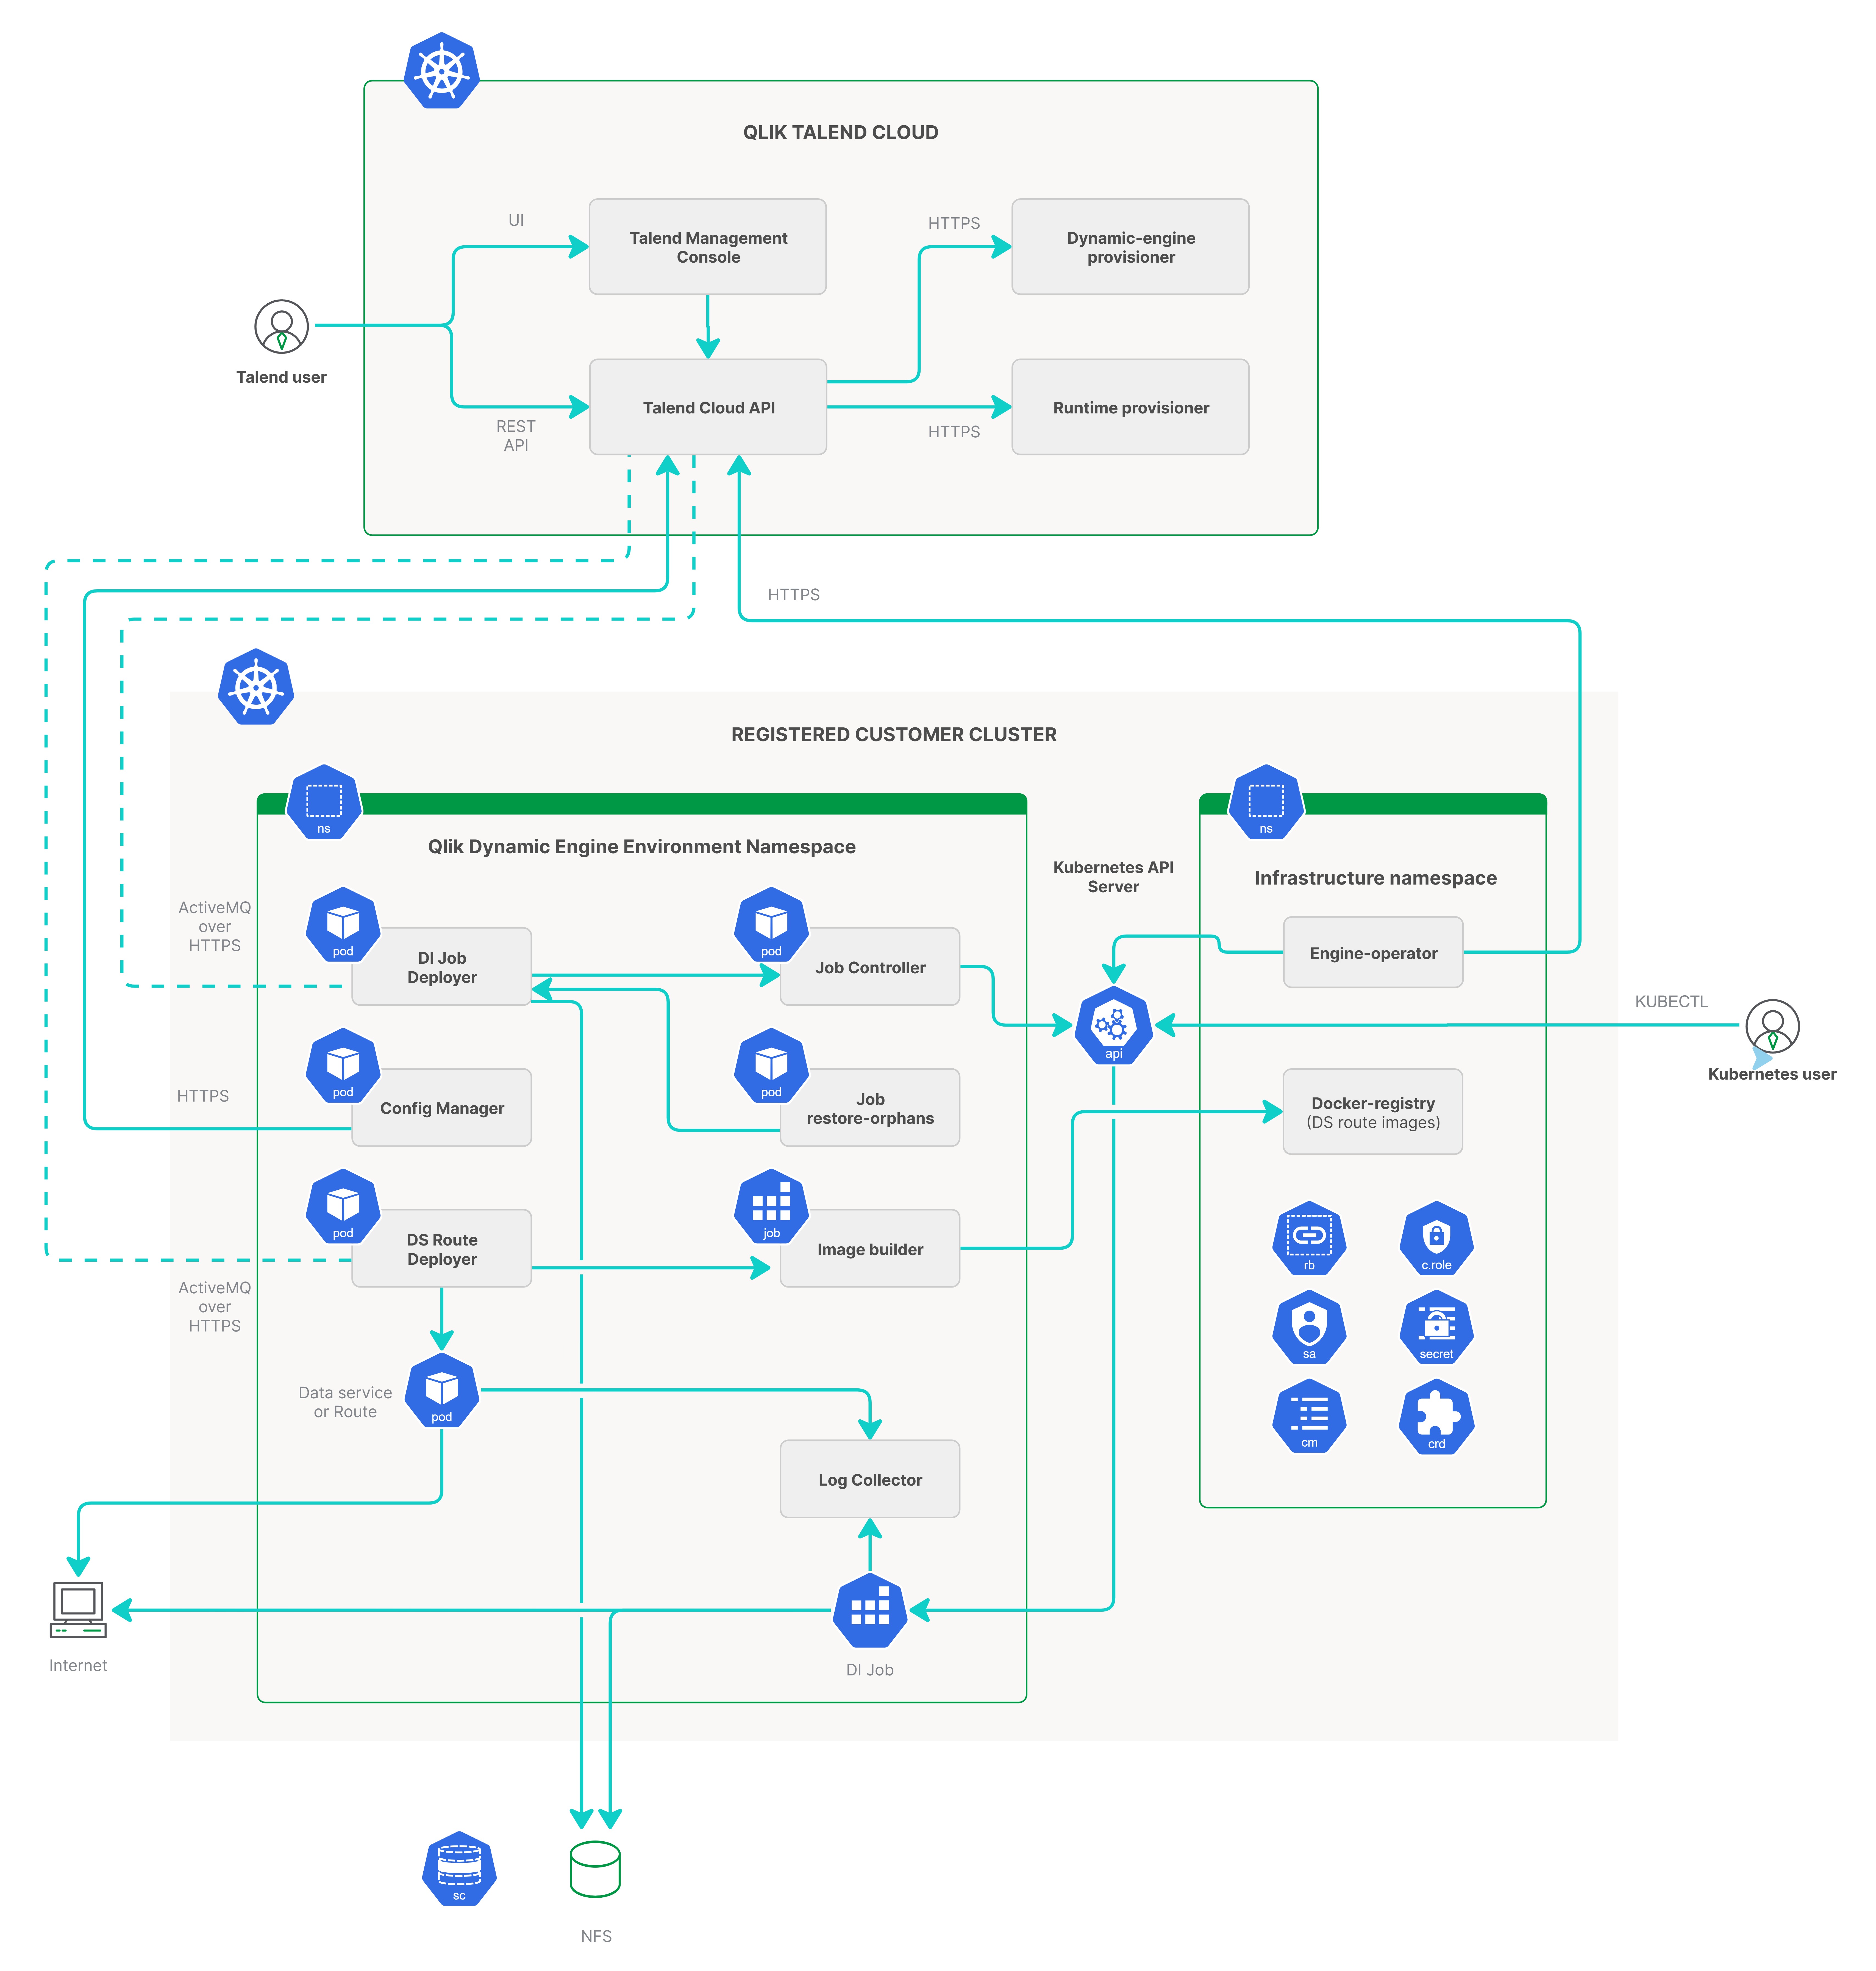
- Talend Management Console provides UI features and API services for creating Dynamic Engine entities, monitoring their status after deployment, and allocating workloads to them.
- Authorized Kubernetes cluster users provision Dynamic Engine instances and their runtime environments through auto-generated deployment files, such as manifest files or Helm files, from Talend Management Console.
- Multiple communication channels facilitate the interaction between Talend Management Console and Dynamic Engine instances, each dedicated to specific functions such as health checks, task scheduling, and other operations, while isolating potential issues.
- Tasks run as separate Kubernetes jobs in the namespace assigned to their respective Dynamic Engine environment.
- Services deployed in Kubernetes clusters include:
- engine-operator: Core service of a Dynamic Engine instance, provisioning resources and monitoring engine status.
- Each Dynamic Engine environment namespace hosts the following services:
- config-manager: Manages the pairing between the environment and a Dynamic Engine instance.
- log-collector: Collects metrics and logs related to task executions, such as Job executions, ensuring comprehensive visibility into execution processes.
- The di-job-deployer, job-controller, and job-restore-orphans services: Handle the execution and management of Job tasks.
- The data-service-route-deployer and
docker-registry services: Deploy Data Services and
Routes to a Dynamic Engine instance.
The docker-registry service is used to store images built from Data Services and Routes. You can either use a private registry of your own, or the default docker-registry service deployed with your Dynamic Engine.