
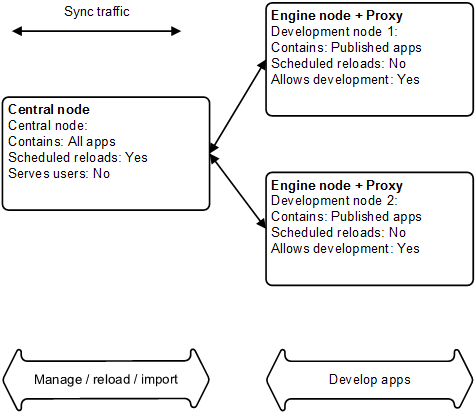
This scenario places the development of apps onto dedicated resources. The number of nodes can be adjusted to support the amount of development activity (for example, a single node can be used).
If more than one development node is used, they can be load balanced using a proxy node. However, when creating a new app there can be a short delay before the app is added on all nodes, which means that the users may be routed to a node that has not yet received the new app.
Node layout
Services on each node
| Node name | Qlik Sense Repository Service (mandatory) | Qlik Sense Engine Service | Qlik Sense Scheduler Service | Qlik Sense Proxy Service |
|---|---|---|---|---|
| Central node | x | x | x | x |
| Development node(s) | x | x | x |
Configuration steps
Basic installation
Proceed as follows to perform the basic installation:
- Starting with the central node, install the Qlik Sense software and services as described in the table above.
- Add each rim node via the Qlik Management Console (QMC) on the central node.
- When all rim nodes have been added, check that they are displayed as being online in the QMC on the central node.
See: Installing and upgrading Qlik Sense
See: Configuring the node
See: Authorizing the certificate on the node
Load balancing
Proceed as follows to configure the load balancing:
- Select Proxies in the Qlik Management Console (QMC) on the central node.
- Edit the settings for the proxy node.
- Check that the hub is accessible on the development nodes. In addition, check that the hub lists the apps on the nodes and that new apps can be created.
Under Load balancing nodes, specify that the local Qlik Sense Engine Service (QES) should be used for each proxy.