Creating webhooks for workflows
Webhooks provide a way for you to use Qlik Cloud system events as triggers in your workflow. Once you create a webhook, it automatically sends a JSON request to the webhook endpoint anytime the defined system event occurs. You can use webhooks to send event data to any application that can receive JSON data.
Webhook properties
To create a webhook, you must configure the webhook and endpoint properties, and choose the Qlik Cloud event types.
| Property | Description |
|---|---|
| Name | Name of the webhook. |
| Description (optional) | Description of the webhook. |
| URL | URL for webhook endpoint. The URL (webhook endpoint) must be a fully qualified domain name (FDQN) and must use HTTPS protocol. The endpoint cannot be an IP address. |
| Secret (optional) | Secret for webhook authentication. The secret must be a minimum of 32 characters and a maximum of 64 characters. If you create a webhook secret, it is part of a hash that is appended to the HTTP request as a qlik-signature. |
| Headers (optional) |
Headers that can be appended to the HTTP request. |
Each webhook is configured with one or more event types.
| Resource | Event types |
|---|---|
| Apps | Created, Deleted, Data Updated, Reloaded, Published, Exported Information noteA data update event refers to data being refreshed. A reload event refers to the Qlik Sense app and associated data tables being reloaded. |
| Users | Created, Deleted |
The webhook waits for one of the events to occur, and when it does, it sends the event data to the webhook endpoint. The data is passed to the endpoint URL as a JSON request.
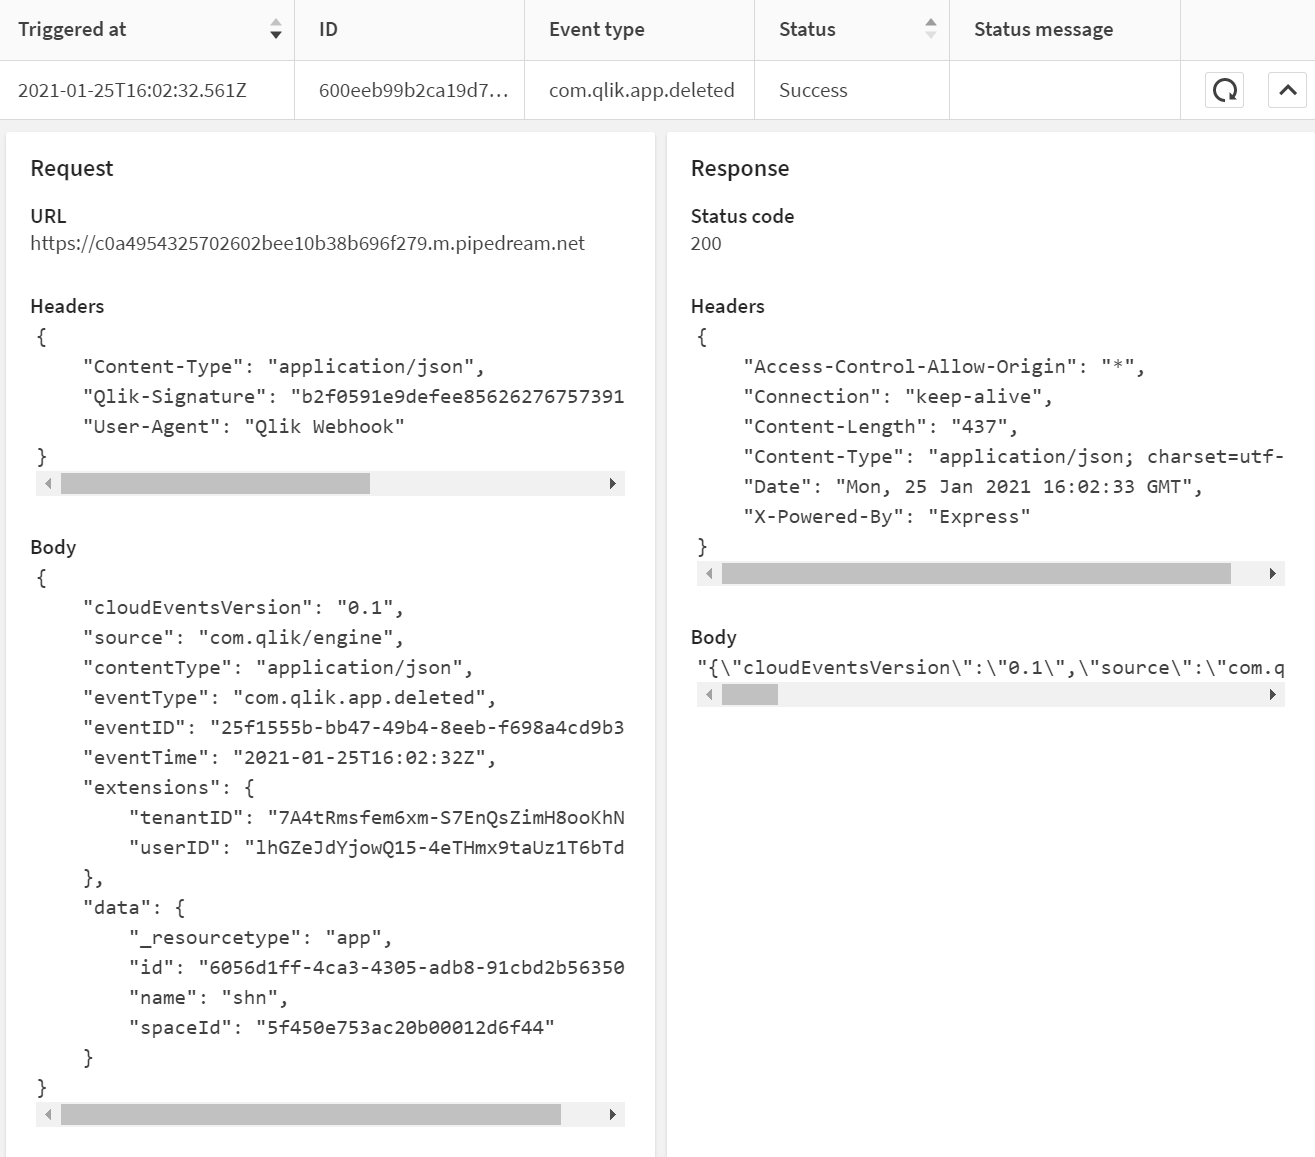
Example: JSON request for app deleted event type
Request
URL
https://api.blendr.io/v1/widgets/F502987A-AF89-4992-8127-F28794C5A74A?X-Execution-Token=xxxxx
Headers
{
    "Content-Type": "application/json",
    "Qlik-Signature": "446bd5e3f5b635f491d17557e4bec6ebc61b7bd2bc9cc7b612e4e",
    "User-Agent": "Qlik Webhook"
}
Body
{
    "cloudEventsVersion": "0.1",
    "source": "com.qlik/engine",
    "contentType": "application/json",
    "eventId": "e65c1481-e8a-4be-a5ca-27dfcde077d7",
    "eventTime": "2021-03-08T14:51:29Z",
    "eventTypeVersion": "1.0.0",
    "eventType": "com.qlik.v1.app.deleted",
    "extensions": {
        "ownerId": "vNRGrDZIypJzauw59BbpvkRhqbmI",
        "tenantId": "oZcMPa_1PwH4FUdrh6839YHHdEJN",
        "userId": "vNRGrDZIypJtcGTzauw59BbpqbmI"
    },
    "data": {
        "attributes": {
            "id": "0984fec4-aa8c-4253-b1d1-4fd4f9c78",
            "name": "New App",
            "createdDate": "2021-03-08T14:51:28.888Z",
            "modifiedDate": "2021-03-08T14:51:29.316Z",
            "owner": "auth0|b62a17c577a4abe6e807b07d18c4d82286352542d633d120100b03fb11",
            "ownerId": "vNRGrDZIypJtcGTzauw59BbpvbmI",
            "published": false,
            "hasSectionAccess": false
        }
    }
}
Creating a webhook
You create webhooks from the Management Console. You can also create webhooks from the Qlik Application Automation interface. For more information, see Working with webhooks.
You can create a maximum of 100 webhooks for each tenant.
Do the following:
-
In the Management Console, go to Webhooks.
-
In the upper right-hand corner, click Create new.
-
In the Create Webhook dialog box, enter a name for the webhook.
-
Add an optional description.
-
Enter the URL for the third-party integration application.
-
Optionally enter the secret to append to the HTTP request.
-
Optionally add HTTP headers to append to the request.
-
Under Events, select the event type for the webhook.
-
When finished, click Create.
The webhooks are listed in a table. Newly created webhooks are turned on by default.

Editing a webhook
Do the following:
-
In the Management Console, go to Webhooks.
-
For the webhook you want to edit, click the
 button at the end of the row.
 -
Click Edit.
The editing panel is displayed with options to change the webhook configuration.
-
Make your edits and click Save.
Deleting a webhook
Do the following:
-
In the Management Console, go to Webhooks.
-
Select the webhook to delete.
-
In the upper right-hand corner, click Delete.
-
A pop-up dialog opens to confirm your choice. Click Delete.
Viewing the webhook history
You access the webhook history under Webhooks in the Management Console.
-
To view the webhook history, click the
 button at the end of the webhook row.
The webhook history is displayed.
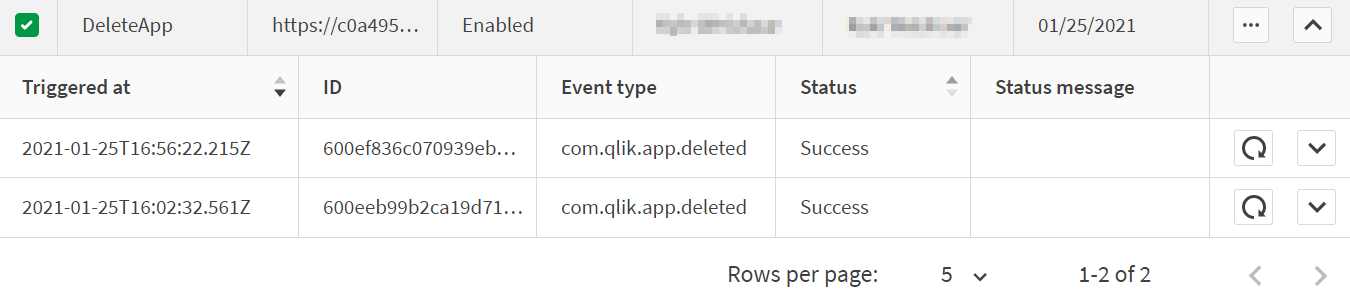
-
To manually resend an event delivery, click the
 button at the end of the event row.
 -
To view the event response payload, click the
button at the end of the event row.