Example 1: 'OpenAI Completions API (GPT-3) - Rows' configuration
This example teaches you how to use the OpenAI analytics connector with the 'OpenAI Completions API (GPT-3) - Rows' configuration. It guides you through basic exercises showing you how to incorporate the functionality into your data model and chart expressions.
The functionality of this connector configuration is very similar to that of the 'OpenAI Chat Completions API (GPT-3.5, GPT-4) - Rows' configuration. However, these two configurations use different models, which in turn leads to different responses. Additionally, due to differences in parameters names between these two configurations, refer to the tutorial example that matches your configuration. For the Chat Completions configuration, see Example 3: 'OpenAI Chat Completions API (GPT-3.5, GPT-4) - Rows' configuration.
You can also complete this example using the Azure OpenAI connector. When using that connector, you interact with the models through the Microsoft Azure platform, rather than the OpenAI platform.
Before you start
Before you can complete this example, you need to complete the following steps.
-
Create an OpenAI platform account
-
Obtain an OpenAI API key
-
Enable analytic connection functionality in Qlik Cloud
-
Create connections with the applicable connector configurations
Using the OpenAI connector in your load script
Create a new Qlik Sense app, to which you will add a load script to communicate with the OpenAI platform. The tables you load with this script will be accessible in your app's data model.
Follow the steps below. For additional details, see Select and load data from an OpenAI connection.
Creating the table of data to be sent to OpenAI
The first step is to create a table which contains the request you are sending to OpenAI. The rows of data in the request are known as "completions". The text for each item must be contained as rows in a single field (column) in the table. Each row in this column represents text to be completed by the OpenAI API.
There can be a second additional field for the Association Field, but this needs to match the field name specified in the configuration. This is a special field that won’t be sent to OpenAI, but is attached to the responses for the purpose of generating a Qlik data model.
In your app, open the Data load editor and paste the following code into a new script section:
SourceTable:
NoConcatenate
LOAD
RowNo() as RowId,
Text
Inline
[Text
translate from English to French: What is the time you go to work?];
This table contains a field called Text, which contains a single question which we are asking to OpenAI. Additional questions could be added as new individual cells below the existing question's cell. The RowId field is the Association Field, which will be used in the next step to link the responses to the app's data model.
Creating the OpenAI load statement
The next step is to create another load statement to communicate with OpenAI. The table you load with this statement points to the names of the table and fields you are using to send the request data. In short, a second table is being loaded by the script to provide OpenAI's responses to your request items.
To generate this part of the script, you can use the Select data wizard for the connection you are using. This generates a template script including the names of the properties you provide. Alternatively, you can add this table manually into the script editor without using the wizard.
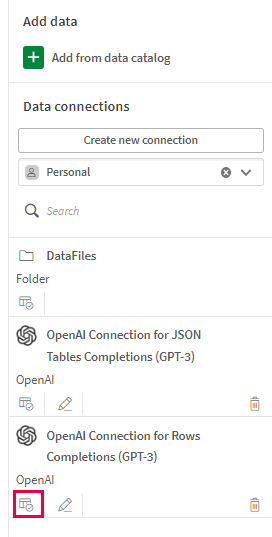
Locate the connection you are using in the Data sources panel of the Data load editor, and click . This opens the Select data wizard.
Select data button for an analytics connection in the Data load editor
When using the Select data wizard, you need to provide two properties:
-
The name of the Resident Table. This is the table with the questions being sent to OpenAI. In this case, it is SourceTable.
-
The name of the Data Field. This is the field containing the questions being sent to OpenAI. In this case, it is Text.
Under Tables, click the checkbox for the table called openai.
Select data wizard in Data load editor
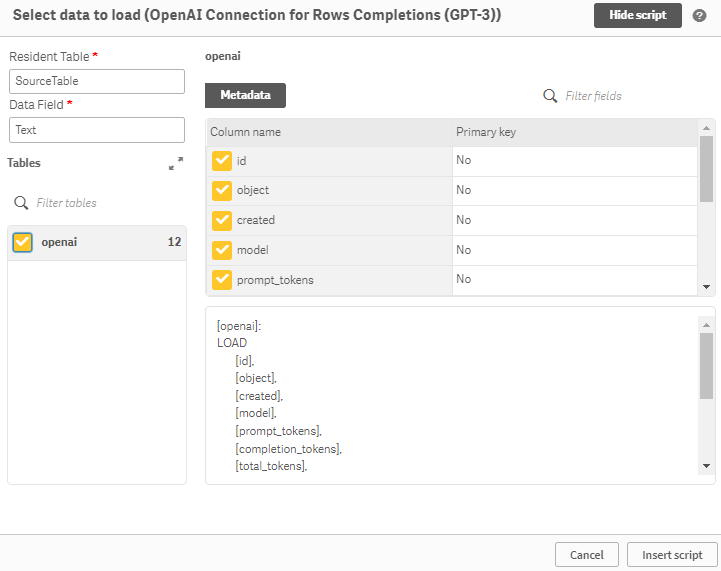
When you click Insert script, the new table is added to the load script.
With the OpenAI load statement now added, your load script should look like the following:
You are now ready to run the load script.
Loading the data into the app
After the script is complete, click Load data. This performs the communications with OpenAI and inserts the tables into your app's data model.
Open the Data model viewer and notice that the two tables are linked together as expected. In the Preview pane, OpenAI's response to the question we asked is included in the second table.
Data model created from OpenAI connection
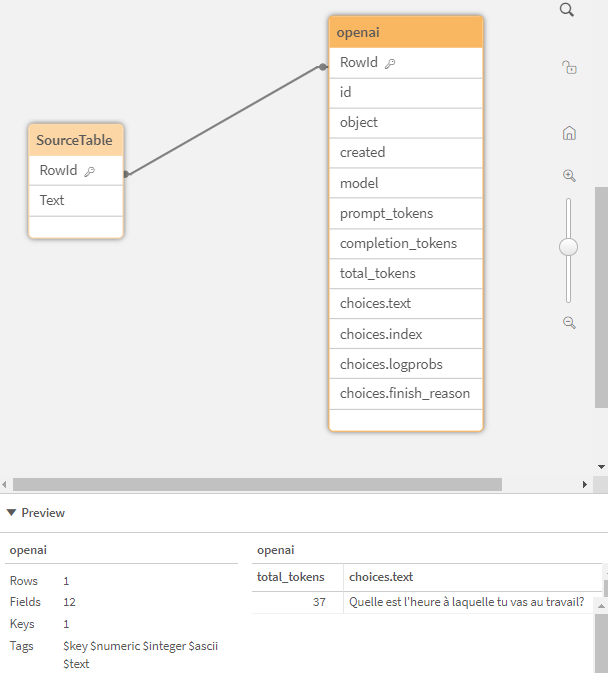
You can now generate analytics content using the data that has been loaded into the app. You will not need to refer to the OpenAI connection in any charts you create using this data. To learn how to use the OpenAI connection directly in chart expressions (rather than using it in the load script), see Using the OpenAI connector in chart expressions.
Using the OpenAI connector in chart expressions
In addition to adding OpenAI questions and answers to your app's data model using the load script, you can also perform these operations directly in a chart in your app. This can be an alternative to using tables in the load script to communicate with OpenAI.
Data for a single field is sent back and forth between you and OpenAI. In many cases, the code used for a load script connection can be re-purposed for use in a chart, with some notable differences.
For additional details, see Using OpenAI connections in visualization expressions.
Considerations for data request volumes
It is recommended to only use OpenAI connections in chart expressions for one or a handful of rows of data. Using chart expressions to send large amounts of data to OpenAI is not recommended.
It is important to be aware of how many rows you are sending with each request. Errors in configuring the connection in a chart expression can lead to unintentionally large requests (for example, identical rows with the same question due to improper use of the data model in a chart). Before you interact with a third-party platform, make sure you're aware of how the fields used in the chart expression calculation, and their place in the data model, affect your financial agreement and billing arrangements with the third party. Higher usage of the external platform could result in higher costs incurred.
Follow these guidelines to moderate and limit the size of your requests:
-
Only use the connection in a Text & image chart expression. Using the OpenAI connection in a Table object is strongly discouraged, especially if you are adding the expression to a table with one or more dimensions already added.
-
If the chart expression is linked to your app's data model, use an if statement in the expression to only calculate the chart when a single selection is made in the app. This drastically reduces the row count in the requests that your chart will send to OpenAI.
-
If you are using the OpenAI connection to send large requests, use the connection in your load script instead of in a chart expression, so that the data is pre-loaded into your data model.
Exercise: Creating a basic chart expression
Do the following:
-
Create a Qlik Sense app and open a new sheet in advanced edit mode.
Information noteThe analytics connection you are using for the chart expression needs to be already created in the space where you create the app. You can do this in the Data load editor within an app, or from the Qlik Cloud Analytics hub. For more information, see Creating an OpenAI connection. -
Drag a Text & image chart onto the sheet.
-
In the properties panel, under Data > Measures, add a measure and click
to open the expression editor.
-
Paste the following expression into the expression editor:
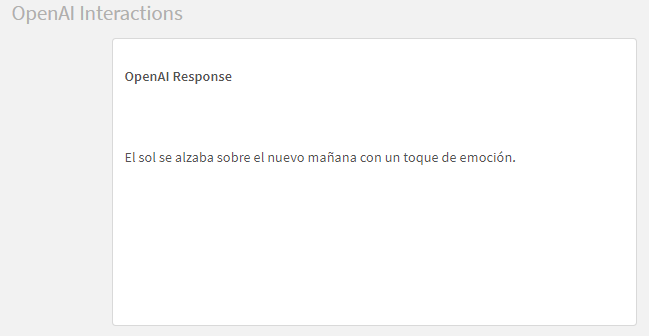
endpoints.ScriptAggrStr('{"RequestType":"endpoint", "endpoint":{"connectionname":"OpenAI Connection for Rows Completions (GPT-3)","column":"choices.text"}}', 'Translate this text from english to spanish: The sun was rising over the new tomorrow with a tinge of excitement.')Information noteIn this example, it is acceptable to not use an if statement, because we are only sending a single row of data and there is no connection to a data model. In other scenarios, use an if statement to ensure the chart is only calculated when a single field value is selected in the app. For examples, see Quick examples.Information noteFor this exact code to function correctly in your app, your OpenAI connection must also be configured with the same Name value as the connectionname specified in the expression. For the values used for the purposes of this tutorial, see Create the connections. -
Click Apply.
Qlik SenseText & image chart with OpenAI response
Exercise: Creating a text input box using a variable
Alternatively, you can replace the question string with the name of a variable you have created in the app, allowing the creation of an input box where app consumers can enter their own questions without interacting with expressions.
This simple interface can be used to enrich your app data with contextual information generated in real time.
Do the following:
-
Create an app and add some data and visualizations to a new sheet.
-
Click
to create a variable. For this exercise, give it the NamevUserQuestion. Leave the remaining parameters blank.
-
In the assets panel, drag a Variable input chart onto the sheet. This is located under Extensions > Qlik Dashboard bundle.
-
In the properties panel for the Variable input chart, expand Appearance > Variable.
-
Under Name, select vUserQuestion.
-
Under Show as, select Input box.
-
In the assets panel, drag a Text & image chart onto the sheet.
-
In the properties panel, under Data > Measures, add a measure and click
to open the expression editor.
-
Paste the following expression into the expression editor:
if(vUserQuestion <> '', endpoints.scriptAggrStr('{"RequestType":"endpoint", "endpoint":{"connectionname":"OpenAI Connection for Rows Completions (GPT-3)","column":"choices.text"}}',vUserQuestion))Information noteFor this exact code to function correctly in your app, your OpenAI connection must also be configured with the same Name value as the connectionname specified in the expression. For the values used for the purposes of this tutorial, see Create the connections -
Click Apply.
-
Re-size these input and response boxes to suit your needs.
You should now be able to exit edit mode and type a question into the input box. When you press Enter or click anywhere else on the sheet, the response box will populate a response from OpenAI.
Simple sheet with generic data and input box for asking questions to OpenAI
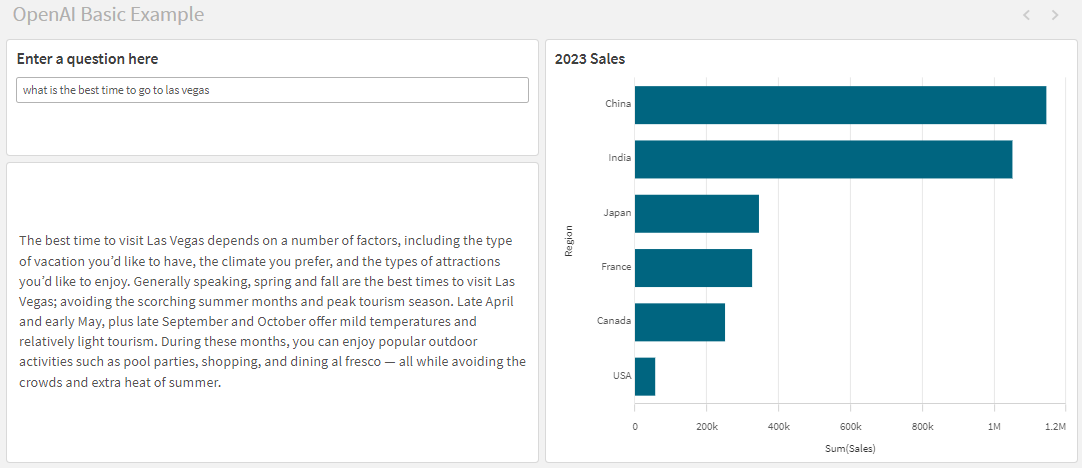
The OpenAI connection in this exercise does not communicate with the app's data model at all, but it is possible to create much more sophisticated apps which are fully integrated with the data loaded into the app, and responsive to selections you make in the app.
For more information about working with variables, see Creating a variable and Variable input control.
Differences between the load script and chart expression code
In these chart expressions, we have re-purposed the code entered in the earlier load script lesson. The following list highlights the most important differences between the load script version and the chart expressions:
-
We changed ScriptEval to ScriptAggrStr. This outlines that we are sending a single row of data and expecting a single row back. This is required when working with custom data such as a variable or constant as in this case. The “Str” indicates that we are sending and receiving text values.
-
We added a new property, column, with a value of choice.text. It is nested inside the endpoint object. This addition to the configuration string is needed to specify which field is to be returned from the connector. In a chart expression, only one field is used, and we must specify which one.
For more information, see Server side extensions syntax.
