
Sheets structure your ideas and purpose of your app. When you create an new app, it is good practice to first build a structure of empty sheets, where each sheet represents an idea or a goal. This gives a good overview of the app.
Overview
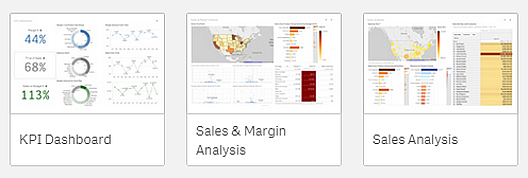
For example, you are creating an overview of your company's key metrics, sales, and margins by state, region, and product. Instead of having all this information in one place, you could structure it by having one sheet for each purpose.
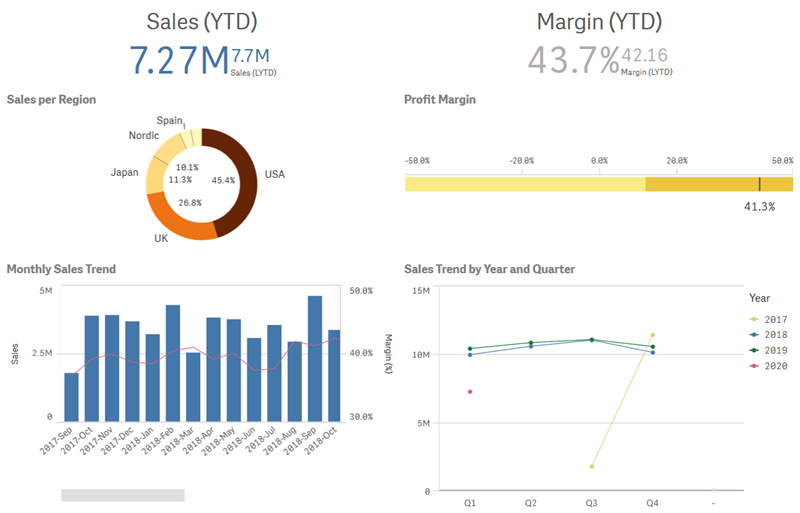
A sheet is where charts and tables for data visualization are placed. An app can include several sheets. The selections that you make affect visualizations, regardless of which sheets they are on.
Creating a new sheet
You can create a new sheet from the app overview or from the sheet navigator.
Do the following:
- From the app overview, click
 to view the sheets.
 - Click
 or Create new sheet.
 - Give your sheet a title and add a description.
- Click outside the text area to save the title and description.
A new sheet is created.
Changing the title and description of a sheet
You can change the title and description of your sheets. You can either use a fixed sheet title, or a dynamic sheet title based on an expression.
Do the following:
- In the app overview, click to view the sheets.
- Do one of the following:
- If you are in grid view,
 , click the sheet title followed by clicking
  .
. - If you are in list view,
 , click .
- If you are in grid view,
- Edit Title and Description.
- Click outside the text area.
Using a dynamic sheet title
You can set a dynamic sheet title based on an expression in the Title expression property of the sheet properties panel. You can use any valid chart expression. For more information, see Using expressions in visualizations.
If you set a dynamic sheet title, the fixed title (Title) is not used.
Setting a show condition for a sheet
You can set a condition in Show condition to show or hide a sheet in an app depending on if an expression evaluates as true or false. The sheet is only shown if the expression evaluates as true. Hiding a sheet does not hide or exclude data in an app.
For example, you could create a sheet that is only available if certain values are present in your data. Typically, you should use an if function. For more information, see if - script and chart function.
Changing the sheet thumbnail
You can replace the default thumbnail, to make it easier to distinguish between sheets in the app overview and in the sheet navigator. You can use one of the default images, or an image of your own.
Note the following:
- The following formats are supported: .png, .jpg, .jpeg, and .gif.
- The optimal aspect ratio of a thumbnail is 8:5 (width:height).
- You can only add or change the thumbnail of an unpublished sheet.
Do the following:
- In the app overview, click to view the sheets.
- Do one of the following:
- If you are in grid view, , click the sheet title followed by clicking .
- If you are in list view, , click .
- If you are in grid view,
-
Click
 on the default thumbnail.
The Media library opens.
-
Click on a folder in the media library, for example In app or Default.
- Select the image you want to use as a thumbnail for the sheet and click Insert.
- Click
 to stop editing.
The image you selected is now used as a thumbnail for the sheet, and is visible in the sheet navigator and in the app overview.
The following formats are supported: .png, .jpg, .jpeg, and .gif.
For Qlik Sense: You can upload images to the In app folder in the media library. You need to use the Qlik Management Console to upload images to the default folder.
For Qlik Sense Desktop: You can place images in the following folder on your computer: C:\Users\<user>\Documents\Qlik\Sense\Content\Default. Images will be available in the default folder in the media library. When moving an app between installations, the images that you use in the app are saved in the qvf file together with the app. When you open the app in a new location, the images will be in the In app folder in the media library for the app.
Fore more information, see Managing a Qlik Sense site: Uploading objects to content libraries.
Changing the grid sizing of a sheet
You can adjust the grid sizing of the sheet to be able to fit more visualizations on a sheet, or have more control over how visualizations are positioned. The grid displays when you are adding, moving, or resizing a visualization.
Do the following:
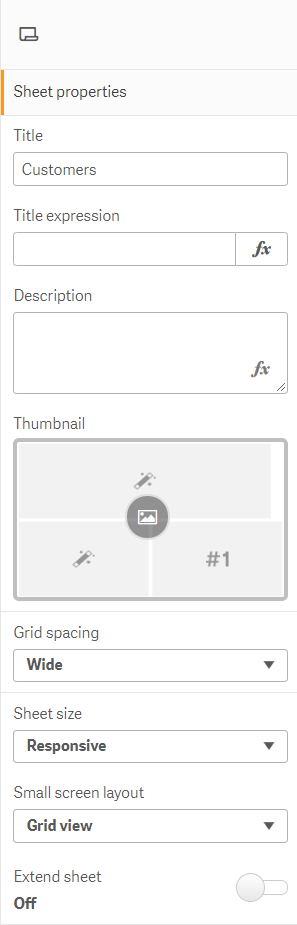
- Change the Grid spacing setting in Sheet properties from Wide (the default option) to Medium or Narrow.
The sheet grid is now more dense and the grid squares are smaller.
Customizing sheet size
By default, Qlik Sense uses a responsive layout for sheets that adjusts the sheet to the dimensions of the user’s screen. You can set a custom width and height for the sheet if you want to use a non-responsive layout for your sheets. This ensures that your dashboard will be presented to users exactly as you created them, with no adjustments for responsiveness. You can set the height and width of a sheet anywhere between 300 pixels and 4,000 pixels.
When a sheet is using a custom size, you can change the grid spacing, but you cannot use Extend sheet to change the size.
When a custom sheet is exported, the downloaded sheet is downloaded as a Responsive sheet. For optimal default sheet thumbnails, keep your custom size ratio to 8:5 (width:height).
Custom-sized sheets may have a lower quality PDF output if the sheet is too large to clearly display on a single PDF page.
Do the following:
- Change the Sheet size setting from Responsive to Custom.
-
Enter a width for the sheet in pixels.
-
Enter a height for the sheet in pixels.
Changing the small screen layout
By default, sheets are displayed in List view when viewed on small screens. You can change them to display as a grid. Sheets must be set to responsive layout to display as grid on small screens.
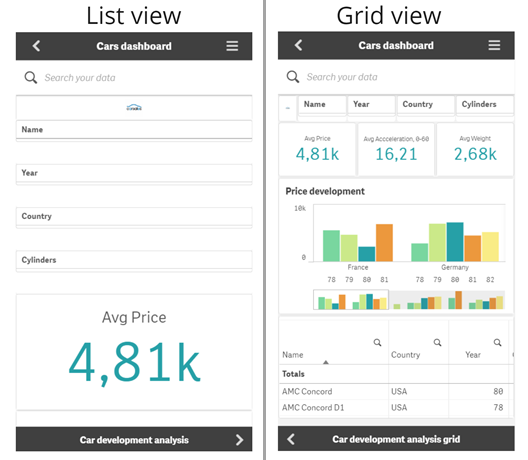
Grid view shows a small preview of your visualizations. List view only shows the visualization titles.
Do the following:
- Under Sheet properties, go to Small screen layout.
- From the drop-down, select Grid view.
Extending the sheet area
You can extend the area of a sheet vertically if you need to add more visualizations than what can fit on a screen.
Downloaded extended sheets may have a lower quality PDF output if the sheet is too large to clearly display on a single PDF page.
Note the following:
- You need to activate Extend sheet under Sheet properties.
- Each extension adds 50% of the original sheet height.
- If you have visualizations that scroll, this can interfere with scrolling of an extended sheet. You should leave some empty space that allows for scrolling when you design the sheet.
You can extend the sheet in two different ways:
Do the following:
- Drag an object to the bottom of the sheet and drop it on the drop zone that appears.
- Toggle Extend sheet under Sheet properties.
The sheet is now expanded by 50% of the original height. You can scroll vertically in the sheet to access all content.
Adding actions to sheets
You can add actions to sheets that trigger when users navigate to those sheets. For example, you could automatically clear selections in the app when users navigate to a particular sheet.
For more information, see Adding actions to sheets.
Copying, replacing and moving items on sheets
You can copy, replace, and move items on a sheet and between sheets. You can do this in the following ways:
- Using the edit bar on the sheet (
 ,
,  and
and  ).
). - By right-clicking and selecting Cut, Copy and Paste.
- With the keyboard shortcuts Ctrl+C, Ctrl+X and Ctrl+V.
Duplicating a sheet
You can duplicate any sheet, regardless of whether it is a sheet that belongs to the app or a sheet you have created yourself. The purpose of duplicating sheets is to save time by reusing content, and to allow you to modify the duplicate so that it fits your needs better.A duplicated sheet contains the same visualizations as the original sheet, and is linked to the same master items. The duplicated sheet is a standalone sheet with no connection to the original sheet. Duplicated sheets appear under My sheets in app overview and in the sheet navigator.
You can duplicate a sheet in the following ways:
- Click Duplicate in the shortcut menu of a sheet in the app overview or in the sheet navigator.
- Click Duplicate sheet in the global menu in the app overview or in sheet view.