
Creating the basic AngularJS skeleton
Create the container
Create a folder that will contain your assets. The folder should be created in the following location: C:\Users\[UserName]\Documents\Qlik\Sense\Extensions\.
Example:
C:\Users\[UserName]\Documents\Qlik\Sense\Extensions\Hello-AngularJS
Create the QEXT file
The next step is to create a QEXT file in the folder we just created and name it Hello-AngularJS.qext.
It should contain the following information:
Example: Hello-AngularJS.qext
{
    "name" : "Hello AngularJS",
    "description" : "Example on how to use AngularJS in visualization extensions",
    "icon" : "extension",
    "type" : "visualization",
    "version": "0.1.0",
    "author": "Qlik"
}
Create the main script file
Then it is time to create the main script file. This is also placed in the same folder as the QEXT file and we name it Hello-AngularJS.js.
Instead of using the paint method, you now have to define a template and a controller in the main script file. Paste the following code into the script file and then save it:
Example: Hello-AngularJS.js
define( [
    ],
    function (  ) {
        'use strict';

        return {
            definition: {},
            initialProperties: {},
            support: {snapshot: true},
            template: '<div qv-extension>This is my message: <b>{{msg}}</b></div>',
            controller: ['$scope', function ( $scope ) {
                $scope.msg = 'Hello AngularJS';
            }]
        };
    } );
Code explanation
- Note that the paint method is not used.
- template defines your AngularJS template which interacts with the controller. It can be defined inline (as shown in code example above) or by using a separate file (as shown further below).
- qv-extension must be part of your template root element. qv-extension is a AngularJS directive which takes care of several aspects that your visualization extension can use AngularJS.
Creating an external template file
You can move the template to a separate file which simplifies maintenance of the HTML code. This is also placed in the same folder as the other files you have created and we name it template.ng.html.
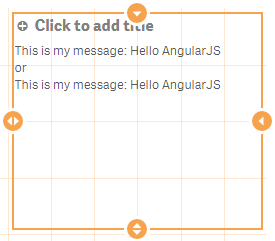
Example: template.ng.html
<div qv-extension>
    This is my message: {{msg}}<br/>
    or<br/>
    This is my message: <span ng-bind="msg"></span>
</div>
Since we created a separate template file, we also have to update the main script file.
Example: Hello-AngularJS.js
define( [
        'text!./template.ng.html'
    ],
    function ( ngTemplate ) {
        'use strict';

        return {
            definition: {},
            initialProperties: {},
            support: {snapshot: true},
            template: ngTemplate,
            controller: ['$scope', function ( $scope ) {
                $scope.msg = 'Hello AngularJS';
            }]
        };
    } );
This results in the following:
Accessing the layout and properties
Working with properties does not change and you define definition and initialProperties as described in earlier sections. All property values are automatically bound to the current scope under $scope.layout.
If you change the HTML template you can retrieve some basic information about the current object.
Define properties
First you define the properties in a separate file. This is also placed in the same folder as the other files you have created and we name it properties.js.
Example: properties.js
define( [], function () {
    'use strict';

    var dimensions = {uses: "dimensions"};
    var measures = { uses: "measures" };
    var sorting = { uses: "sorting" };
    var addons = { uses: "addons" };
    var appearancePanel = { uses: "settings" };
    return {
        type: "items",
        component: "accordion",
        items: {
            dimensions: dimensions,
            measures: measures,
            sorting: sorting,
            appearance: appearancePanel
        }
    };
} );
Define initial properties
Then you define the initial properties, also in a separate file. This is also placed in the same folder as the other files you have created and we name it initialproperties.js.
Example: initialproperties.js
define( [], function () {
    'use strict';
    return {
        qHyperCubeDef: {
            qDimensions: [],
            qMeasures: [],
            qInitialDataFetch: [
                {
                    qWidth: 10,
                    qHeight: 50
                }
            ]
        }
    };
} );
Update the template
You then update the template file (template.ng.html).
Example: template.ng.html
<div qv-extension>
    <b ng-bind="myTitle" />

    <table border="1">
        <thead>
        <tr>
            <th ng-repeat="dim in layout.qHyperCube.qDimensionInfo" ng-bind="dim.qFallbackTitle" />
            <th ng-repeat="mea in layout.qHyperCube.qMeasureInfo" ng-bind="mea.qFallbackTitle" />
        </tr>
        </thead>
        <tbody>
        <tr ng-repeat="row in layout.qHyperCube.qDataPages[0].qMatrix">
            <td ng-repeat="col in row">
                {{col.qText}}
            </td>
        </tr>
        </tbody>
    </table>
</div>
Update the main script
Finally we update the main script file with the definition of the files we just created and updated.
Example: Hello-AngularJS.js
define( [
        './properties',
        './initialproperties',
        'text!./template.ng.html'
    ],
    function ( props, initProps, ngTemplate ) {
        'use strict';

        return {
            definition: props,
            initialProperties: initProps,
            support: {snapshot: true},
            template: ngTemplate,
            controller: ['$scope', function ( $scope ) {
                $scope.myTitle = 'This is my AngularJS table';
            }]
        };
    } );
This results in:

Additional resources
Bootstrap (from AngularJS developer guide)