
When running a silent installation, QlikView is installed with a limited set of or no dialogs at all. This means all features, properties, and user selections have to be known when creating the silent installation package. There are also some standard properties in Windows Installer Service that may be required.
To prepare a silent installation, the MSI file has to be extracted from the QlikView Setup.exe file.
A silent installation can be run with different interface levels:
| Command | Type |
|---|---|
| /qn | Completely silent. |
| /qb | Basic user interface. |
Add a + sign at end of the interface levels command to get a modal dialog at the end of the installation saying “Finished” and if it was successful or not.
The following silent installation command lines are recommended for QlikView:
msiexec /i QlikViewServerx64.msi Addlocal="all" IS_NET_API_LOGON_USERNAME="Domain\username" IS_NET_API_LOGON_PASSWORD="password" /qn+
Alternatively:
QlikViewServer_x64Setup.exe /s /v"/qn+ Addlocal="all" IS_NET_API_LOGON_USERNAME="Domain\username" IS_NET_API_LOGON_PASSWORD="password""
The command line above installs all features completely silently with a modal dialog at the end of the installation.
If just a limited set of the features are to be installed, change all to the name of the feature instead. If several features are to be installed, separate them with commas.
The following features can be installed:
- DirectoryServiceConnector
- ManagementService
- QVS
- QvsDocs
- WebServer
- DistributionService
- SupportTools
- QvsClients with the sub-features Plugin and AjaxZfc
- MsIIS with the sub-features QvTunnel and QlikView Settings Service
msiexec /i QlikViewServerx64.msi ADDLOCAL="all" DEFAULTWEBSITE="2" /qn+
This command line installs all features, including the virtual directories to another website than the default one. This requires a machine with Microsoft Internet Information Services (IIS) installed and more than one website on it. The site number also has to be known. Set DEFAULTWEBSITE to the site number where the virtual directories are to be installed. To find the number of the website, check IIS.
The installation procedure can be logged, using the following command:
msiexec /i QlikViewServerx64.msi ADDLOCAL="all" DEFAULTWEBSITE="2"/L*v log.txt /qn+
Settings
The following settings are good to know when designing a silent installation package:
| Setting | Description |
|---|---|
| Prerequisites |
.NET Framework 4.8 or higher Information noteFor .NET Framework 4.8 to work, Windows 10 must be updated to the Anniversary update Build 1607 or later.
|
| Default installation folder (INSTALLDIR) | ProgramFilesFolder\QlikView |
| Windows Installer Version | 3.1 Schema 301 |
| Default language | English (United States) 1033 |
| Require Administrative Privileges | Yes |
| INSTALLEVEL | 100, all features is set to 101 by default |
| Features |
There is a hidden feature called “Install”. Do not remove it. |
| IIS | Four virtual directories and an Application pool are installed |
| Services | Five services are installed |
Dialogs
The QlikView installation has a number of dialogs, one of which is a Custom Setup dialog and one of which is a Website dialog. All dialogs set important properties. To find the value of a property, do a test installation with verbose logging. Note that the property values may differ depending on the language and operating system used.
Region
This dialog is used for specifying the region.
Property: REGION_LIST

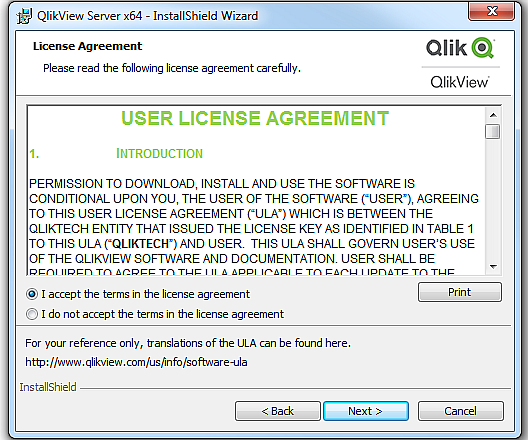
License Agreement
This dialog displays the license agreement for the selected region.
Radio button: AgreeToLicense = "Yes"
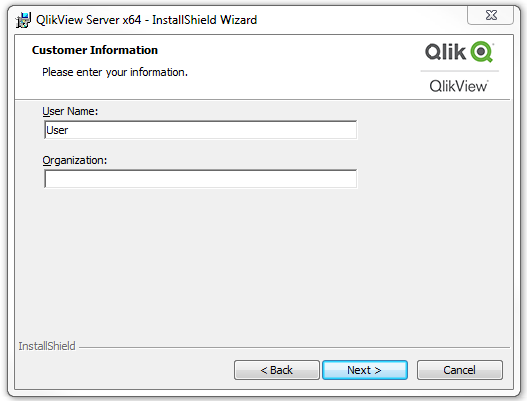
Customer Information
This dialog is used for entering the customer information.
Properties:
- USERNAME
- COMPANYNAME
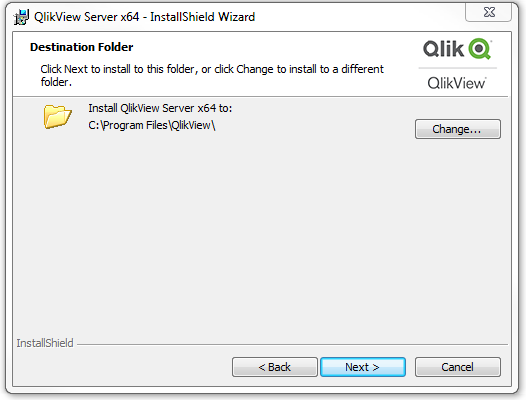
Destination Folder
This dialog is used to set the default folder for the installation.
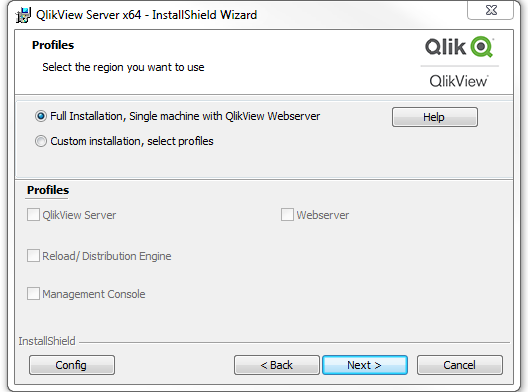
Profiles
This dialog has several properties connected to it, since there are multiple profiles to choose from.
Select Full Installation, Single machine with QlikView Webserver to install everything, including QlikView Web Server, needed to run QlikView on a single machine. To use IIS instead, select Full Installation, Single machine with IIS (this option is only available if IIS is installed on the target machine).
To perform a custom installation, select Custom installation, select profiles and then select the profiles to install. The Webserver profile allows the user to choose between QlikView Web Server and IIS (if IIS is installed on the target machine).
Properties:
- PROPQVS: QlikView Server
- PROPDS: Publisher
- PROPQMC: Management Console
- PROPWEB, PROPIIS = 1 or 2: Webserver
- PROPIIS (if IIS is installed) or PROPSTATE: Single Machine Install
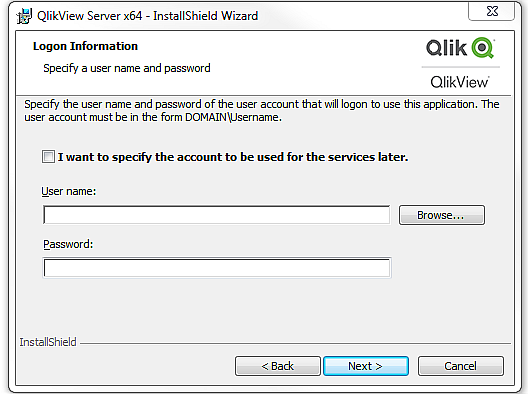
Logon Information
This dialog, which is optional to use, is used to specify the user that is to run the services that are installed. When clicking Next, a Custom Action checks that the entered user is valid. The Custom Action, which is implemented by InstallShield, requires the machine to be part of a Domain to work properly.
Properties:
- LOCALSERVICE
- IS_NET_API_LOGON_USERNAME
- IS_NET_API_LOGON_PASSWORD
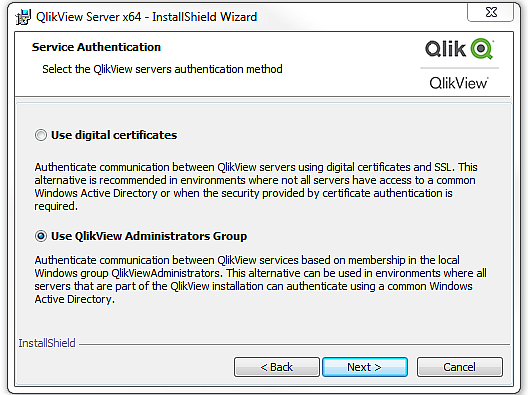
Service Authentication
This dialog is used to select the type of service authentication. QlikView Administrators Group is selected by default.
Property: PROPCERT (1 = Digital certificates, 2 = QlikView Administrators Group)
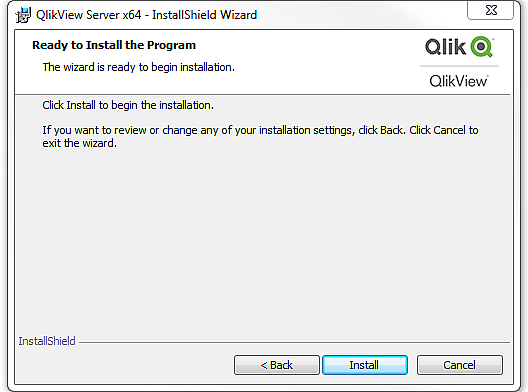
Ready to Install
This is the last dialog. Click Install to start the installation.
Additional Dialogs
Custom Setup
This dialog is displayed when clicking Config in the Profiles dialog.
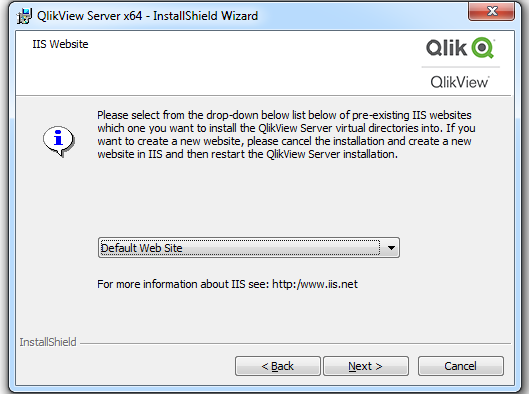
Website
This dialog is displayed when selecting IIS as web server in the Profiles dialog.
Property: DEFAULTWEBSITE
MST
When creating an MST file, the MSI file is customized without any changes being made directly in the MSI. The MST file works as a filter on top of the MSI and allows changes to be made to the installation. For example, the default installation folder for QlikView Server is %ProgramFiles%\QlikView, but if that is changed to C:\QlikView in the MST file, the default folder is changed. The same thing can be done with the dialogs, which means properties can be preset, so that the installation can be run with a limited set of dialogs.
To create an MST file, an MSI repackaging studio (for example, InstallShield AdminStudio) is needed.