
Connecting to Qlik Sense apps
You can connect to Qlik Sense apps that are stored on Qlik Sense servers that you have permission to access.
This page shows how to connect specific Qlik Sense apps to Qlik NPrinting. If you are:
- Installing Qlik NPrinting and trying to connect to a Qlik Sense server, see: Connecting Qlik NPrinting with Qlik Sense.
- Trying to publish your reports to the Qlik Sense hub, see: Distributing reports to the Qlik Sense hub
Unsupported Qlik Sense objects
You should not create connections to Qlik Sense apps that use the following:
- Always one selected value for fields
-
Calculated dimensions
-
Drill-down dimensions
-
Alternate states
-
Sheet triggers
Qlik NPrinting cannot modify or remove these options. As a result, Qlik NPrinting may not have access to the entire data set of the connected Qlik Sense app during cache and report generation.
If you want to use Qlik Sense app with these unsupported features:
Do the following:
- Create a copy of the Qlik Sense app.
- Remove all unsupported features.
- Use the copied Qlik Sense app for reporting purposes.
For more information on unsupported objects, see: Qlik objects that are not supported.
On-Demand reporting
You cannot create connections to Qlik Sense apps that use the following if you are generating On-Demand reports:
- Variable selections used from input buttons as triggers to select data
- Input boxes
- Calculated dimensions
- Hidden tabs
Requirements
- Qlik NPrinting Server and at least one Qlik NPrinting Engine must be installed and activated.
- Qlik Sense certificates must be installed on all Qlik NPrinting Engine computers. See: Exporting and installing Qlik Sense certificates .
- The Qlik NPrinting user creating the connection must have a domain user account that is a member of the same domain as the Qlik NPrinting server and the Qlik Sense server.
- A working connection to Qlik Sense. For more information, see: Requirements.
Connection rules for Qlik Sense apps
The following rules apply to connections to Qlik Sense apps:
- You can create connections from a single Qlik NPrinting app to multiple Qlik Sense apps.
- Connections are not shared between Qlik NPrinting apps. If you want to connect the same Qlik Sense app to multiple Qlik NPrinting apps you must create a connection for each.
Types of connection status
The Cache status column shows one of the following values for each configured connection:
- Never generated: the connection has never been opened.
- Pending: Qlik NPrinting is attempting to connect.
- Generating: Qlik NPrinting is connected and importing metadata.
- Generated: connection successful on all Qlik NPrinting engines.
- Error: the connection is failing on all available engines. The Qlik NPrinting scheduler service will try to connect again two minutes after a failure.
The Connection status column shows one of the following values for each configured connection:
- Connection successful on all NPrinting engines.
- Warning: One or more engines are not working.
- Connection failed on all NPrinting engines.
Testing and troubleshooting
You can use our Qlik Sense sample app, Beginner’s tutorial.qvf, to test your connections. To download this file, visit Sample files.
There are several way to resolve a Warning, Error, or Connection failed status. To start, open the connection you want to troubleshoot, and click the Run verification button. This will give you a list of possible issues. Here is an example where verification failed because Qlik Sense certificates were not installed correctly:

You can also check the following:
- Connection properties: For example, check if the Qlik Sense certificates are present on the Qlik NPrinting Engine computer. Also, verify the proxy address and app ID.
- Qlik NPrinting Engine installation and configuration: For example, check that the Qlik NPrinting Engine is running.
After resolving any issues, re-launch cache generation, or run a task.
Here are some common causes of connection errors:
- Verify connection errors when setting up a connection to Qlik Sense apps
- Connection status not shown in Qlik NPrinting web console
- Connection timeouts and long running tasks
Connecting to Qlik Sense apps on a Qlik Sense server
Do the following:
- Log in to Qlik NPrinting as a user with authorization to perform connection tasks.
- From the Apps menu, click Connections. The Connections page appears.
- Click Create connection.
- In the Name box, enter a name for the connection.
- In the App drop-down list, select the Qlik NPrinting app that you want to connect to.
- Click Qlik Sense as your Source.
- Enter the following information:
- Proxy address: the full computer name of the Qlik Sense server.
The proxy address must be prefixed with HTTP or HTTPS if it is enabled on the Qlik Sense proxy. HTTPS is the default. You can find this in the Qlik Sense hub, in your browser's address bar, on your app's overview page. The format is: https://sense_proxy_computer_name.domain_name.
Information noteYour proxy address may have a prefix at the end. In this case, the format is: https://sense_proxy_computer_name.domain_name/prefix.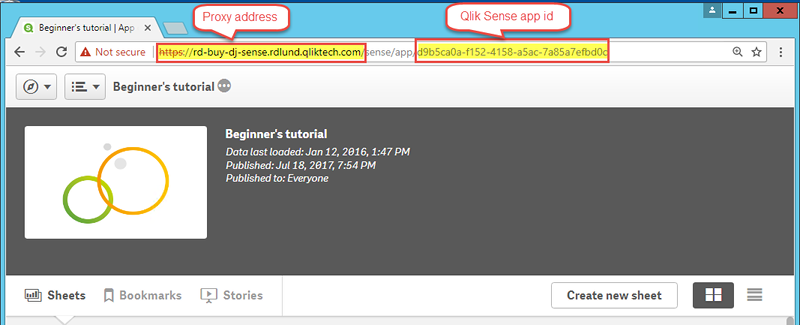
- Qlik Sense app id:
This information is available from the Qlik Sense QMC under Apps. If you cannot see the app id column, click on the
 at the top right and check "ID".
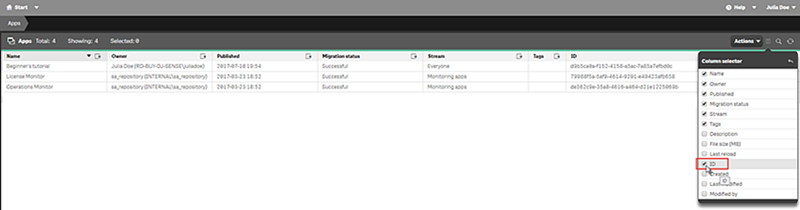
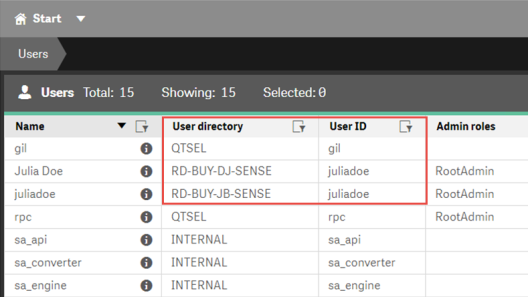
- Identity: the <Windows domain name>\<user name> of the Qlik Sense user who has access to the app.
This information is available from the Qlik Sense QMC under Users. You will need the information in the User directory and User ID fields.
- Proxy address: the full computer name of the Qlik Sense server.
-
If you want to apply the theme colors from the Sense app to reports created with this connection, click the Apply Sense app theme check box.
If you make any changes to the Sense app theme, you will need to manually reload the connection to apply the updated theme.
- If you want to apply section access for the selected Identity, click the Apply user section access for reports check box.
-
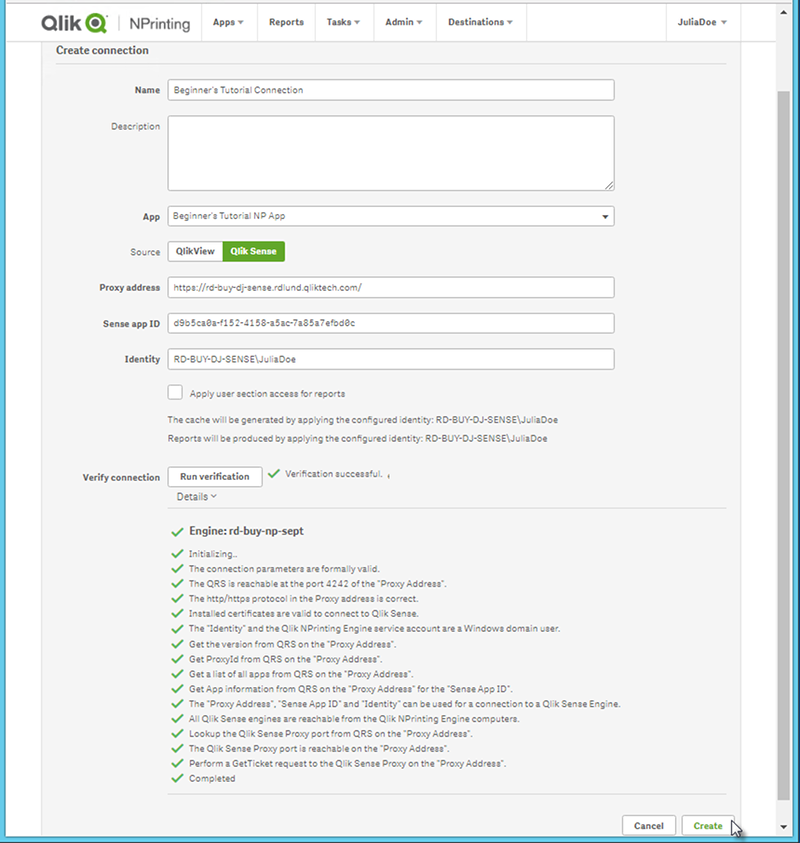
Click the Run verification button. This ensures your connection is valid.
If the connection is valid, you will see a "Verification successful" message. If not, you will see the following message: "Errors detected. Check details below."
- Under Notifications, you can select Send email notification when metadata reload finishes. An email will be sent to the addresses specified under Settings > Tasks. See: Task execution notifications.
- Once your connection settings have been verified, click Create. You will be automatically moved back to the Connections menu.
-
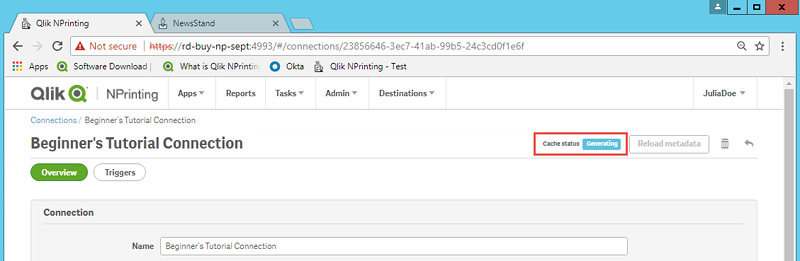
Click on your new connection. You will see the status Cache status - Generating. This means that Qlik NPrinting is connecting to Qlik Sense and importing metadata. If you have a large Qlik Sense app, this may take several minutes.
-
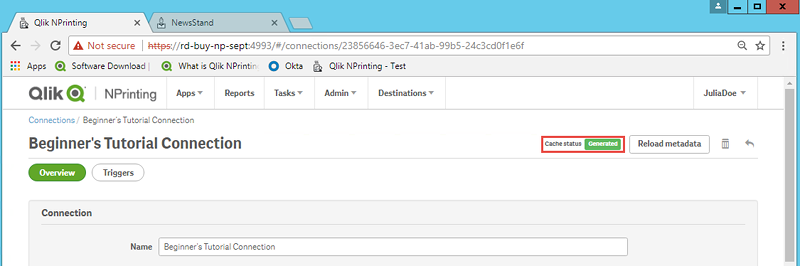
Once the cache status shows Generated, you can create a new report template. If you get an Error status, check your connection information.
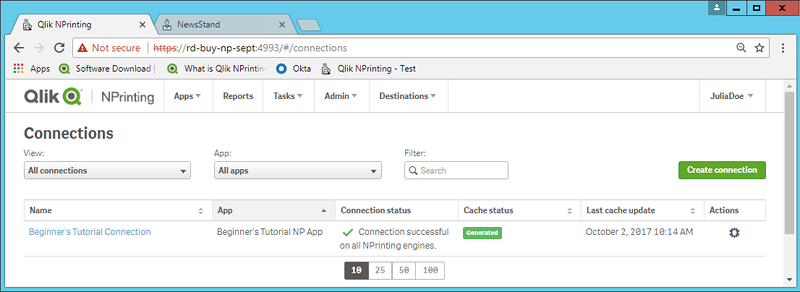
You will now be able to see your new connection on the Connections screen.
Modifying or deleting a connection
Do the following:
-
From the Apps menu, click Connections.
-
Click on the connection that you want to modify or delete.
-
- To modify, make the desired changes and click Save.
-
To delete, click
 . Warning noteThis action cannot be undone.