
Managing multiple users for Qlik Web Connectors
When you install Qlik Web Connectors to be used by more than one user on different machines or locations, you need to adjust how the Qlik Web Connectors are configured. The page describes how you manage set up and manage multiple users.
Prerequisites
By default, user management is disabled. Before you can add users you need to enable user authentication.
Setting up user authentication for the Qlik Web Connectors
Adding users
After you setup authentication and restart the Qlik Web Connectors, you can add users in the Qlik Web Connectors browser interface from the Manage Users menu.
Do the following:
-
Start the Qlik Web Connectors and sign in with your admin username and password.
Tip noteRemember, the logins.xml file created two user profiles. You need to log in with the admin account to use the Manage Users menu. -
Select the Settings tab and click on Manage users.
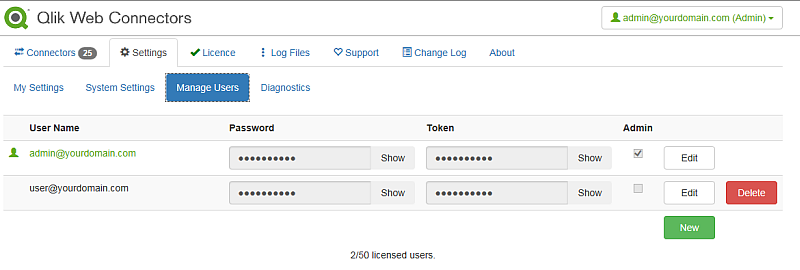
The current user is marked by a small icon and highlighted in green.
Information noteThe current user cannot delete their own account or remove their own admin status. You can edit the password and token. - Click New.
- Enter a User Name in the form username@domain.com.
- Enter a Password, or click Generate to generate a random password. The password must be at least 10 characters or more.
- Enter the Token or click Generate to generate a random token. The token must be at least 10 characters or more.
- Select Admin if the user is required to have an administrator role.
- Click Save. The password and token become hidden. Click Show to view the hidden token.
Passwords are stored using a secure salted hashing algorithm. You should record the password and send it to the user before clicking Save, after which the password will no longer be available.
Tokens are user-specific keys that are embedded in the generated load script, specifically the URL of the HTTP request. The tokens map the request to a particular user so any associated settings for the request, which are now included in the URL, can be retrieved. They also allow the system to build a log file for the user and track API requests. Tokens are embedded in your QlikView and Qlik Sense load scripts so you should be careful how you distribute these as the access token can potentially allow others to make requests to your Qlik Web Connectors installation and retrieve data from your connections.
Editing and deleting users
To edit users, you must be logged in as an administrator.
Do the following:
- From the Manage Users menu, click Edit beside the name of the user you want to edit.
- Enter a password and token, or use the Generate button to generate a random password and token.
- When you have finished editing click on Save.
To delete a user, you must be logged in as an administrator.
Do the following:
- From the Manage Users menu, hover over the username and record the number.
- Click the Delete button beside the user you want to delete.
- Click OK to confirm the deletion.
The user-associated data is located here:
\{Qlik Web ConnectorsFolder}\App_Data\{User GUID}\
After you delete the user account from the Manage User menu, you can safely delete the user's entire GUID folder.