
Calling an automation via a webhook URL (REST API endpoint)
Each automation that you create is automatically exposed as a REST API endpoint, which means that it can be called as a Webhook URL to execute the Blend.
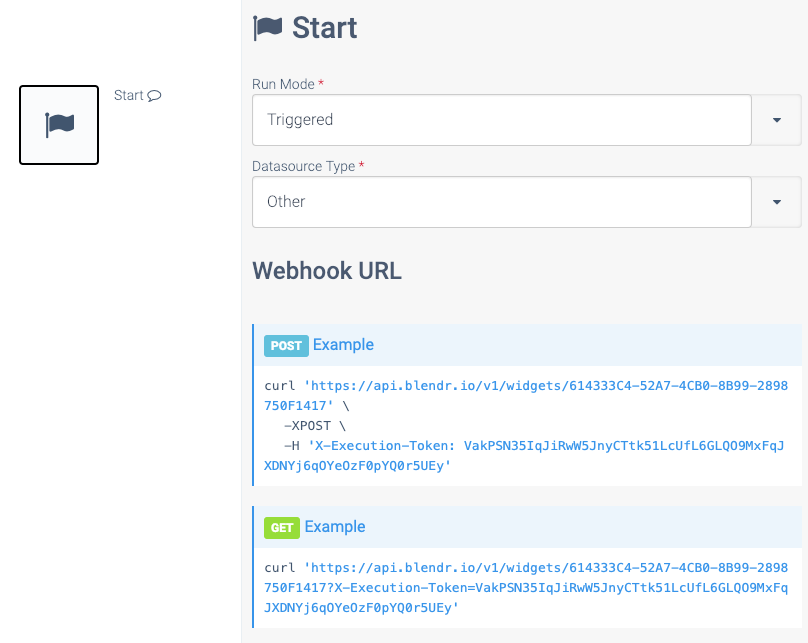
Getting the Webhook URL inside the Blend
You can find the Webhook URL of an automation by clicking on the Start block of your automation. Make sure to save your new automation first!
In the Settings pane on the right side, set Run Mode to Triggered
and set Datasource Type to Other
. You will now see a full curl
command to do a GET or POST to the Webhook URL, including credentials (the execution token). Example:
The Start block of an automation, with example GET and POST versions of the Webhook URL.
Note: you can also add the credentials (X-Execution-Token) to the querystring instead of the headers, even when doing a POST. Example:
https://api.blendr.io/v1/widgets/F502987A-AF89-4992-8127-F28794C5A74A?X-Execution-Token=xxxxx
You can also use the automation name instead of its GUID in the URL. Example:
https://api.blendr.io/v1/widgets/datablendname?X-Execution-Token=xxxxx
Getting the data posted to the Webhook URL
You can reference the output of the Start block to get the incoming data (payload) that was posted in the HTTPS request:
an automation that outputs incoming data.

See the next paragraph for more information on using the lookup feature to select specific fields from the posted JSON data. You can switch to raw view and edit the path to retrieve only a part of the JSON. Example path to get the key name
from the posted JSON:
{ $.Start.name }
Defining specific input parameters
If you want to define specific input parameters with validation (e.g. define required input parameters), you can add an Inputs
block in the automation and define one or more inputs. Make sure the Inputs
block is the top block, directly below the Start block. This is optional, you can also reference the output of the Start Block directly, to retrieve the data (payload) that was posted as part of the HTTPS request (see above paragraph).
Below the Inputs
block, you can add other blocks that process the data which is posted to the automation via its Webhook URL. For example, you could use a Slack block Send message
that sends some of the input data to Slack. Example:
an automation that sends a message to Slack.
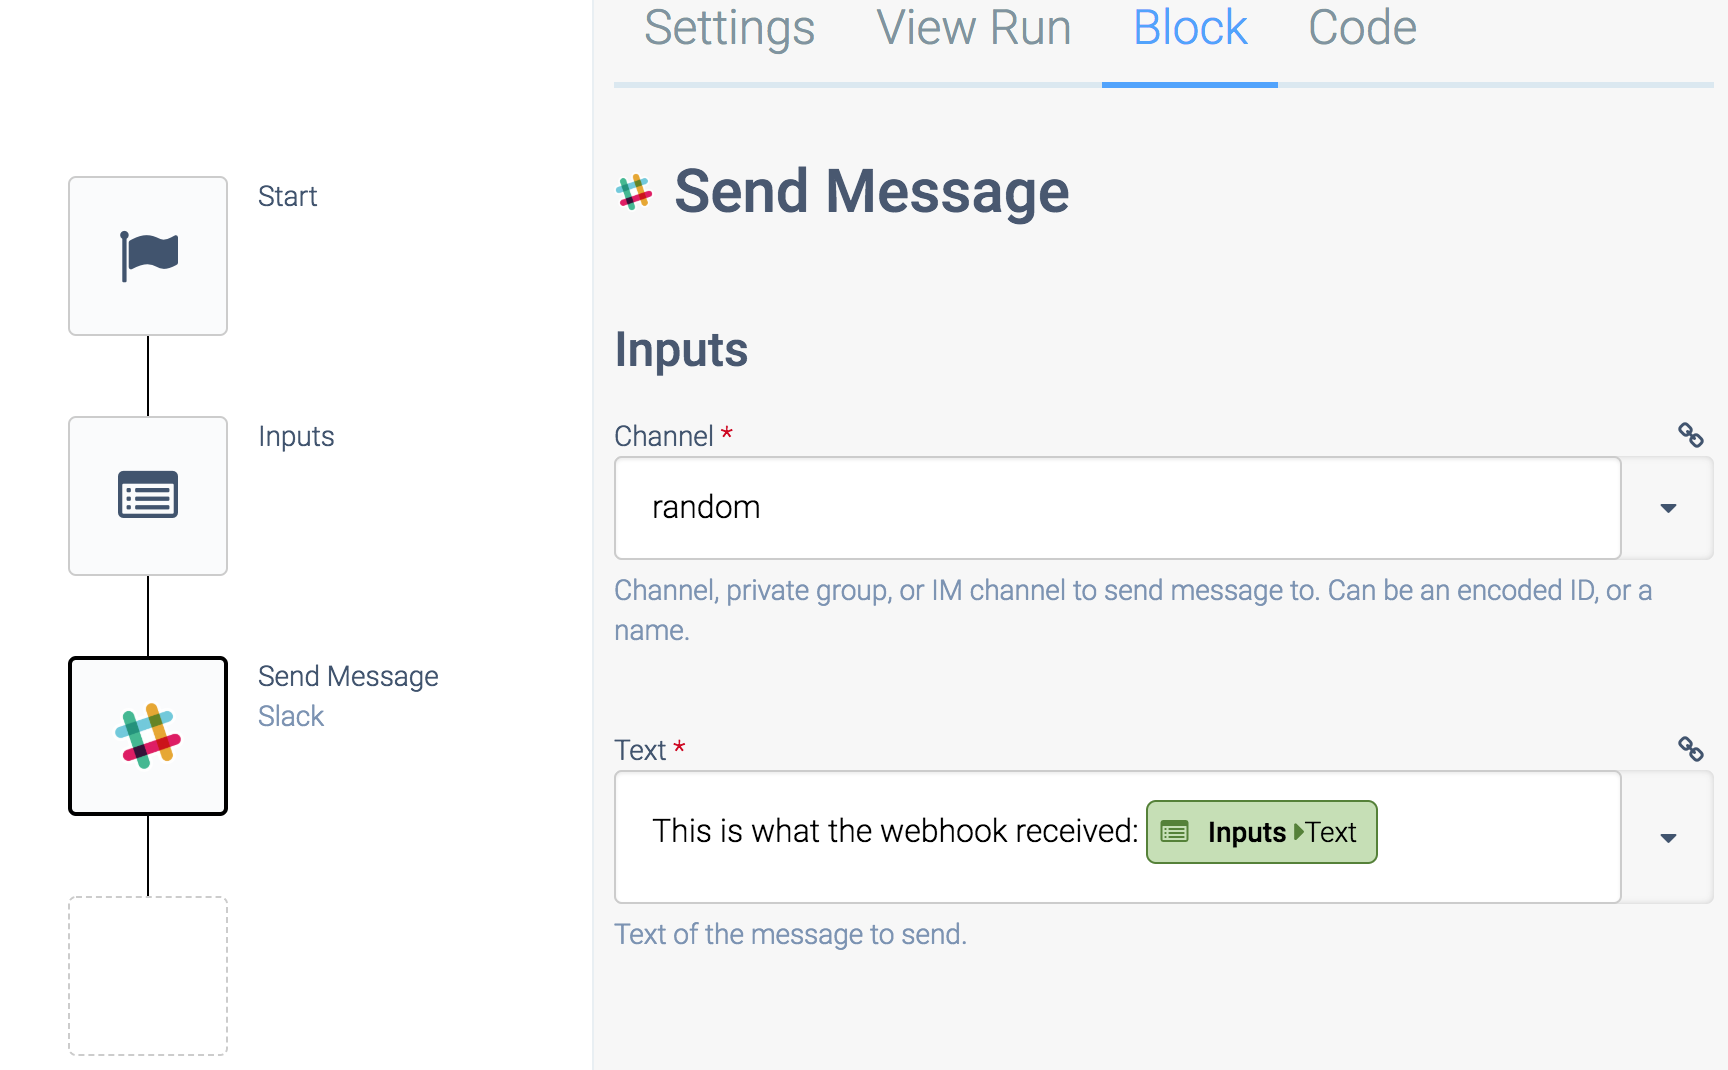
The above automation will read the field text
from the incoming data, and send it to the channel random
in Slack.
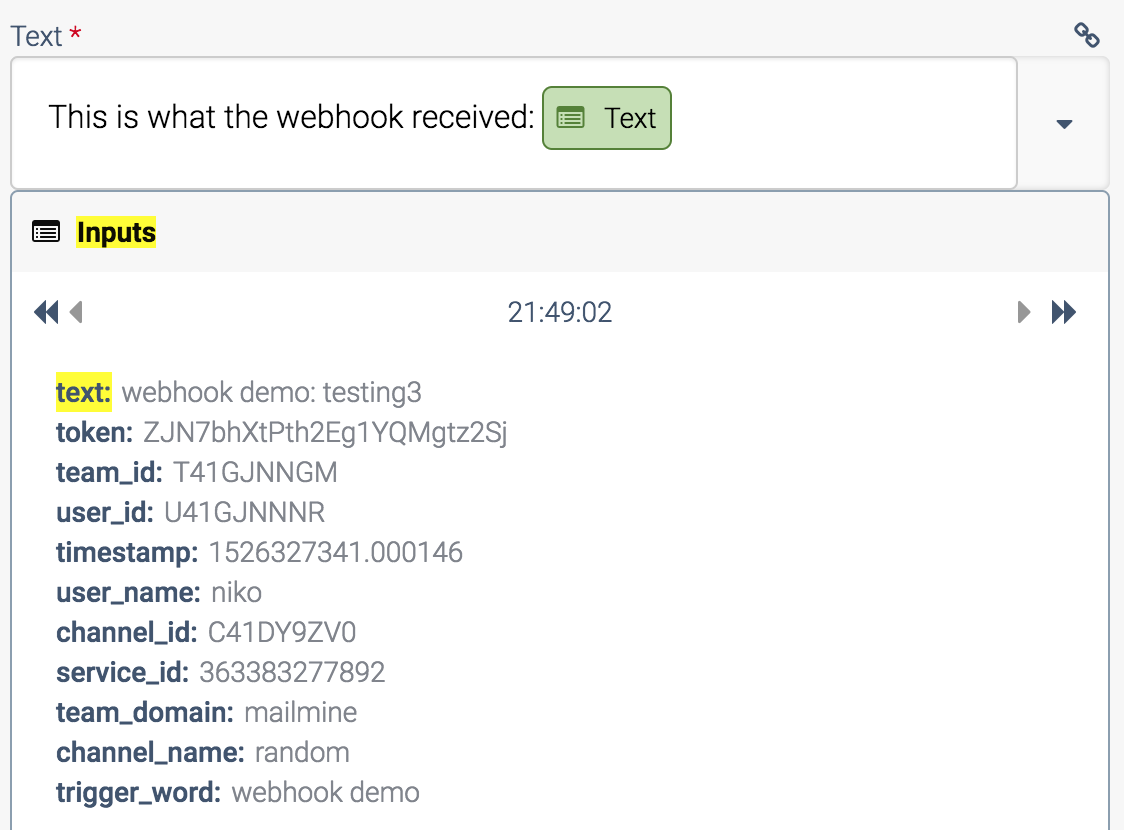
You can use the lookup feature to insert the correct placeholder, but this will only work if you already posted some data to the Webhook URL. Example lookup:
The lookup feature.
If the lookup is not available, you can also manually type the placeholder. Make sure to switch to raw
editing mode first, using the icon above the input field (on the right hand side). Example:
An example placeholder.

The placeholder { $.inputs.text } references the field text
from the incoming data, which is received by the Inputs block. $.inputs is the reference to the Inputs block.
Output of API endpoint
If you want your automation to send a response, you can add an Output
block in your automation. The output of this block will be the response of the API endpoint and the response will be JSON encoded data.
The response JSON is always an array, and each Outputs
block will add one item to this array.
Executing integrations in customer accounts (for SaaS companies)
See the SaaS API to execute an integration (automation) inside a customer account: SaaS API overview.
Did this page help you?
If you find any issues with this page or its content – a typo, a missing step, or a technical error – let us know how we can improve!